Using the Neuron to send and receive e-mail
The TAG Neuron® supports multiple protocols, among them, both the XMPP Protocol and the SMTP protocol. In XMPP, clients have accounts on brokers, and connect to their broker to connect to the federated XMPP network. Addresses in XMPP are called Jabber IDs, or JIDs for short. The Bare JIDs look like e-mail addresses, in the form: ACCOUNT@DOMAIN. Once connected, the connection is assigned a Full JID, in the form ACCOUNT@DOMAIN/RESOURCE.
The account can also interact using the SMTP protocol. This means, the client can send and receive e-mail seamlessly using the same XMPP account. E-mail messages sent to the account gets forwarded as messages to the client. The client can send messages back. The Neuron converts the messages into e-mail messages and forwards them to the recipient using the SMTP protocol.
There are some differences between how SMTP works on the Neuron®, and if you are using a traditional SMTP Server:
In order to be able to communicate with a client on the Neuron, you need a presence subscription. This is a requirement on XMPP. SMTP does not have such a feature, which is one of the reasons why e-mail is so ripe with spam. The Neuron enforces presence subscription on e-mail as well. It does this via a squence of e-mails that are sent to anyone trying to send e-mail to an account on the Neuron. The e-mails will contain links allowing the sender to request presence. Once the client has accepted the presence subscription, the sender of the e-mail gets notified that it is able to send e-mail to the indented recipient.
Outgoing messages are accumulated for a short time before being sent. In XMPP, messages are sent instantaneously to the recipient. If you use a chat program and write multiple rows of text, you want all rows to get into the same e-mail message. For this reason, the Neuron accumulates outgoing text messages, and forwards them once there is a silence for a minute (or an hour has passed since the first row).
Incoming e-mail messages are sent to the client encoded in multiple ways. First, the text of the message is extracted, and forwarded as Markdown, HTML and/or plain text, as appropriate. The original contents of the e-mail is also forwarded, but can only be processed by the client, if it understands a separate e-mail extensions. This means, you can e-mail to any XMPP client, using text content. But only XMPP clients understanding the e-mail extension will be able to receive more advanced concepts, such as embedded attachments, etc.
Outgoing messages from XMPP clients are typically of a simpler nature: Plain text, HTML and/or Markdown. This is transformed into multi-formatted e-mail messages accordingly, before being sent.
Example
As an example, following is a short interaction between an e-mail client using a hotmail e-mailing address, and an XMPP client, using an XMPP address. No Mail Relay was used on the Neuron used in this example.
Sending first mail to XMPP client
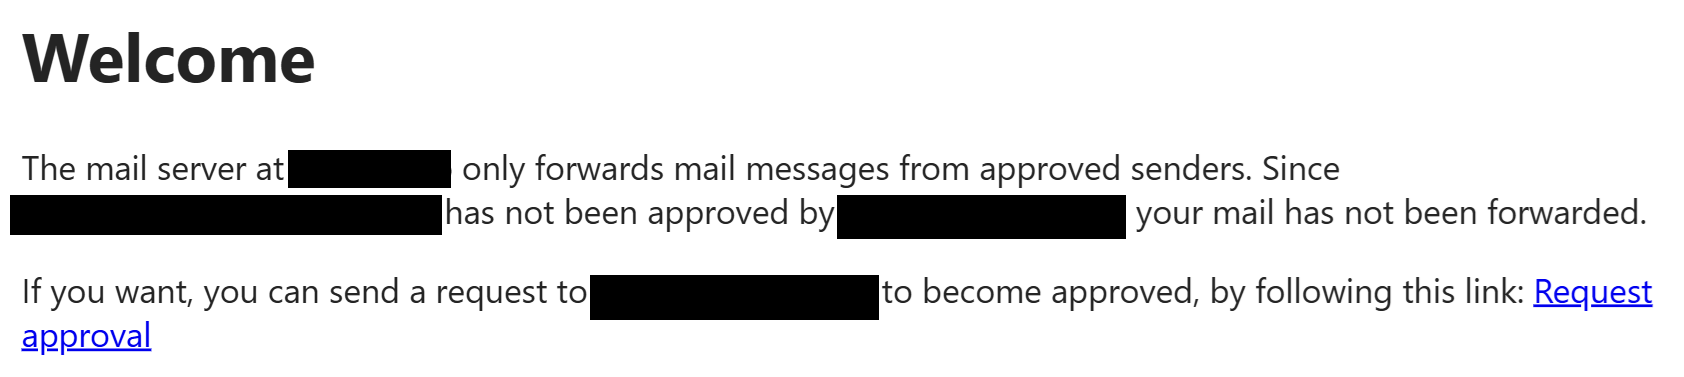
First step, that will trigger the approval process (or white-listing process), is to send an e-mail to the XMPP client you want to interact with. The contents of this e-mail will be ignored; it can be anything. When the Neuron receives this e-mail, it will check the roster of the recipient to see if an approved presence subscription is available. If not, it will immediately return an e-mail stating this fact.
Sending a presence subscription request
The e-mail will contain a link the recipient can click on, that will send a presence subscription request to the intended recipient. The link is cryptographically protected with the associated e-mail, and the sender and receiver identities. The sender will also receive an e-mail confirmation that the presence subscription request was sent to the recipient.

Receiving presence subscription acceptance confirmation
If the recipient accepts the presence subscription request, a two new e-mails are sent to the original sender, confirming this fact, and instructing the sender that it is now allowed to send e-mails to the intended recipient. The first e-mail shows the sender has been added to the white-list (roster in XMPP). The second, that the presence subscription request has been accepted.


Testing e-mail <-> XMPP link
The e-mail sender should now be able to communicate with the XMPP recipient. Sending a simple test message to the recipient, will make the text in the e-mail appear as a chat message in the XMPP client. The XMPP client can respond using chat, just as if the sender was another XMPP-client.
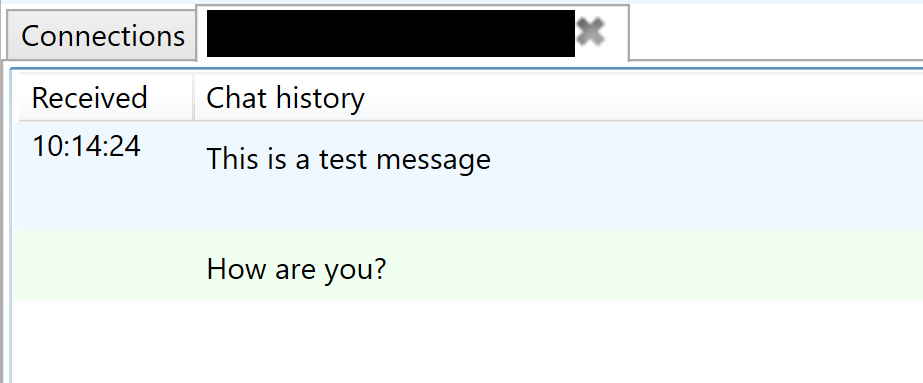
The XMPP chat response is transformed into an e-mail and sent to the original sender.

Troubleshooting SMTP Communication
A lot of problems can occur in SMTP communication. The principle reason is lack of cybersecurity in the original specifications, and security added on-top, as people became aware of threats. There is often no clear indication as to why there are problems sending or receiving e-mail.
The principle resource for troubleshooting e-mail is SMTP communication logs. These are stored in the SMTP subfolder in the Neuron Program Data Folder. The SMTP folder contains subfolders with communication logs for different senders and recipients. Input logs (containing information about incoming messages) are stored separately from Output logs (containing information about outgoing messages). To distinguish the two, Input logs are suffixed with IN and Output logs are suffixed with OUT.
When troubleshooting incoming logs, you need to know from where the message will be received. This can be learned from DNS SPF entries. When troubleshooting outgoing logs, you need to know to where the message will be sent. This can be learned from DNS MX entries. There are tools online for finding out both. You can also use the Script engine on the Neuron to get the relevant DNS records.
Also, you need to ensure the DNS has been configured correctly for the Neuron, especially those related to Sender Policy Framework SPF (TXT records) and Mail Exchange (MX records).
Posts tagged #mail
No more posts with the given tag could be found. You can go back to the main view by selecting Home in the menu above.