PlantUML integration on Mac OS
PlantUML is a tool that can generate various types of diagrams from textual definitions. The TAG Neuron® can be integrated with PlantUML, if it is installed on the same machine. This article outlines how to install PlantUML on your MAC so that it will work with the TAG Neuron® installed on the same MAC machine.
First, make sure you have installed Java on your machine. You can easily do this from a terminal window by typing:
java -versionIf not available, make sure to install it first.
Download the
plantuml.jarfile, using the license that suits your requirements. This contains the compiled Java program that converts PlantUML text files into image diagram files.The downloaded file will contain version information included in the file name. For the file to be found by the TAG Neuron®, you need to rename the downloaded file, to just
plantuml.jar.Check what folders are in your system PATH. You can do this from the terminal window by executing:
echo $PATHCopy the
plantuml.jarfile downloaded earlier into one of the folders in defined in PATH, for example/opt/local/bin. As long as it is located in a folder defined in PATH, the TAG Neuron® will find it when it restarts.Restart the Neuron®
After restarting the Neuron®, you should se an event logged, that confirms that PlantUML and Java has been found on the machine, and that the PlantUML Markdown integration is active:
PlantUML found. Integration with Markdown added.
  Timestamp=01-06-2024 12:08:35PM, Level=Minor, Path=/opt/local/bin/plantuml.jar, Java=/usr/bin/java
You can later update PlantUML by simply downloading a new plantuml.jar file, replacing the previous file. You do not need to restart the Neuron® after updating PlantUML.
To test the PlantUML integration, you can open the PlantUML Lab from the Admin menu by pressing:

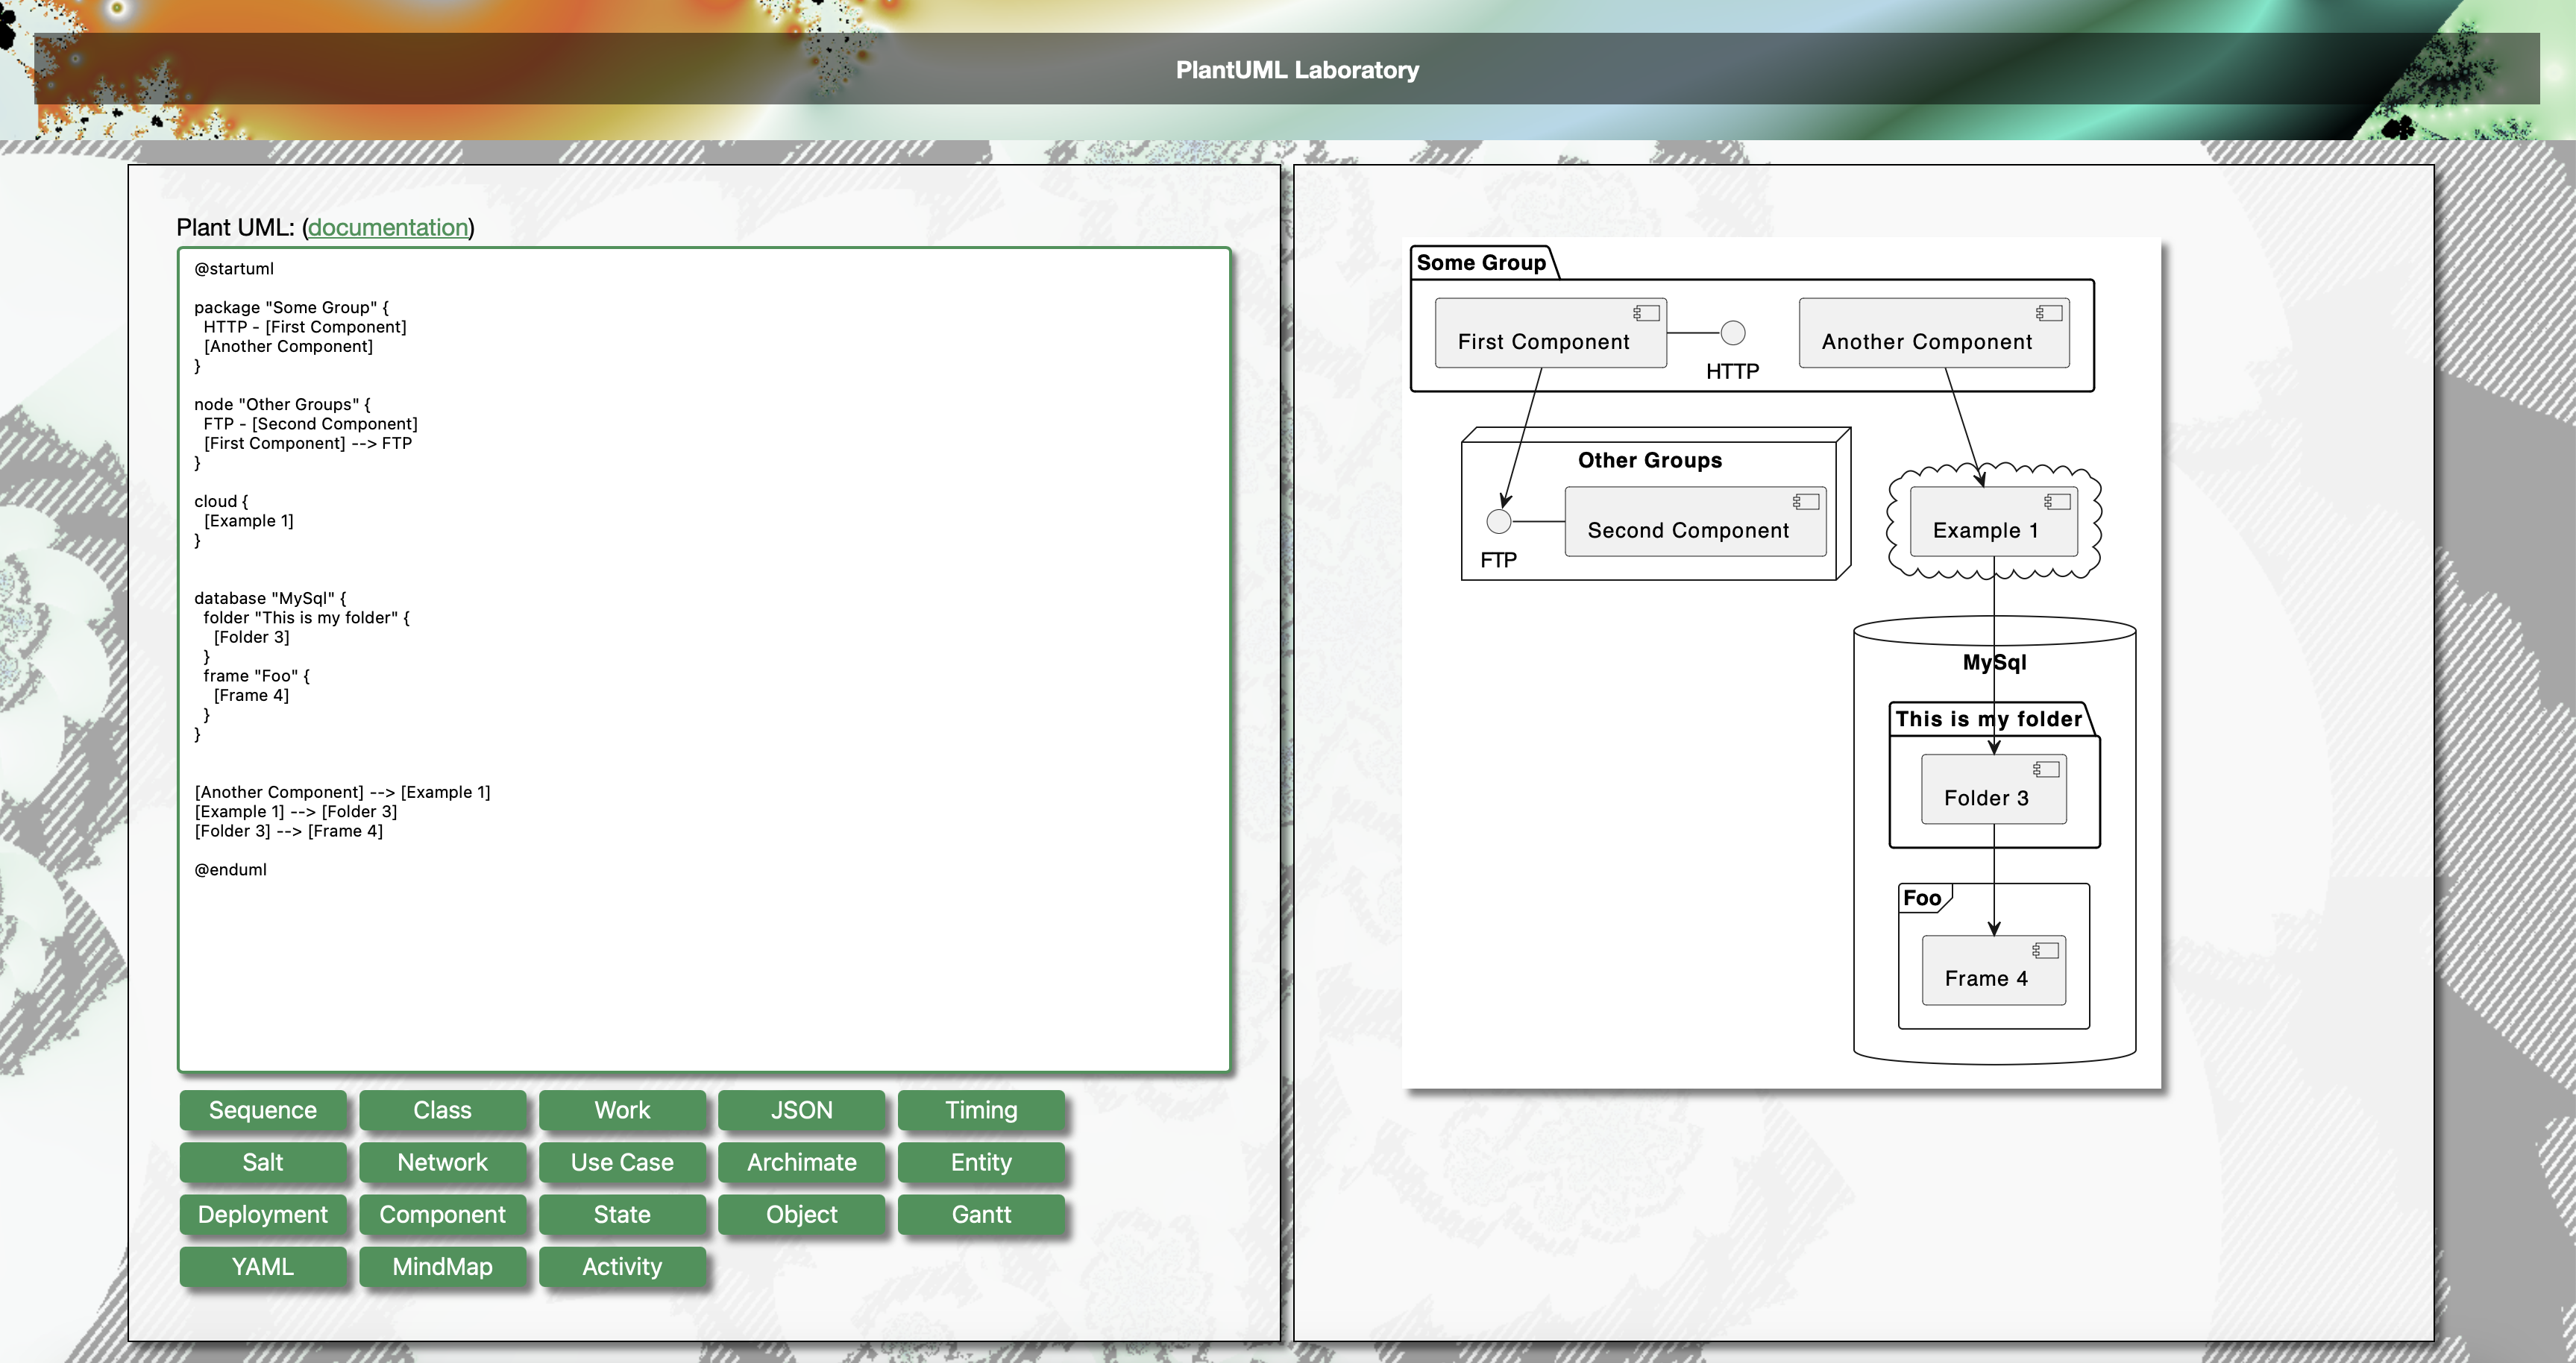
A page opens with two panes. In the left one you can edit PlantUML text. In the right one you’ll see the rendering of the text (or any errors found):

You can also check the PlantUML integration section in the Markdown documentation to see that the integration works.
Graphviz integration on Mac OS
The TAG Neuron® can integrate with GraphViz, permitting automatic generation of diagrams from GraphViz definitions in Markdown. The integration requires GraphViz to be installed by the operator of the Neuron®. Follow these steps to install GraphViz:
On Mac OS, GraphViz can be installed using MacPorts. It is an application that simplifies the installation of open source projects on your Mac via the terminal window. The MacPorts project provides multiple installers for different versions of Mac OS.
Once MacPort is installed, install GraphViz from the terminal window, using the following command-line (as described in the GraphViz MAC installation documentation).
sudo port install graphvizIf the terminal session cannot find port, use the full path of the MacPort application as follows:
sudo /opt/local/bin/port install graphvizSimilarly, you can install a GUI tool for viewing GraphViz documents:
sudo port install graphviz-guiOr:
sudo /opt/local/bin/port install graphviz-gui
Once GraphViz has been installed on the Mac, you need to restart the Neuron®. Once restarted, you should see a log entry during startup confirming the Neuron® has found GraphViz, and that the integration is in effect:
GraphViz found. Integration with Markdown added.
  Timestamp=31-05-2024 8:17:17PM, Level=Minor, Installation Folder=/opt/local/bin, Binary Folder=/opt/local/bin, dot=True, neato=True, fdp=True, sfdp=True, twopi=True
  circo=True
From the Admin-menu, you can now open the GraphViz Lab:

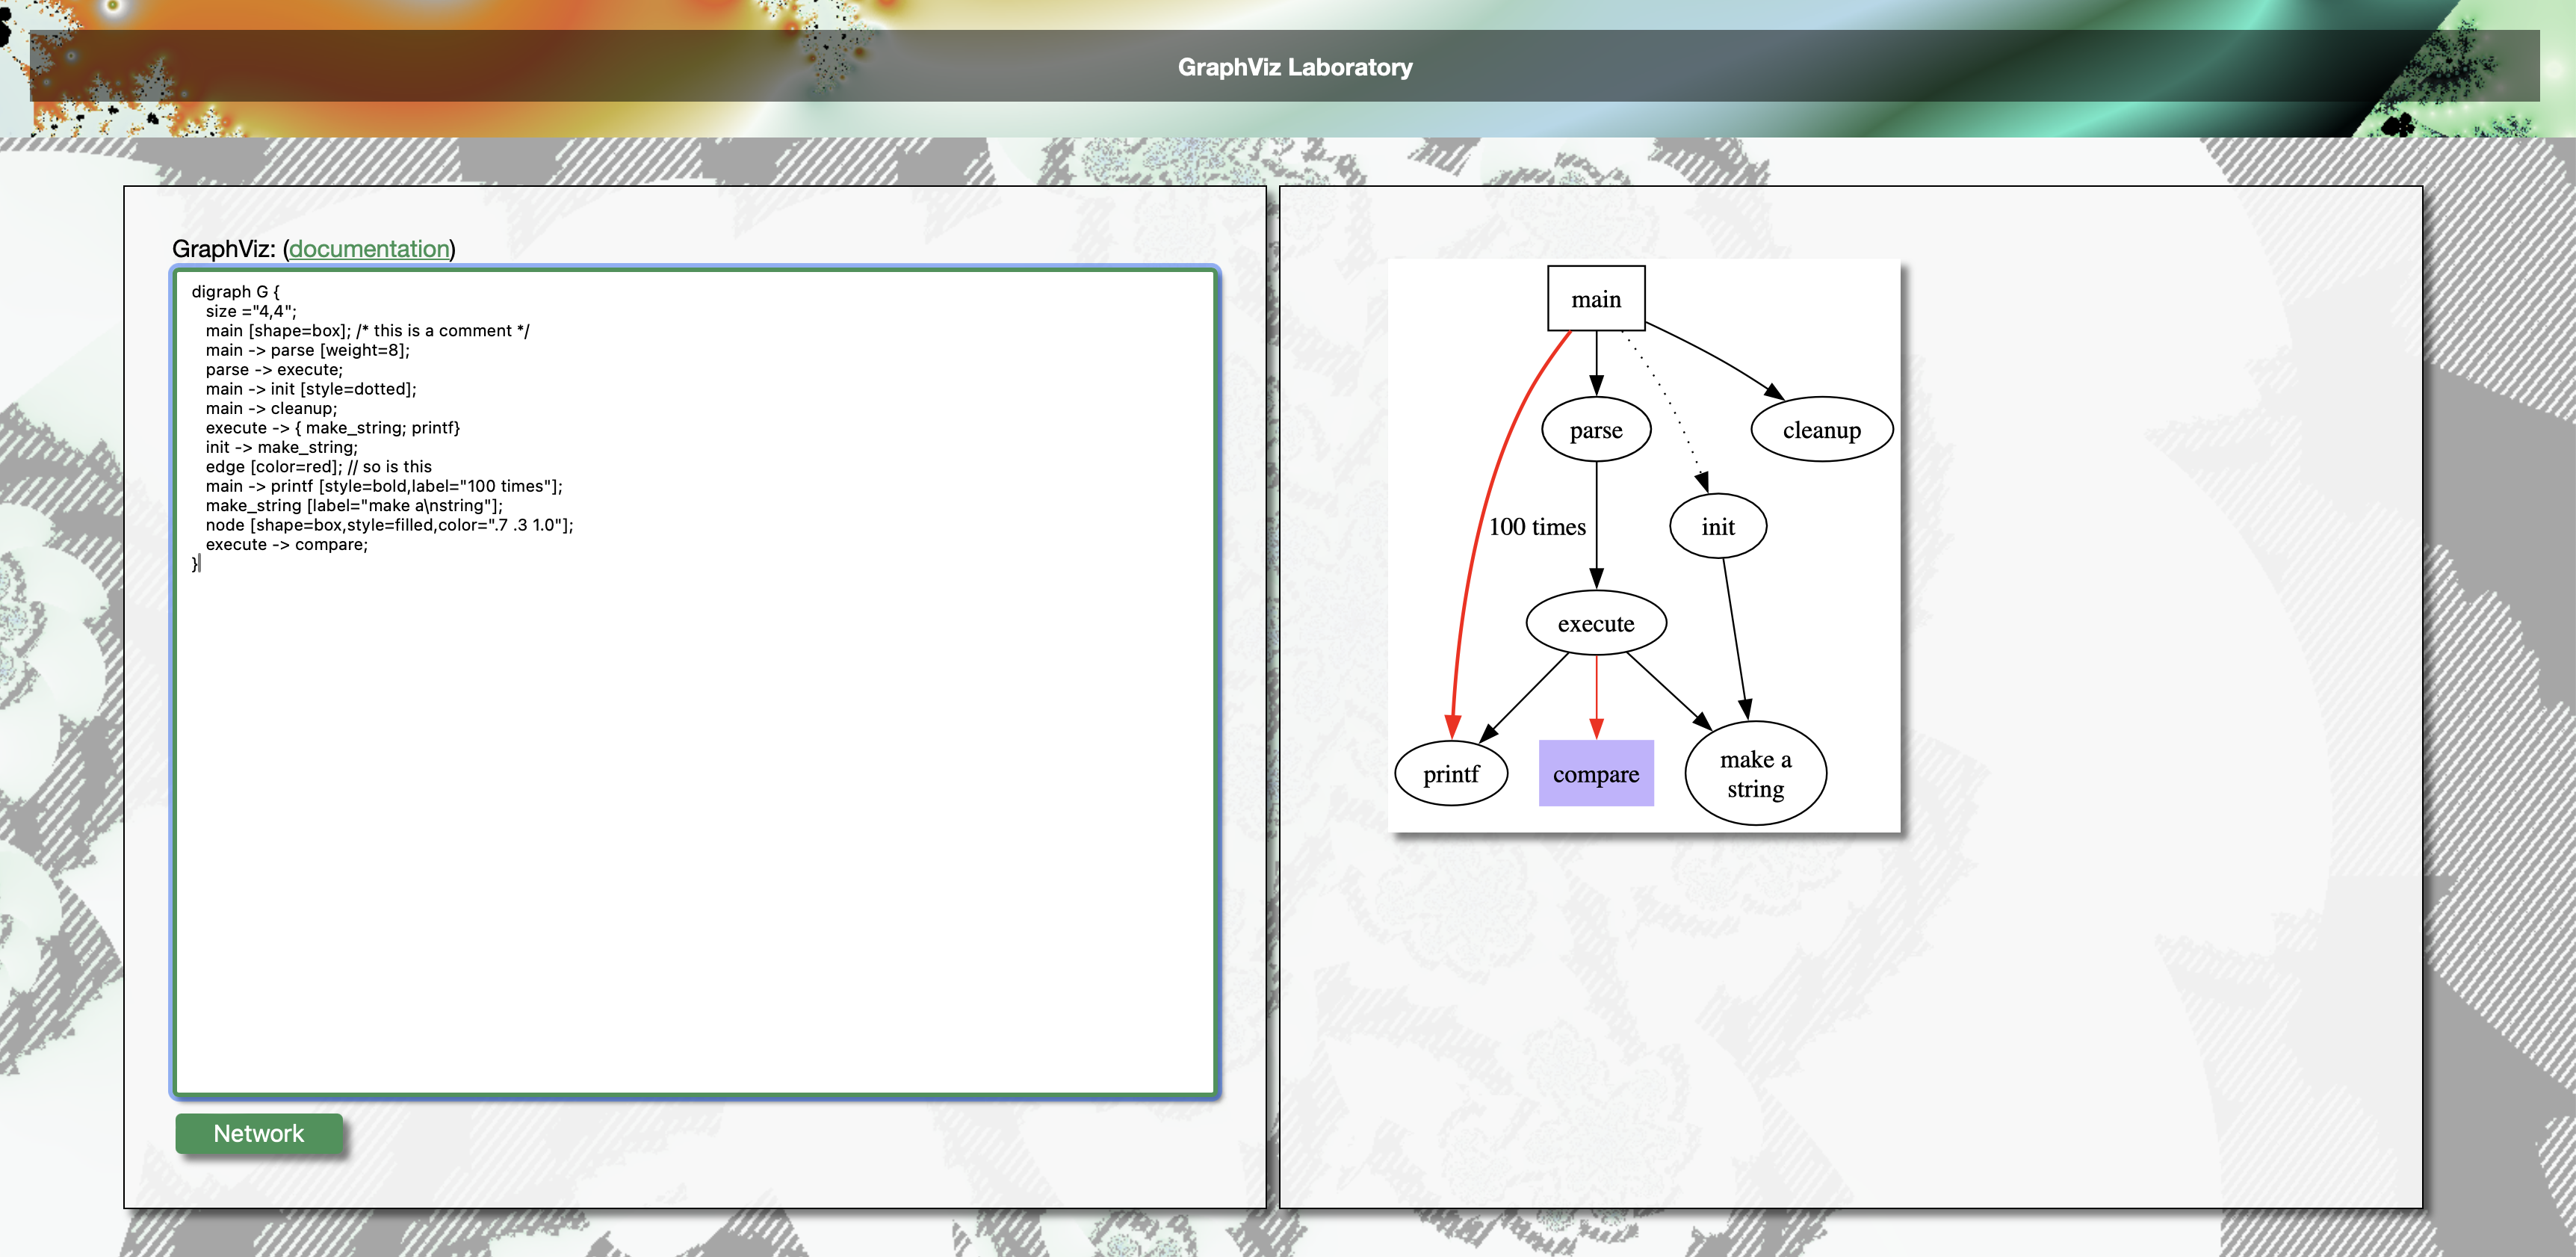
Once open, you can edit your diagrams in the left pane, and view the corresponding output in the right pane:

Integration into existing Markdown pages will also show that the integration works.
Configuring alternative onboarding Neuron
As of build 2024-01-16 configuring the Onboarding Neuron® has been refactored. Articles earlier written on the subject (which have now been updated accordingly) include:
Purposes of Onboarding Neuron®
The purposes of hosting an Onboarding Neuron® include:
- Acting as the first contact point for a client application (such as a digital ID), helping the client to find a suitable service provider hosting their own Neuron®.
- Validating e-mail and phone numbers.
- Sending validation messages via e-mail and SMS.
Configuring Onboarding Domain
You now configure the domain name of the Onboarding Neuron® under the Notarius Electronicus menu (previous versions had a Neuro-Access button under the Software menu, which has been removed):

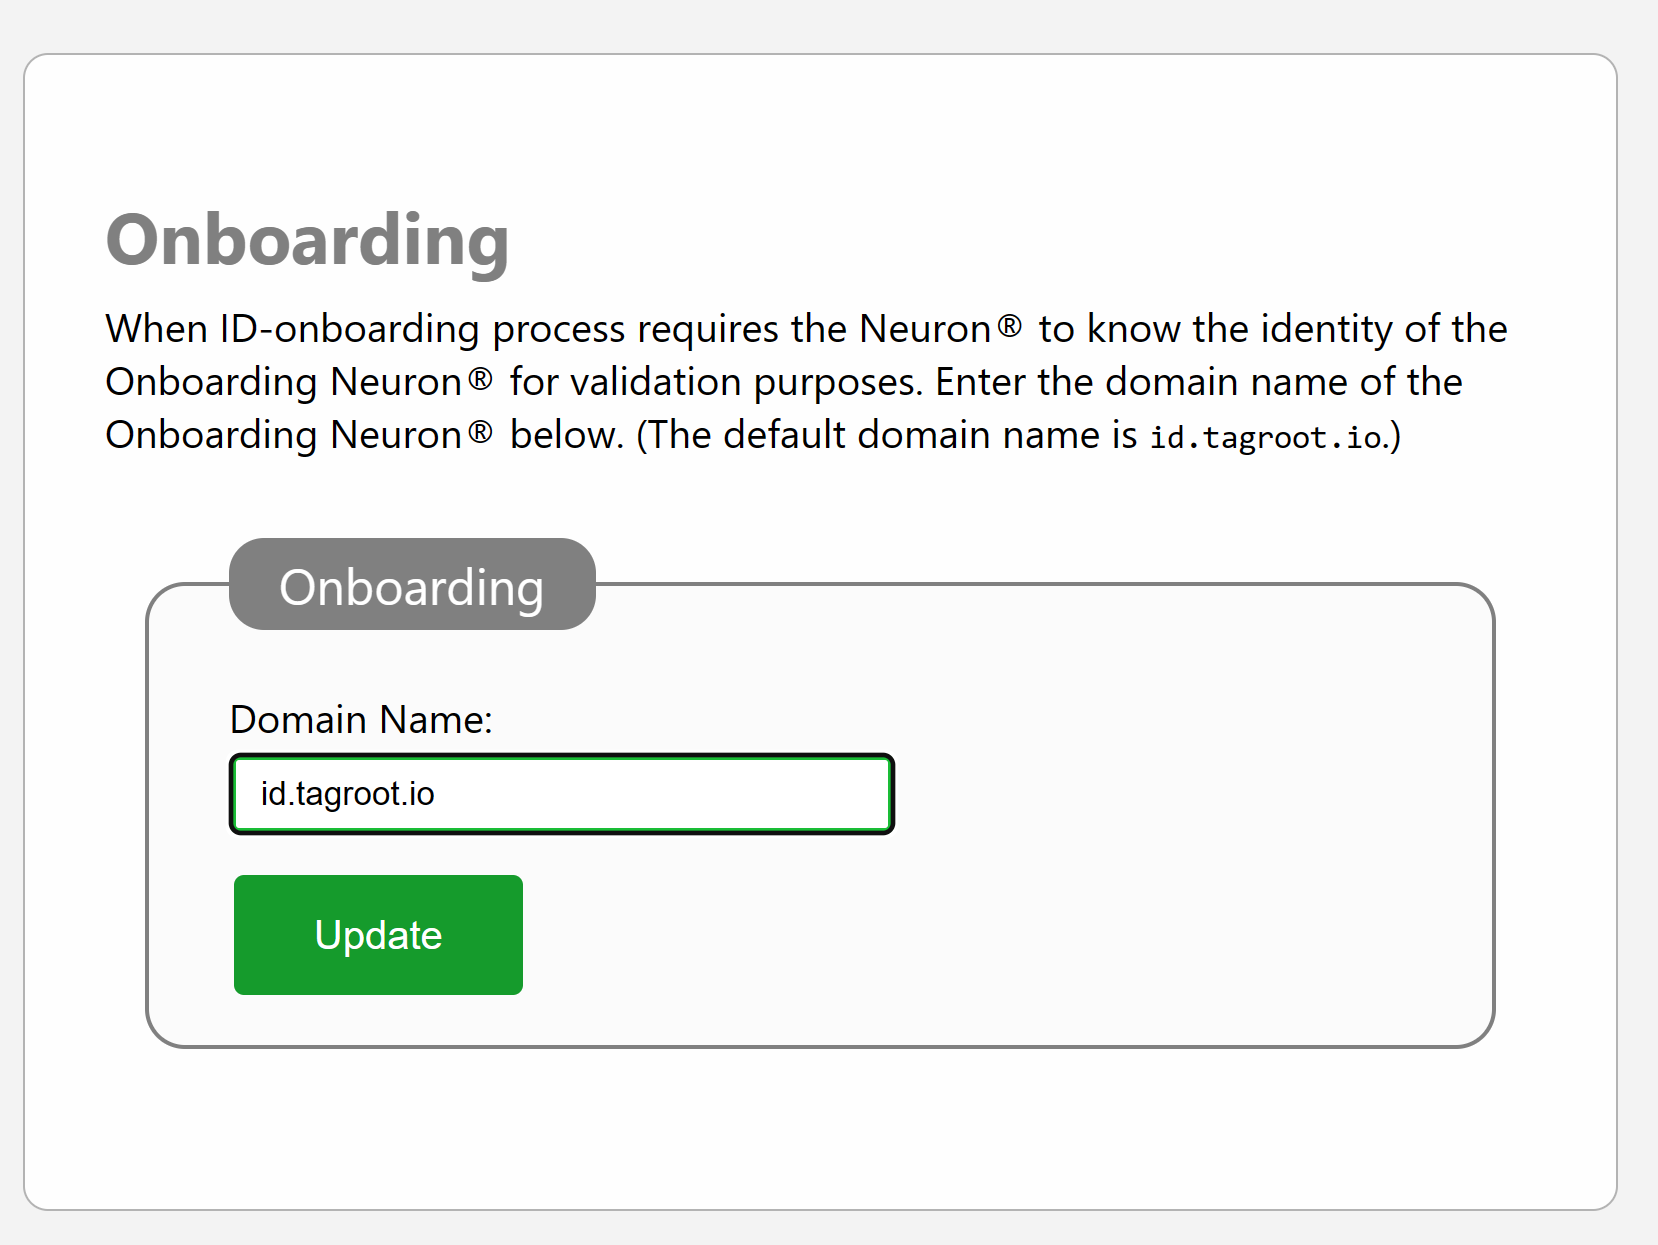
Clicking on this menu item opens a simple dialog where you enter the domain name of the Onboarding Neuron® you want to use:

Adding external notes to Neuro-Feature™ tokens
Each Neuro-Feature™ token has an event log. Notes can be added to this log. If the Neuro-Feature™ token runs a state-machine, the state-machine can process the contents of such notes also.
There are 2 × 2 × 2 types of notes that can be added: Plain text and XML notes can be added, and they can be either by owner or an external source. They can also be personal or public. Personal notes are deleted when the token changes owner. This article describes how a public (to those with access to the token) external note can be added to the Neuro-Feature™ token.
External Sources
To add an external note on the token, you need to be an approved external source. Depending on method used to add the token, this source is typically a User name on the Neuron® hosting the token. This User name, can also be a domain name of the caller, if mutual TLS (mTLS) is used to authenticate the call. If note is added by an XMPP client or Agent API client, the source would be the Bare JID of the client adding the source. In all cases, the source needs to be an approved source, otherwise the note will be discarded.
Methods of adding an External Note
There are multiple ways how a note can be added to a token. If the caller is not the owner of the token, the note will be added as an external token. Some of the methods described allow the Owner to add a note. If this is the case, the note will be added as a normal note, and may be processed differently to an external note.
XMPP Library
You can use an XMPP extension library, such as the NeuroFeatures nuget from TAG. It extends the Waher.Networking.XMPP library using in the Neuron®, LegalLab, IdApp, Neuro-Access, and other projects. Once the XMPP Client is connected, you can use the extension library to add notes to any tokens.
Approved Sources: If adding a note via the XMPP library, the account you use to sign in must either be part of the contract that created the token, or be an approved external source. The token (if running a state-machine) can define what external sources are approved.
Agent API
The Agent API can be used to add notes to tokens in the network. Multiple implementations exist, including an Agent API nuget. Depending on the type of note you want to add, you can use the AddTextNote or AddXmlNote resources to add notes.
Approved Sources: As with using an XMPP Library, the account you use to sign in must either be part of the contract that created the token, or be an approved external source. The token (if running a state-machine) can define what external sources are approved.
NeuroFeatureNotes Nuget
A specific nuget exists for adding external notes to Neuro-Feature™ tokens: NeuroFeatureNotes. The source-code of this nuget is available in the AddNote repository published by TAG. The repository also contains information about the methods to use to add an external note, and what parameters are required.
Approved Sources: The nuget performs an HTTP POST to the Neuron® hosting the token. The request is authenticated using mutual TLS (or mTLS), where the caller provides a valid certificate that can be used to sign the request. To be able to use this method, you need to do the following:
Enabled mTLS on the Neuron® hosting the Neuro-Feature™ token. This is done in the gateway.config file, and then restarting the Neuron®. You need to set mTLS option to Optional at least, for mTLS to be activated for use in HTTP requests.
Create a Role on the Neuron® for users that are permitted to add notes on the Neuron®. The regular expression approving adding of notes specifically is:
+NeuroFeatures\.Notes\.Add\.(Text|XML)Create a User on the Neuron® with the same user name as the domain name in the certificate you want to use. The user needs at least the privileges define in the Role above.
Note: There is no need to specifically in the token approve the external source, if the operator has approved the domain name already, authenticated using mTLS, as described above.
Once the settings have been made, the library can be used to add external notes to tokens on the Neuron®.
Command-Line tool
The AddNote repository contains a command-line tool that can be used to add external notes on tokens. This command-line tool can be used to automate adding notes via script. The repository lists the arguments required to run the tool.
Approved Sources: As the command-line tool uses the NeuroFeatureNotes nuget to add notes, authentication is performed using client certificates and mTLS, and the same steps of configuring the hosting Neuron® is required, as described above.
Script
If running multiple Neurons, you can add an external note using script on one Neuron® on a Neuro-Feature™ token on another Neuron®, using the certificate of the calling Neuron®.
To add a text note, call the following script (on the first Neuron®, via a web-service or the Prompt):
Post("https://DOMAIN/AddNote/TOKEN_ID","ADD THE TEXT YOU WANT TO ADD HERE.",\{\},Waher.IoTGateway.Gateway.Certificate)
To add an XML note, call a similar script, but instead of POSTing a string, POST an XML document (the XML needs to be valid, in accordance with the schema, downloadable from the namespace):
Post("https://DOMAIN/AddNote/TOKEN_ID",<ADD THE XML YOU WANT TO ADD HERE>,\{\},Waher.IoTGateway.Gateway.Certificate)
PS: The Community site adds backslash characters before the start and stop braces in the script examples above. These need to be removed when executing the script.
Approved Sources: The script above performs a POST that will be authenticated using mTLS, as in the examples above. Therefore, the same steps of configuring the Neuron® hosting the token is required, as described above.
Integrating an external payment service with a Neuron
You can integrate an external payment service with a TAG Neuron® in several ways. You can choose to integrate it with a service module you install on the TAG Neuron®. Or you can implement an API in the external payment service, to allow it to be integrated using an already existing service module in the Neuron® called Paiwise. This article describes the steps necessary to implement this light-weight API.
Configuration on the Nueron
The first step is to install the Paiwise.Internal.package on the Neuron®. Following is some information regarding this package:
| Some more information | |
|---|---|
| Package | Paiwise.Internal.package |
| Installation key | Q1a8tCfisc2z4IJ1aqTohsjYBe2kD1EZLCyrG0A4ZfQvPMHdOjMKQ/2sEppwXZaiR93k3oQelugA67e770167db44c319088bf1d26a4248e |
| Configuring Service | /Settings/Paiwise.md on the Neuron® on which the service is installed. |
| API Documentation | https://lab.tagroot.io/Settings/PaiwiseApi.md (or similar on the Neuron® on which the service is installed). |
Once the package is installed, you will find a link to the configuration page in the Software section of the Admin page. You can also enter it manually as a URL, from the link above. On the configuration page, you setup a Token, configured for the Neuron®. This token will be provided in calls to the external service, and help identify the Neuron® to the service (together with multual TLS). You also configure a domain name for the host of the external payment service, as well as a timeout parameter.

Security
All requests made to the external payment service will be made using HTTPS. The Neuron® will validate the name of the payment service, by validating the server certificate of the external service.
In requests made to the external payment service, the token will be provided in a Bearer HTTP header. This token should be seen as an API key, and does not change. It provides very little security.
To validate the identity of the Neuron®, the payment service should use Mutual TLS. If enabled, the Neuron® will send the public part of its server certificate in the request, enabling the external payment service to validate the origin of the call, and make sure the caller has the right to use the associated token.
Host
The host name is the domain name of the server hosting the service. All API calls will be made to this host name. When listing resources for the API below, it will be assumed they are prefixed by https://HOSTNAME, where HOSTNAME is replaced by the domain name provided here.
API
Once the service has been installed and configured, payment services implemented on the external payment service will be provided to users connected to the Neuron®, as long as the external payment service implements the Paiwise API, as described in the API documentation of the service. You can find a link to the API documentation on the configuration page. You can also type the URL manually into the browser, using the URL above.
Posts tagged #documentation
No more posts with the given tag could be found. You can go back to the main view by selecting Home in the menu above.