Auto-signing contract proposals using LegalLab
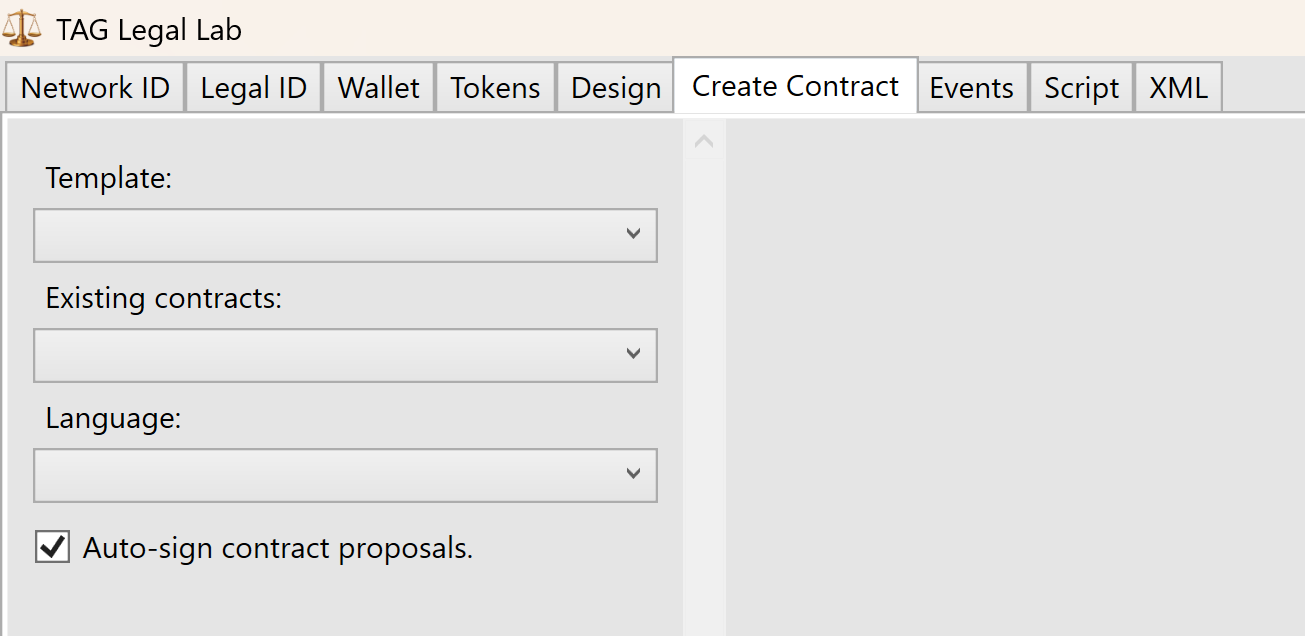
It is now possible to let LegalLab auto-sign contract proposals for you, simplifying often occurring tasks during development. You enable this feature by checking the “Auto-sign contract proposals” checkbox in the Create Contract tab. The feature is only available when LegalLab is connected. If this checkbox is enabled when a contract proposal is received, the contract will be automatically loaded and presented, and LegalLab will automatically sign the contract for the proposed role.
Identity attachments in LegalLab
LegalLab now supports uploading attachments to identity applications. You can also start KyC processing from LegalLab from the identity view. After applying for an ID, a new row is shown with a QR code to the created identity. While the identity is in the Created state (before anyone approves or rejects it), two buttons now appear:
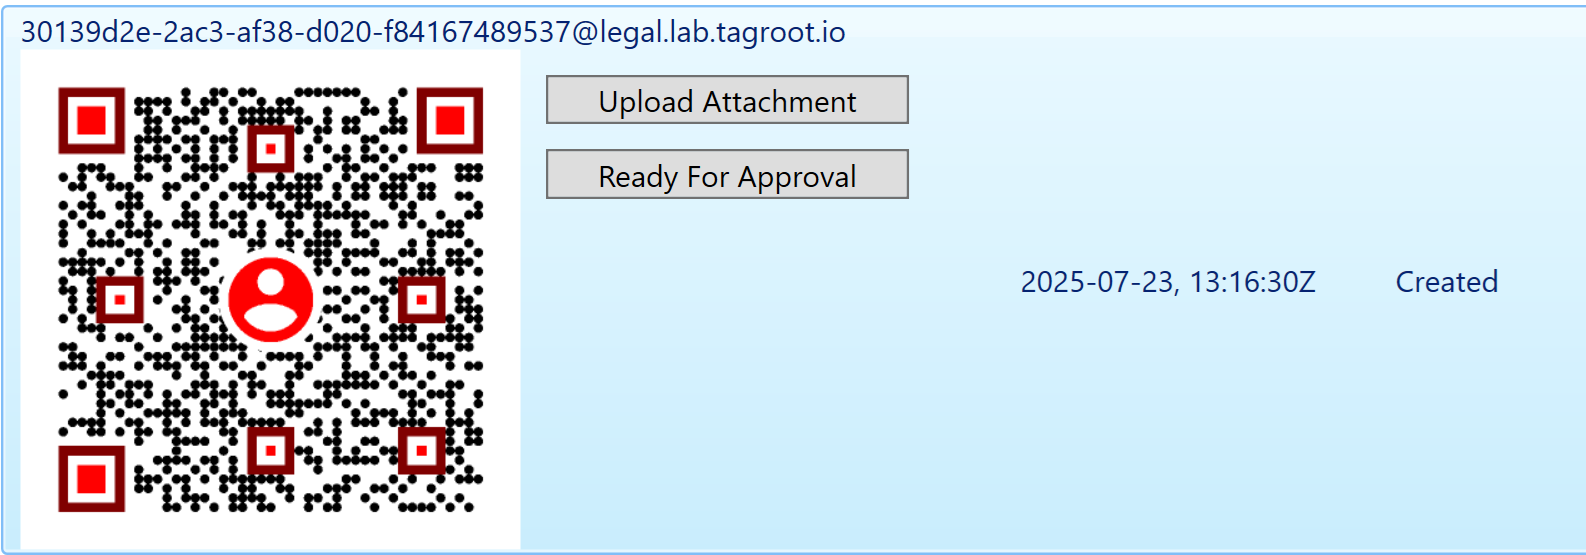
You can upload any attachment. Predefined file filters include filters for images, PDF files and XML files, but you can select any file to upload, as long as the Content-Type is recognized. Press Ready For Approval once the KyC process can be initiated. If you want to manually approve the identity, you need to do so via the administrative portal of the Nueron® to which the application was sent.
The installer for LegalLab has also been updated: https://lab.tagroot.io/Downloads/LegalLab/setup.exe
Geo-spatial contract parameters in LegalLab
LegalLab has been updated to support geo-spatial contract parameters. An example contract is also available showing how geo-spatial parameters in contracts can work. Make sure the Neuron® to which you are connected is updated to include support for geo-spatial parameters.
Adding to templates
A new button is available that you can click to add a geo-spatial parameter to a contract template you are designing:

Note: When editing geo-spatial parameter values, use GPS Coordinate syntax.
Geo-spatial Publish/Subscribe
When signing contracts with geo-spatial parameters, one of the parmeters can be used to give the contract a location. The example contract contains one such parameter. This means the contract, when signed, is assigned the geo-spatial coordinate provided in the parameter. The contract position is also published using the Neuron’s geo-spatial publish/subscribe service. If the visibility of the contract is set to Public & Searchable, the publication will be persisted. Otherwise, the publication will be ephemeral, i.e. shown only at the time of signature.
Processing signed contracts in a state machine: Open Vote example
The LegalLab repository contains a new example that illustrates how Neuro-Feature token state machines can be used to process signed smart contracts. The example implements a simple open voting system that tokenizes each vote, counting ballots within a given time frame, as they are cast. Each ballot is a smart contract signed by a participant. The state-machine of the vote counts accepted ballots, rejects incorrect ballots, and logs events to the Neuro-Ledger for transparency and auditability.
Note: The same architecture as exemplified by the Open Vote set of contracts (Vote + Ballot contracts) can be used in many technically similar (albeit conceptually different) cases. One such example is the tokenization of agriculture, for example, where each cultivation can be tokenized, and it can keep track of its current state transparently (for the end consumer) by processing observations, each observation recorded as a signed smart contract with information about what has occurred. Another example can be the tokenization of medical journals, for interoperability and privacy protection. The journal observes diagnoses and tests being performed, each one recorded as a signed smart contract with the appropriate information.
Vote Contract
The first contract in the Open Voting model (OpenVoteYesNoAbstain.xml), contains the state-machine Neuro-Feature token definition and contract. It defines the basic states of ballot processing. It assumes each ballot contains machine-readable information, as defined by the schema OpenVote.xsd, also downloadable online via its target namespace: https://paiwise.tagroot.io/Schema/OpenVote.xsd.
Note: Each contract containing machine-readable instructions will only be accepted if each Neuron® can validate the XML it contains. This is done by downloading the schema files from the corresponding target namespaces and using these schemas for validation. If the validation does not complete successfully, the contract is automatically rejected.
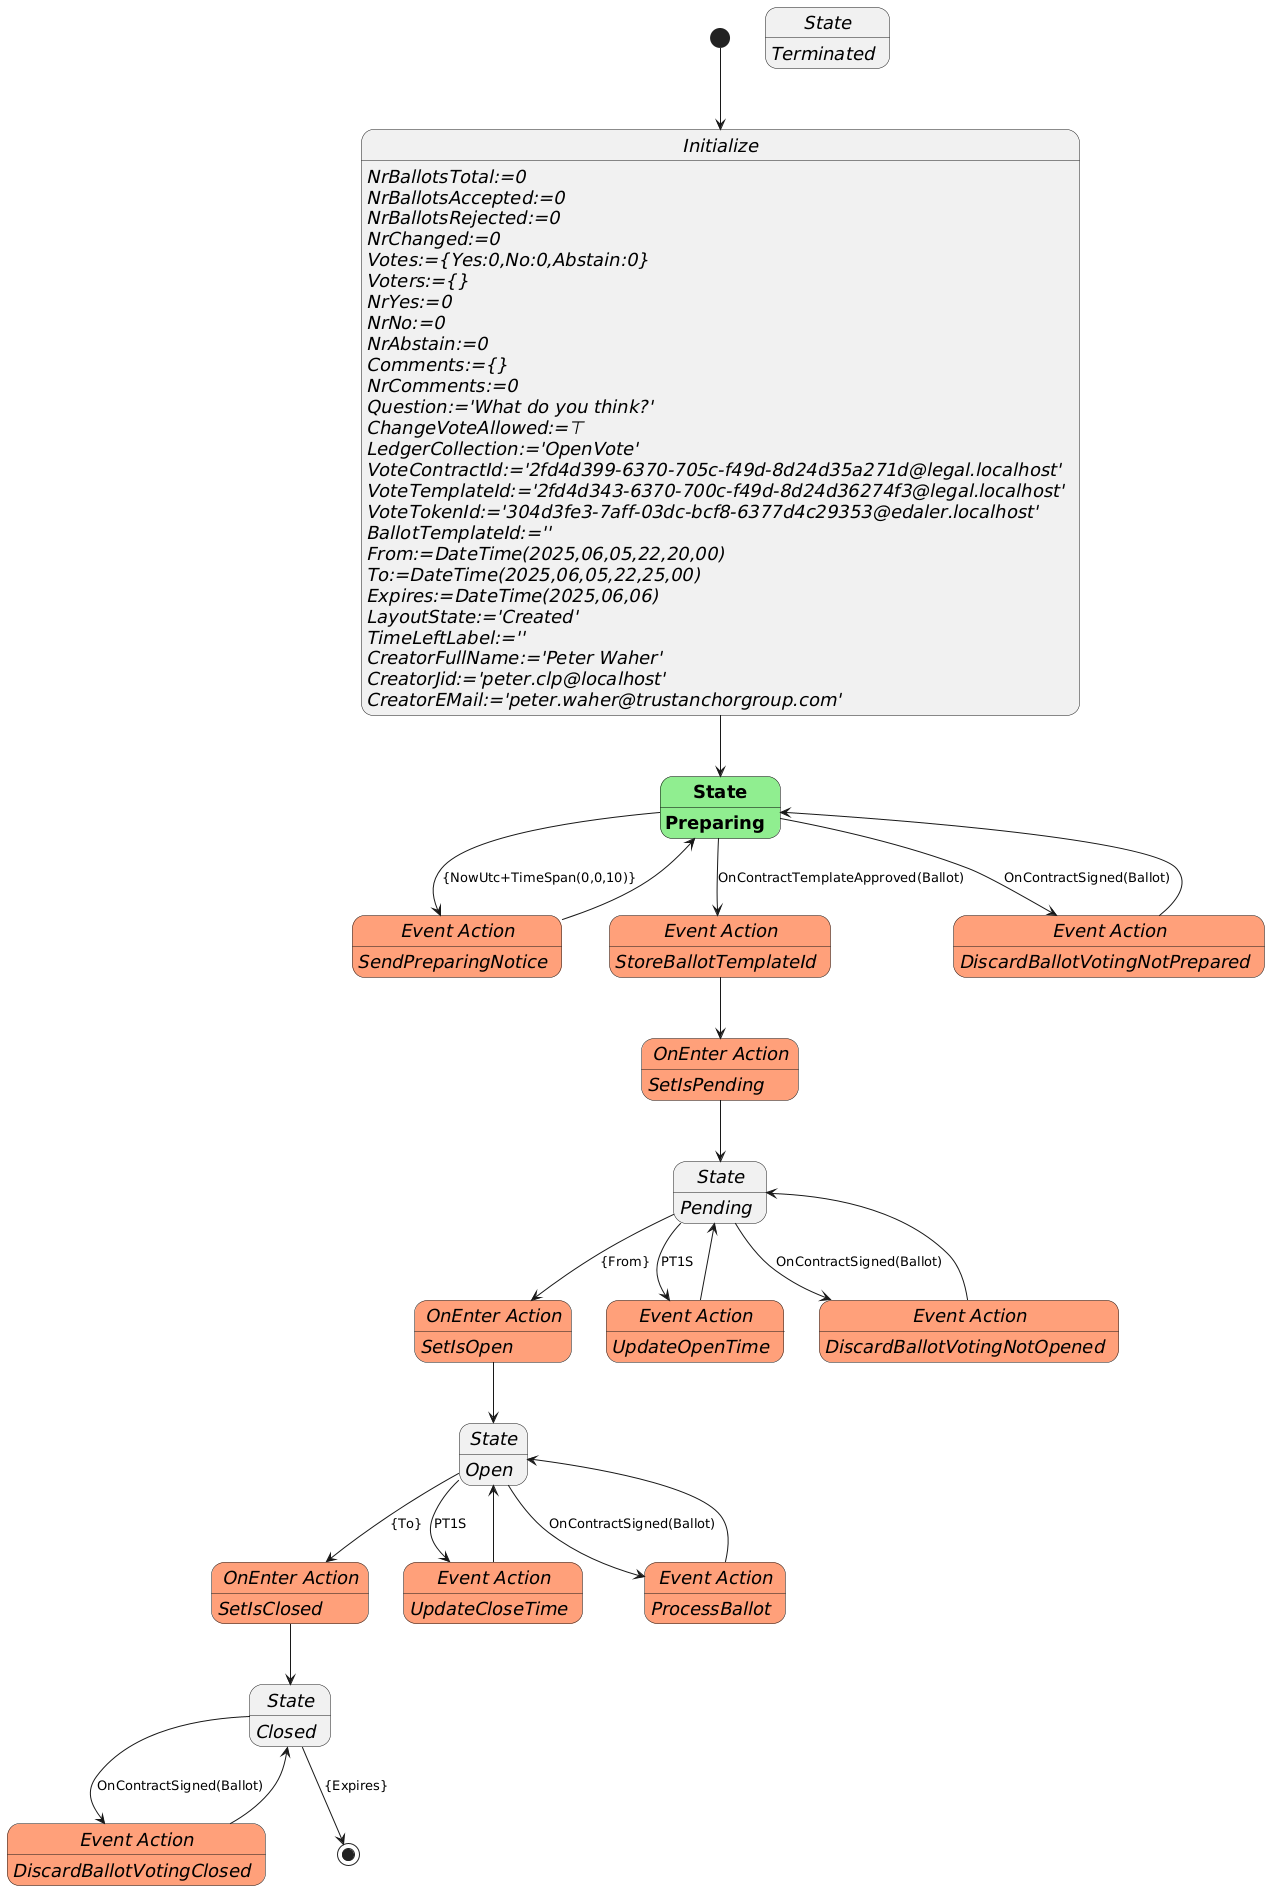
The states defined in the contract can be illustrated with the following state diagram:
The voting contract allows the creator to pose a question, define if participants are allowed to change their votes, and between what times the vote will be active. Times are defined in UTC. Participants need personal digital IDs with at least a validated country code, personal number and full name. Only one ballot per (Country, Country Code) will be counted. Apart from a Creator, the contract also requires a Certifier, which can be the same as the creator. The Certifier are given rights to cancel (invalidate) an election.
The states a voting procedure passes through are:
During the Preparing state, the state machine checks if it is paired with a Ballot template that points to it. The Ballot template needs to define a contract reference parameter to the vote, and it needs to enforce the template of the vote to match the template used to create the vote. If one such Ballot template is found, it progresses automatically to the next state. If one is not found, it awaits until such a template is approved on the Neuron®.
The Pending state, is a state where the vote is prepared, but has not commenced yet. During this state, the present view can be displayed, and links to the vote can be distributed. Any ballots cast during this state will be automatically rejected. Once the time to open the vote has been reached, the state-machine progresses to the next state.
The Open state is where participants can vote by signing Ballot contracts. If they are signed using the appropriate template, and pointing to the vote, the state-machine will process the ballots. If any errors are encountered, the corresponding ballot is rejected, and error logged. When the finishing time has been reached, the state-machine progresses to the next state.
The last state is the Closed state. Here, the voting machine is kept alive, to present results, but no ballots are processed, so the tally cannot be changed. Once the expiry time is reached, the state-machine is ended.
During state changes, the creator is notified by XMPP (Instant Chat Message) and e-Mail about the state of the vote. The messages contain links to the vote. These can be distributed to participants of the vote. The vote can also be shown in a browser. If published, voters and other participants can follow the results in real-time.
Ballot Contract
The second contract template is the OpenBallotYesNoAbstain.xml contract. It defines the ballot contract that can be used to participate in any votes generated by the corresponding voting template. The two templates must be paired. So, once the voting template has been proposed and apporved, its ID must be set into the Ballot template contract, before it can be proposed. Once this has been done, it can be proposed and approved accordingly. Then, the pair can be used with as many votes as desired.
The Ballot template defines the Boolean parameters necessary to be able to select Yes, No or Abstain. The Machine-readable part (defined by the https://paiwise.tagroot.io/Schema/OpenVote.xsd namespace) instructs the vote state-machine how the ballot is to be interpreted. The Ballot template has a contract reference parameter of a given name, and it must require a contract reference having a template ID restriction equal to the ID of the voting template. Once the voting state-machine is running, it will provide links to the corresponding Ballot contract template, with these references pre-set, so the user does not need to worry about providing the values for thse references. The user will only scan a QR code to vote.
Approved templates for experimentation
If you want to experiment with the open voting solution described, you can use the following approved contract templates. You can either copy the contract IDs and use in your application, or if you use an App, scan the corresponding QR code to access it.
To create a vote, i.e. define a question partiticpants will vote on, use the following template by scanning the code or entering its ID in the appropriate interface:
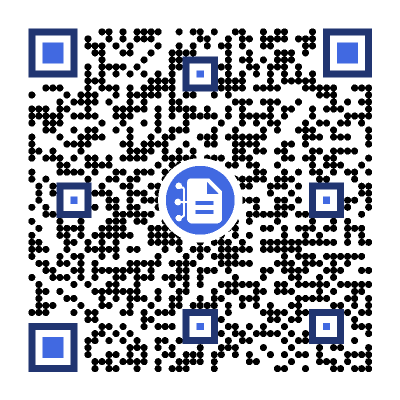
The matching Ballot template (which you will not need to scan here directly, as it will be presented pre-filled for you, see below), is:
After scanning the code, a new vote contract will be displayed. Fill in the details (question, if votes can be changed and the time interval the vote will be open; remember the times need to be provided in Universal Time Coordinates, or UTC). Sign the contract, both as Creator and Certifier (unless you want another person to sign as Certifier). Once the vote has been created and been properly signed, a Neuro-Feature token will be created. It will send you an e-mail with a link to the voting results page. The vote only passes slightly the preparation state, as an approved ballot template already exists. The vote page will look something as follows. Note the QR code to the right. It will point to the ballot contract template to use to cast a ballot, and also contain the reference to the current vote pre-filled. All you need to do after scanning the QR-code, is to select how you want to vote.
Note: The vote token is defined to be unique. This means, you can only create one token (one vote) with the same set of parameters. This means, you need to change any of the parameters from previous versions, including the question or time parameters, before you can create additional votes.
Vote Count & real-time presentation
The token that is generated by the vote contract has a present report that displays the current state of the vote. The creator can access the present report from the client used to create the vote contract, and by extension the token. The creator will also get an Instant Chat Message and an e-Mail, containing the present report and current vote count (which would be zero and pending, before the count starts). There will also be a web URL which can be distributed, that will show the vote to any online viewer. The URL will have a format similar to https://sa.id.tagroot.io/NF/a86d6033-b694-7b5e-c8d3-42d5200ec85c@edaler.sa.id.tagroot.io. The ID in the URL corresponds to the ID of the Vote. You can match this ID with the ID displayed for the vote (see below). The present report can be projected and displayed in kiosk mode as well. It will be updated in real-time as votes are counted. The initial view may be something as follows:
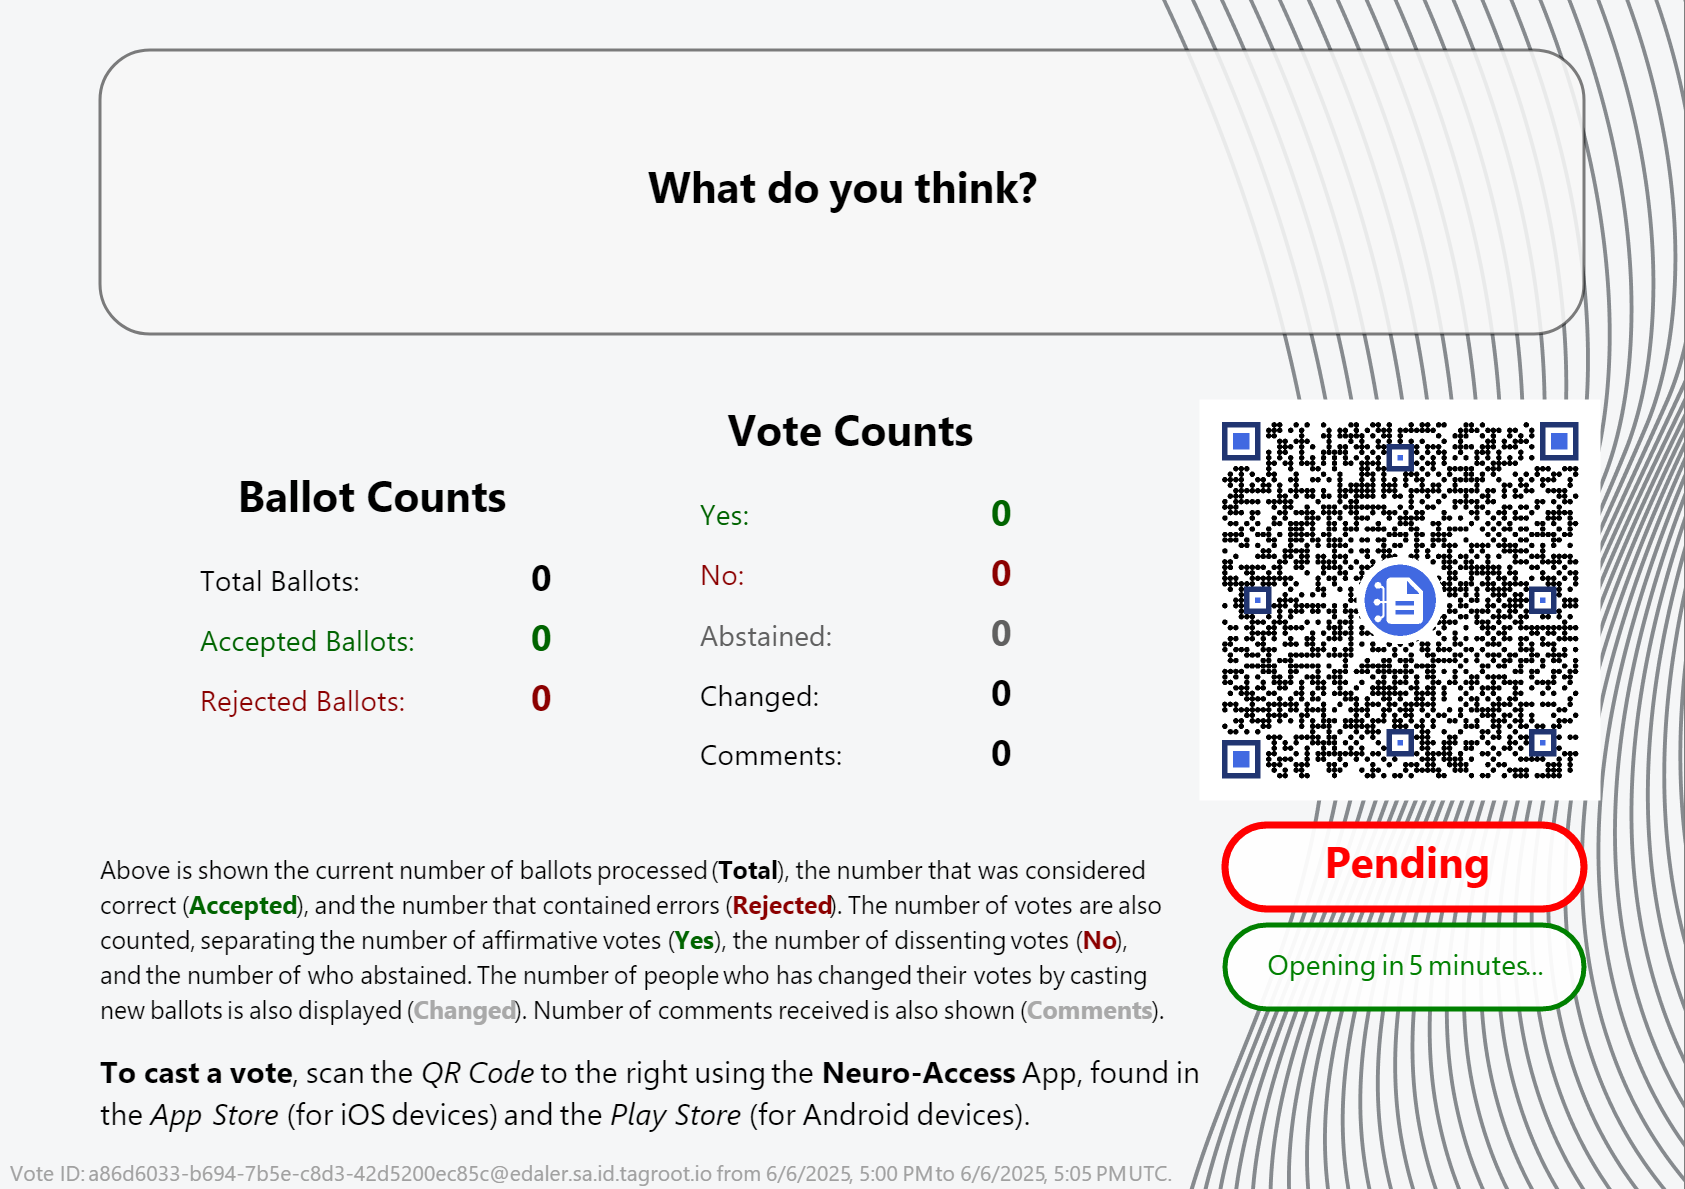
Note The QR code in the report can be scanned by participants, and will point to the ballot template, with the vote reference pre-filled in. All the participant needs to do, is vote, and sign the ballot and the vote will be counted. Once the vote closes, the report will be updated accordingly also.
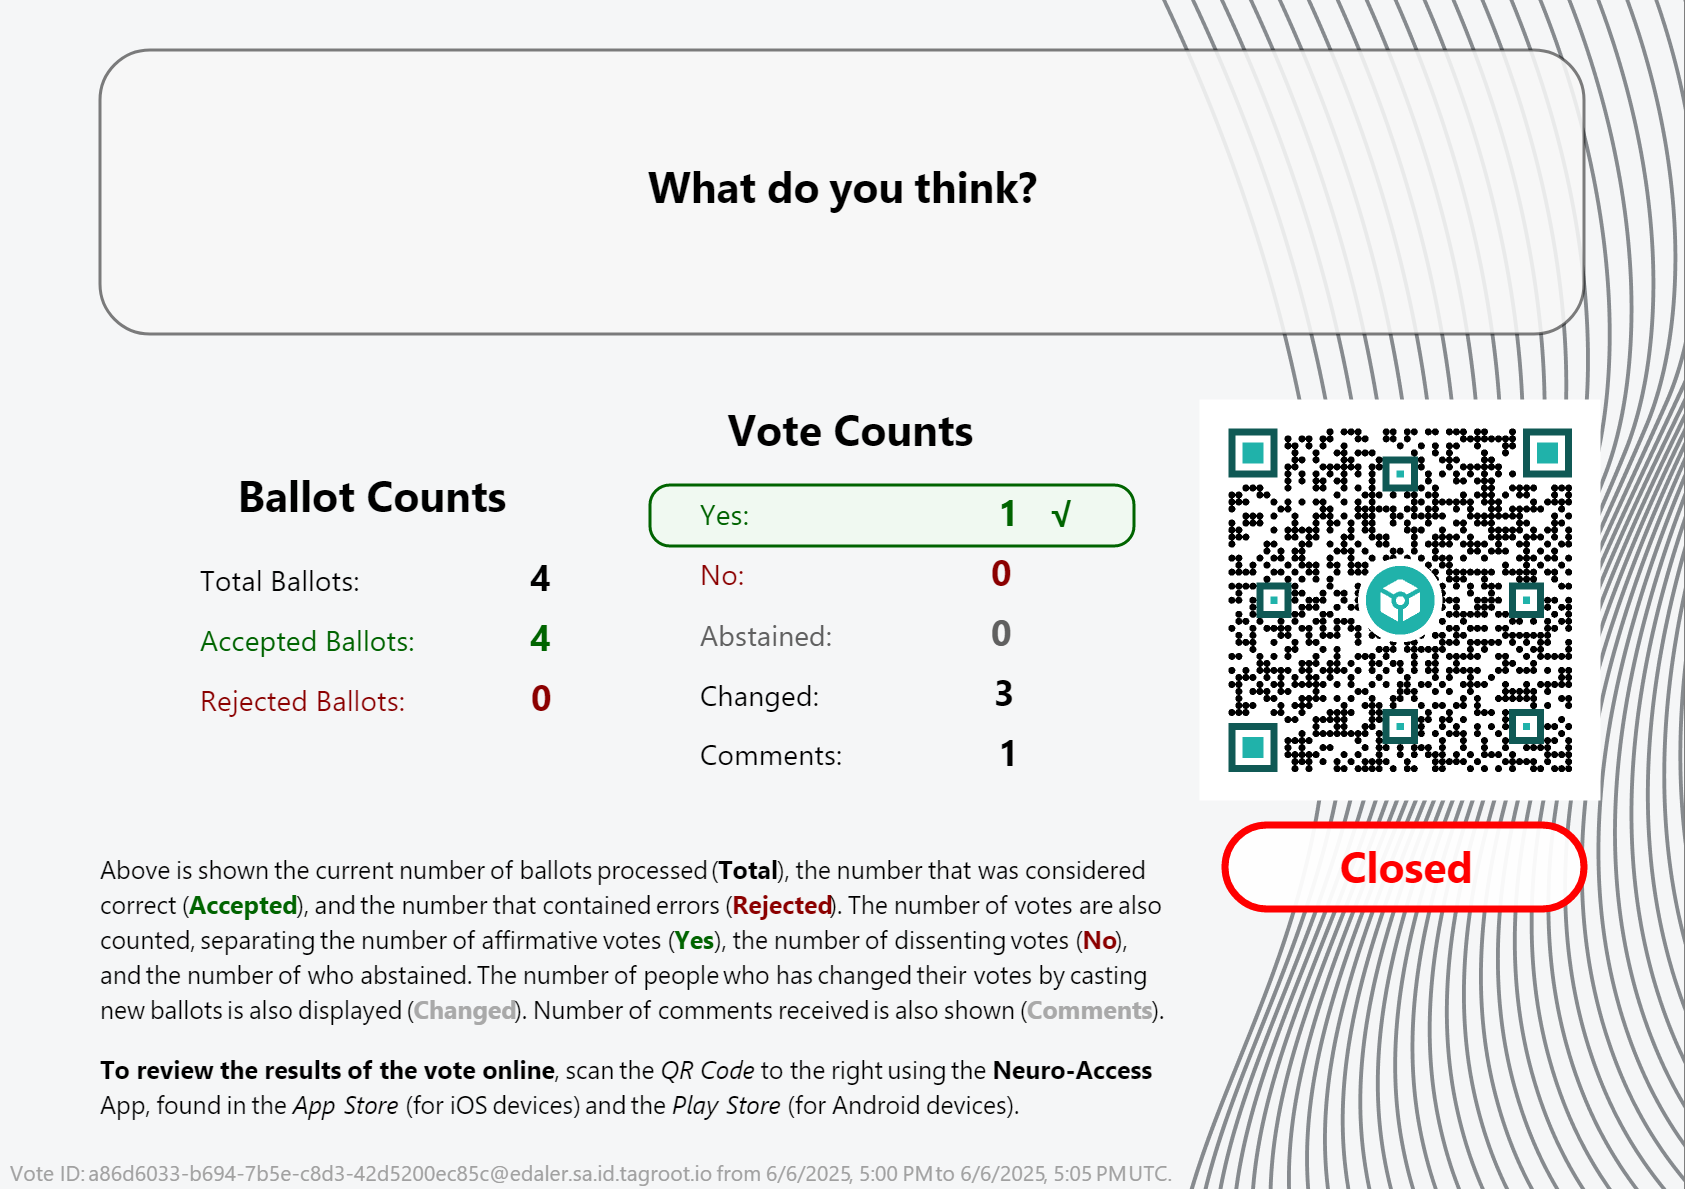
Note: Once the vote closes, the QR code changes. It is no longer pointing to the ballot template, but instead to the token that performed the count. Scanning it will give access to the token, and the reports it publishes.
Presentation Layout
The layout presenting the vote count is generated by the voting token itself, and is part of the vote contract template, and can therefore be reviewed as well. It is an XML Layout format, availble in the OpenVoteResultLayout.xml file. You can edit such XML files and preview the layout using LegalLab as follows:
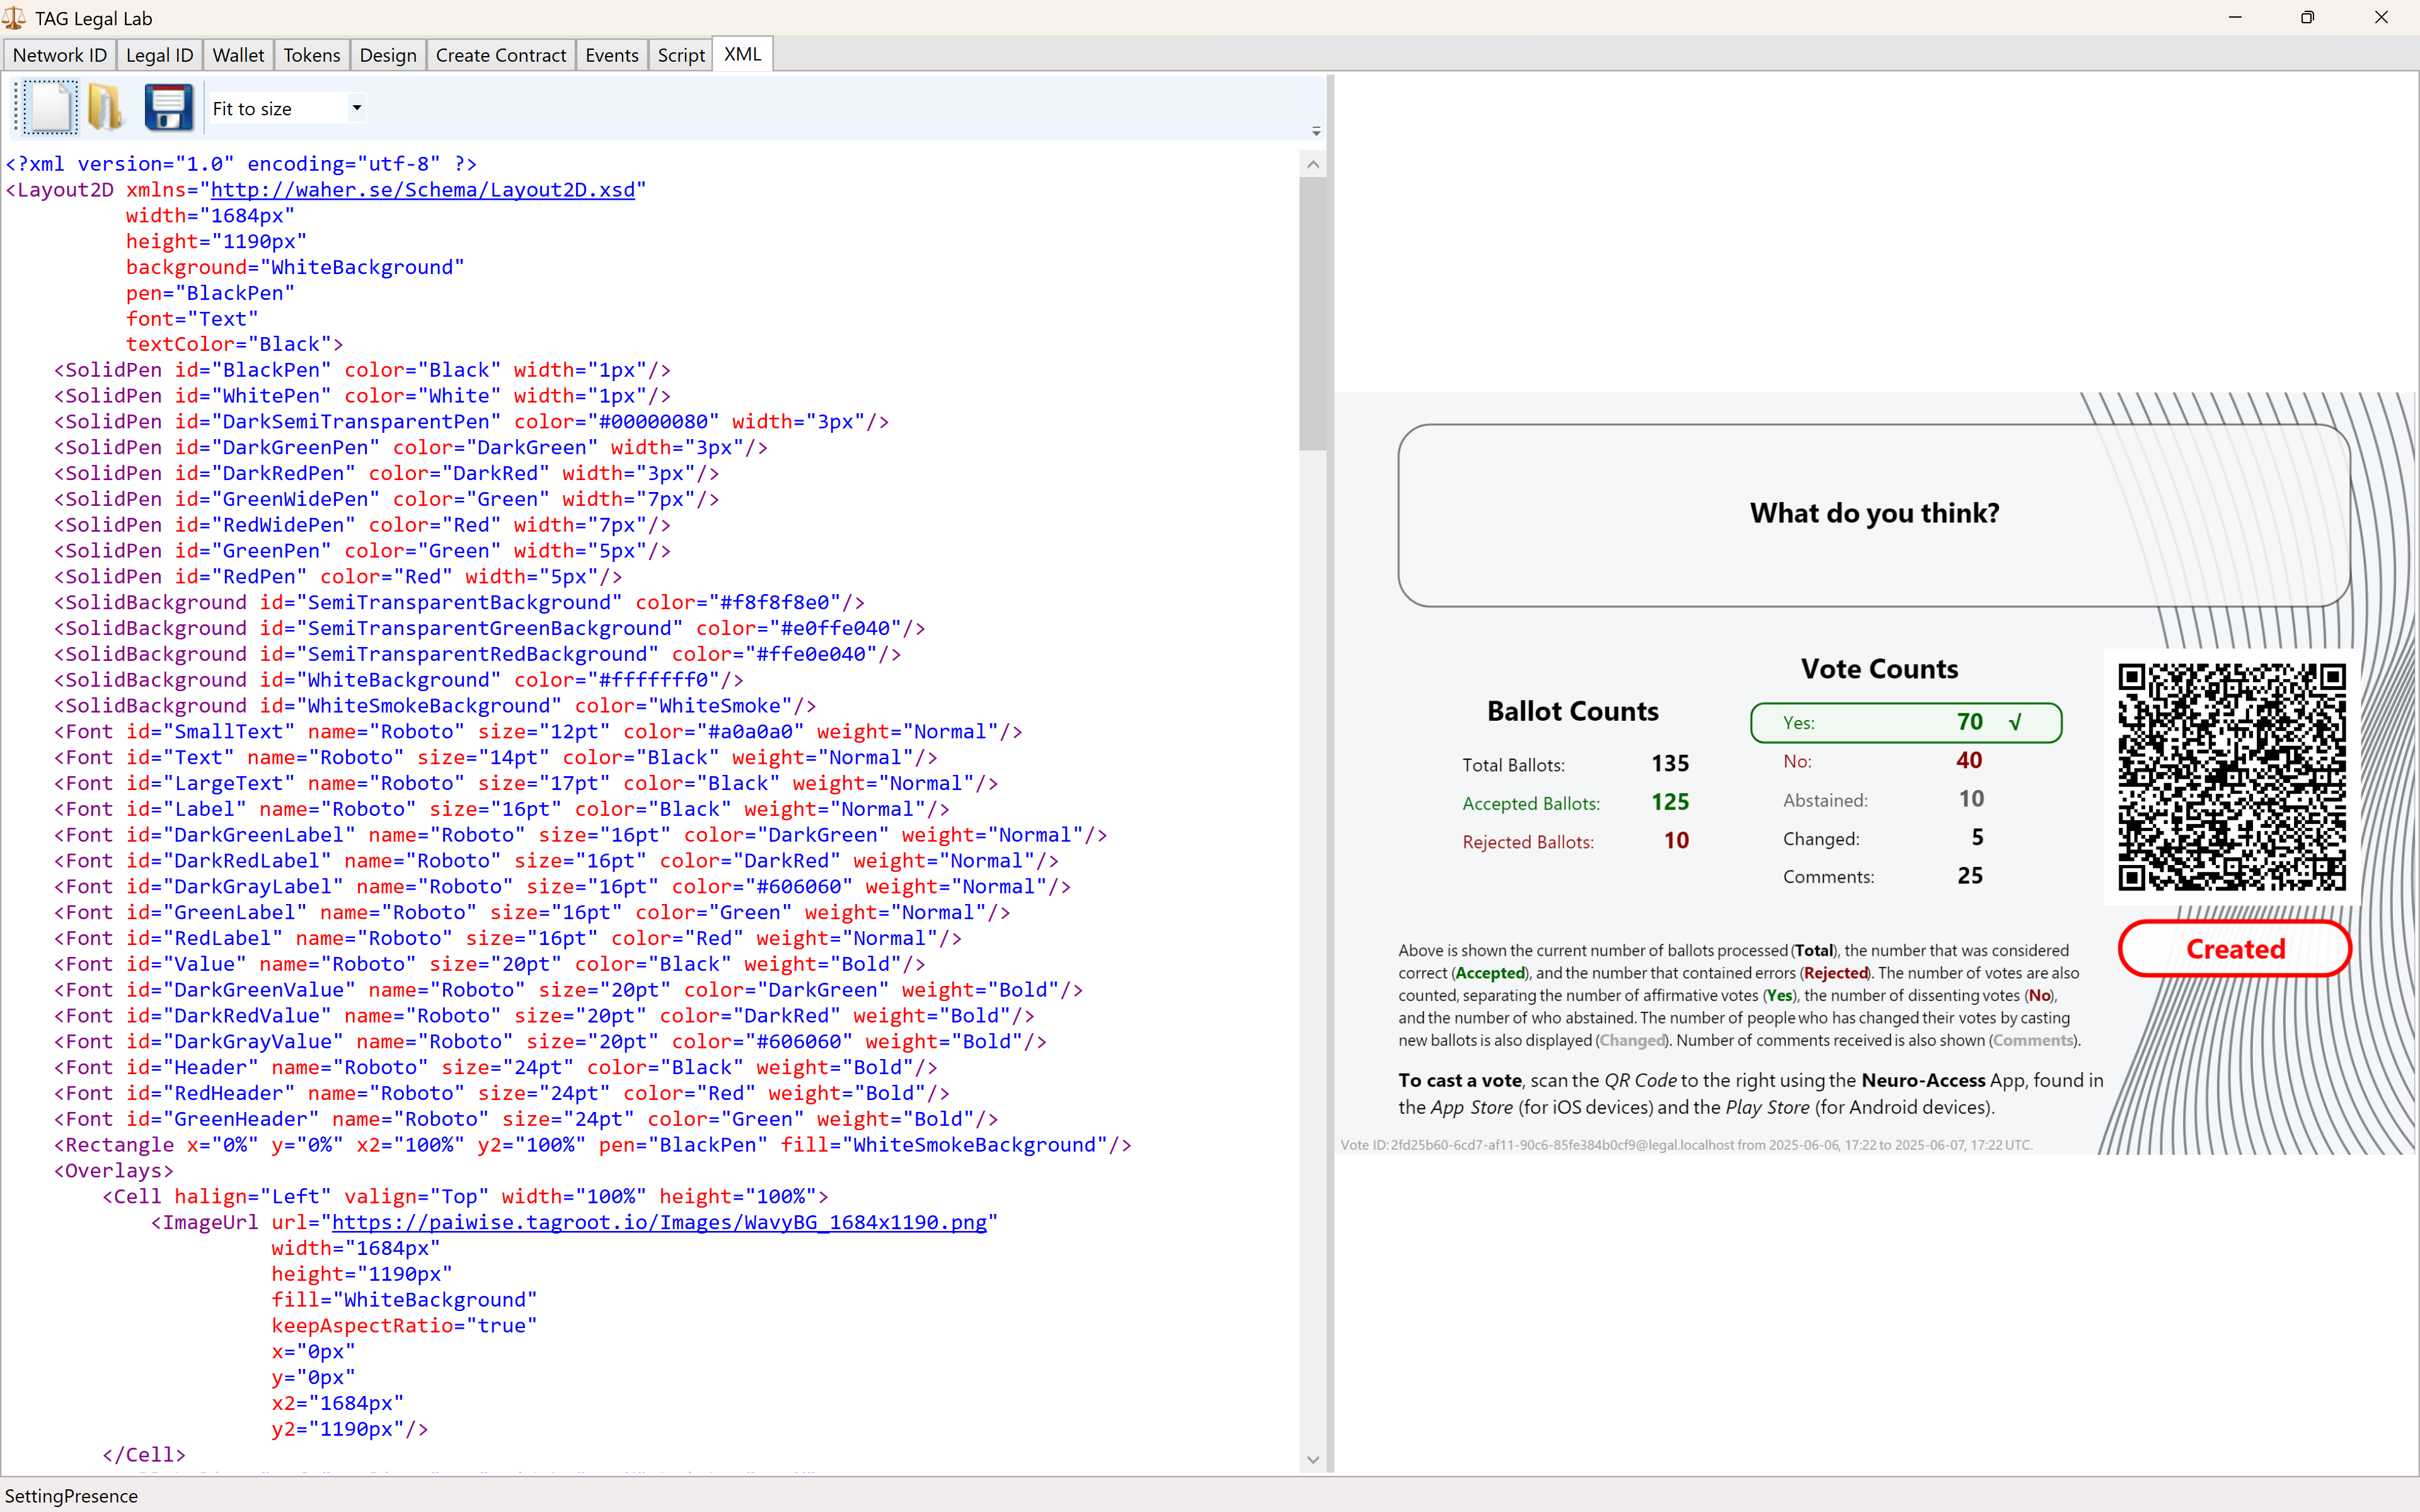
The variables and script functions used in the layout need to be initialized. This can be done in the Script tab. You can use the initialization script published in the repository: OpenVoteResultLayoutInit.script to generate the view above.
Neuro-Ledger entries recorded
Apart from all entries recorded regarding Digital Identities, Smart Contracts, Tokens and State-Machines, the Open Vote example records several entries by itself. These include:
| Entry | Description |
|---|---|
BallotCounted |
A ballot has been counted. |
BallotRejected |
A ballot has been rejected. |
BallotRevoked |
When an older ballot has been revoked because the participant submits a new ballot. |
CommentReceived |
A comment by a participant has been received. |
Note: The vote contract defining the vote, also defines the Neuro-Ledger Collection these entries are recorded in.
The other common Neuro-Ledger collections annotating entries are:
| Neuro-Ledger Collections | |
|---|---|
LegalIdentities |
Contains entries related to digital identities, including Neuro-Access digital identities. |
Contracts |
Contains entries related to smart contracts, including the voting contract and the ballot contracts used during voting. |
NeauroFeatureTokens |
Contains information regarding Neuro-Feature tokens, including the token definition of the open voting logic. |
StateMachines |
State-Machine information is recorded in this collection. This includes the open voting process performing the ballot counting and presentation. |
StateMachineCurrentStates |
Contains current states of different State-Machines. |
StateMachineSamples |
Contains variable changes as they are persisted by State-Machines. These samples can be used to track the counting process. |
#tutorial, #example, #legallab, #contracts, #neuro-feature, #neuro-ledger, #state-machine
Smart Contract operations on tokens
One of the ways an owner of tokens can perform operations on them, is by using smart contracts referencing the tokens. The operations that can be used are defined by the https://paiwise.tagroot.io/Schema/NeuroFeatures.xsd namespace, the same namespace used to create the tokens.
The operations supported include:
CreateDestroyDonate(new)Transfer
Create
A smart contract with the Create machine-readable element creates one or more Neuro-Feature tokens. Creating tokens may require a comission fee to be paid first, as defined by the smart contract template used. An initial value is set by the creator.
Destroy
Destroy on the other hand, in a smart contract, destroys the token, if such is permitted by the token definition. During the creation of the token, the creator defines under what cirumstances the tokenⓈ can be destroyed, and by whom (if at all):
CreatorCanDestroydefines if the creator is allowed to destroy the token.OwnerCanDestroyBatchspecifies that an owner can destroy a token or tokens, but only if the owner is the owner of all tokens created using the same creation contract (here called a batch of tokens).OwnerCanDestroyIndividualallows the owner to be able to destroy any token it owns, regardless if other owners owns tokens from the same batch.CertifierCanDestroycan be used to give privileges to a certifier signing the token creation contract, to destroy any of the certified tokens. This gives the certifier the authority to ensure and enforce the rules set forth in the creation contract.
Donate
The Donate operation is new as of build 2025-01-30. It allows an owner to donate a token or set of tokens to another, without a monetary recompensation. This operation does not change the registered last value of the token. (This is the initial value set during creation if the token has never been transferred, i.e. sold.) The donation operation registers a specific donation event for transparency, showing the ownership has changed without compensation.
Transfer
The original way to change ownership of a token is called Transfer and includes a payment of eDaler® to compensate for the transfer. This payment may include a commission to the Trust Provider hosting the token. The payment will also be recorded as the new value of the token, and a corresponding event will be recorded, for transparency, giving future new owners (buyers) a way to transparently review a token’s history and trade.
LegalLab
The LegalLab repository contains multiple examples of token operations. This includes examples of the Create, Destroy, Donate and Transfer operations.
Posts tagged #legallab
No more posts with the given tag could be found. You can go back to the main view by selecting Home in the menu above.