Publishing and transforming XML web content using XSLT
You can now publish XML files as web content, and have the XML source be automatically transformed to a web page using XSL transforms (XSLT). This feature is available from build 2025-08-26. The XSLT can transform the XML to either Markdown or directly to HTML. By doing this you can publish the content directly using its source in XML, without worrying about having to update any corresponding content pages. The XSLT will automatically transform the underlying source data to its presentable form when a user wants to see it.
Example
Consider the following source XML file. It describes a harmonized interface, and the XML acts as a definition for the interface:
<?xml version="1.0" encoding="utf-8"?>
<?xml-stylesheet type="text/xsl" href="/Xsl/InterfaceToMarkdown.xslt"?>
<interface xmlns="urn:nfi:iot:hi:1.0" id="urn:nfi:iot:hi:actuator:analogOutput:1.0">
	<description>Generical analog output.</description>
	<sensorData>
		<field name="Analog Output" use="Optional" m="true" type="q" description="Momentary output value."/>
		<field name="Analog Output, Raw" use="Optional" m="true" type="integer" description="Momentary raw binary output value."/>
		<field name="Analog Output, Bits" use="Optional" s="true" type="integer" description="Number of bits of precision of output value."/>
		<field name="Analog Output, Range, Low" use="Optional" s="true" type="q" description="Lowest possible value."/>
		<field name="Analog Output, Range, High" use="Optional" s="true" type="q" description="Highest possible value."/>
		<comment><![CDATA[The output value must be reported using the correct precision and unit. Examples of units that could be used:

* `%` - for instance 0-100 %
* `mA` - for instance 4-20 mA
* `V` - for instance 0-10 V]]></comment>
	</sensorData>
	<controlParameters>
		<parameter name="Analog Output" use="Mandatory" type="numeric" range="RangeElement" description="Desired state of output."/>
		<parameter name="Analog Output, Raw" use="Optional" type="integer" range="RangeElement" description="Desired raw state of output. The int version must always be supported. If the range supports numbers larger than that supported by the int type, the device must also support the long version."/>
	</controlParameters>
</interface>
Notice the second row. It contains a processing instruction that references an XSL Transform document that can be used to transform the XML:
<?xml-stylesheet type="text/xsl" href="/Xsl/InterfaceToMarkdown.xslt"?>
You can review the XSLT transform referenced here. See if you can see how it works. Otherwise, review the XSLT tutorial on w3schools to learn how XSLT works.
XSLT on the Neuron
On the TAG Neuron®, the XSL Transform procedure works a bit differently than on a traditional web server. In the traditional case, it is the browser that transforms the XML into a presentable page. This means that all the information is returned, including information you might not want to present. The process is also somewhat slowed down, since two requests have to be made.

On the Neuron, it is the the web server that transforms the XML into a presentable page, not the browser. This means that only one request has to be made. Furthermore, the web server can transform the content in two passes, simplifying the construction of the XSLT: The developer can choose to transform the XML to Markdown first. This Markdown then gets implicitly transformed into HTML in a second step:

A developer can also choose to transform the XML directly to HTML, as in the traditional case. Still, on the Neuron, this transform would be performed on the server:

An added benefit of transforming the content on the web server, is that you get consistent results regardless of browser used to view the page.
Web login procedure
There is a new web session login procedure available in the Neuron®. From build 2025-08-18, clients performing web session login must follow this new procedure. For users using the browser to login, this is accomplished by simply refreshing the page to ensure the most recent javascript file is loaded when logging in.
Note: Web session login is used to access the administrative page. Agent API uses another type of login, based on JWT bearer tokens.
The client calls the /Login web resource with a JSON object payload as follows:
{
	"UserName": Required(Str(PUserName)),
	"PasswordHash": Required(Str(PPasswordHash)),
	"Nonce": Required(Str(PNonce))
}
While the web resource is the same as before, the following is new:
- A
PasswordHashproperty is sent instead of aPasswordin clear text (albeit over an obligatory encrypted channel, i.e. basic authentication over HTTPS). How this password hash is computed is described below. - A
Noncevalue is available. This value must be unique, and cannot be reused. It is recommended this is a base64-encoding of a sufficiently large random number, for instance a 32-byte random number, to generate sufficient entropy. Reusing a nonce value will result in an error being returned. - The respone of the web resource is another JSON object, instead of the earlier redirection response if successful, and a session variable state change, if an error occurred.
The purpose of the change is twofold:
- Secure the login endpoint
- Allow third party clients to login using the web login.
The response to the call is a JSON object as follows:
{
	"ok": Required(Bool(POk)),
	"message": Optional(Str(PMessage))
}
If ok is false, the message will contain an error message. Note that the login will be available in the current session. To enable sessions, cookies must be enabled.
Hash Digest computation
The client needs to perform the following computations to generate the hash digest to send to the Neuron®:
Compute
H1 = SHA3-256(UserName + ":" + Domain + ":" + Password), whereDomainis the host name or main domain name of the Neuron®. It cannot be an alternative domain name, it must be the main domain name of the Neuron®.Compute
H2 = HMAC-SHA-256(UTF8Encode(Nonce),H1), where the UTF-8 encoded Nonce is used as key to the HMAC-SHA-256 algorithm, andH1is used as the data whose digest is to be computed. Note that the UTF-8 encoding must not include a preamble or byte-order-mark (BOM).Compute
PasswordHash = BASE64(H2).
Note: For a reference implementation, see the /Login.js javascript resource on an updated Neuron®.
Embedding PDF Documents in Markdown
It is now (from build 2025-07-24) possible to embed a PDF document into a Markdown page using a simple code block. The basic syntax is as follows:
```application/pdf:PDF Document
JVBERi0xLjcNCiW1tbW1DQoxIDAgb2JqDQo8PC9UeXBlL....
....
```
The code block is rendered to an embedded object in HTML (<embed/>), which, if the browser supports this tag, will display the PDF document directly embedded in the text.
This can be used for multiple purposes:
- Sharing and displaying documents in posts or documentation.
- Using PDF documents in KyC.
- Uploading PDF documents to smart contracts, for documentation purposes.
- etc.
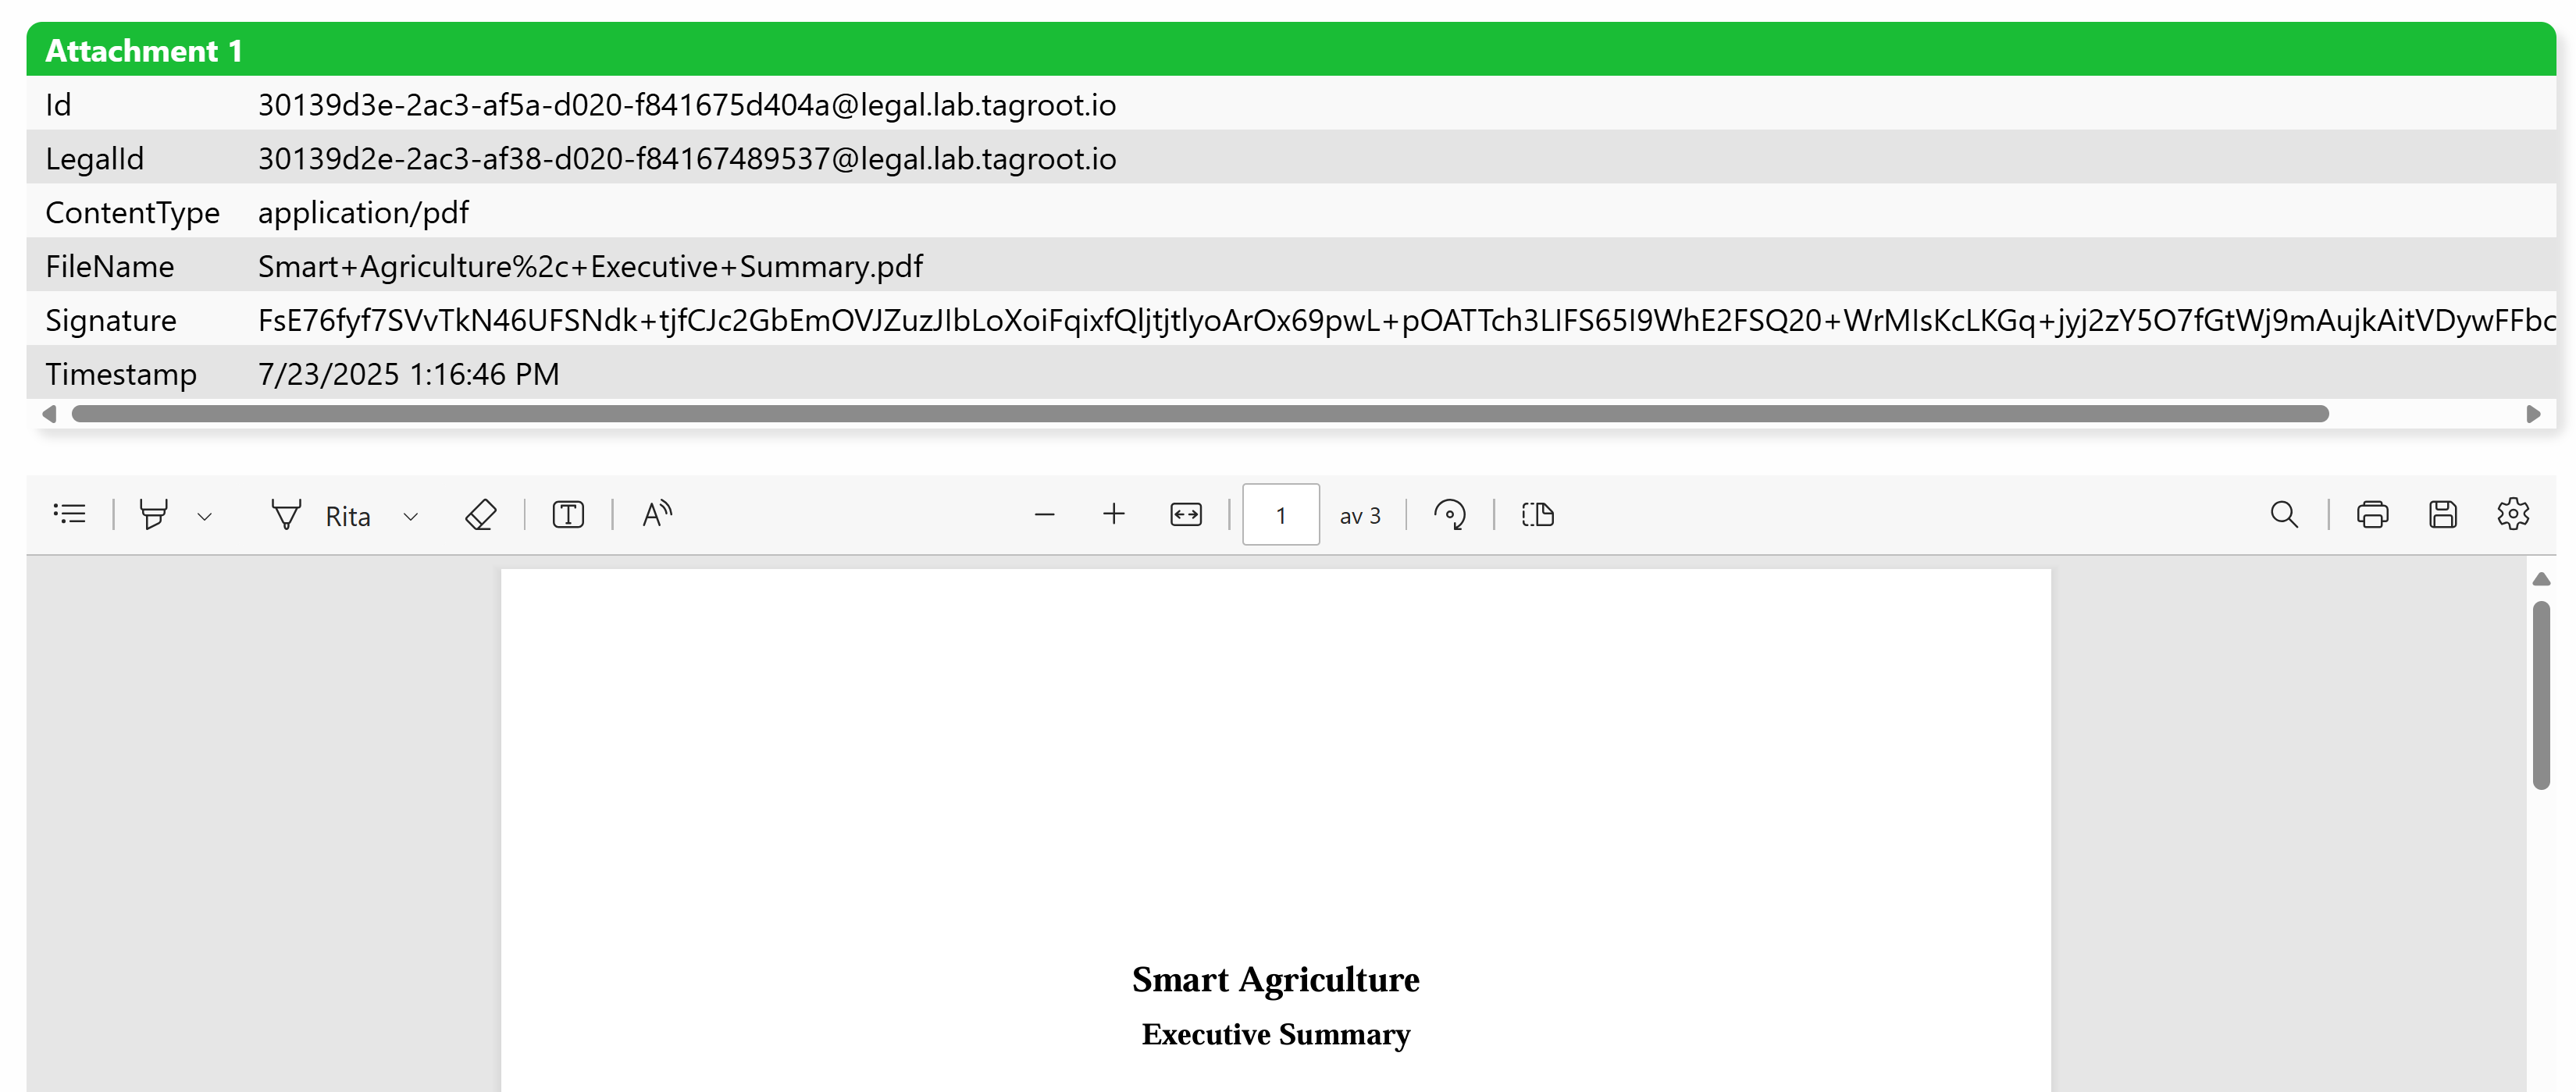
Example:
This makes it seamless, for instance, to include PDF documents in idendity applications. It will be displayed embedded in the application for the operator:
Identity attachments in LegalLab
LegalLab now supports uploading attachments to identity applications. You can also start KyC processing from LegalLab from the identity view. After applying for an ID, a new row is shown with a QR code to the created identity. While the identity is in the Created state (before anyone approves or rejects it), two buttons now appear:
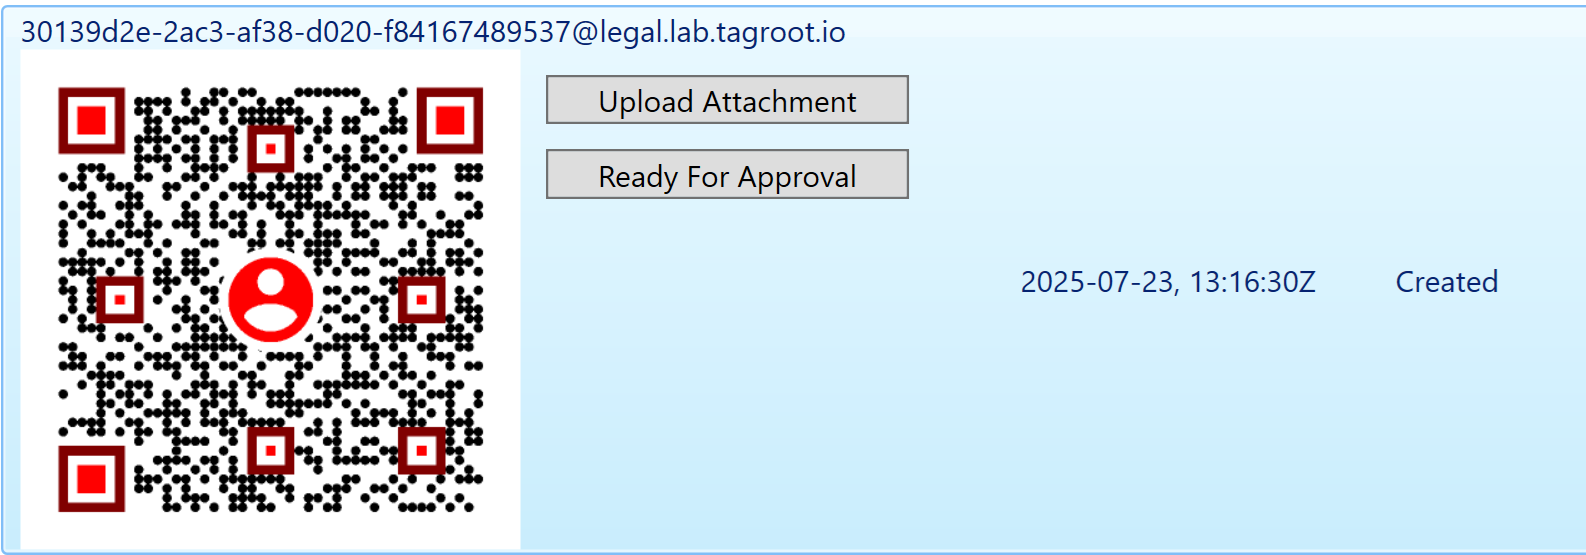
You can upload any attachment. Predefined file filters include filters for images, PDF files and XML files, but you can select any file to upload, as long as the Content-Type is recognized. Press Ready For Approval once the KyC process can be initiated. If you want to manually approve the identity, you need to do so via the administrative portal of the Nueron® to which the application was sent.
The installer for LegalLab has also been updated: https://lab.tagroot.io/Downloads/LegalLab/setup.exe
Public Publish/Subscribe Web Service
Nodes that have been declared as open in XMPP Publish/Subscribe can be accessed as RSS Feeds (from build 2025-07-15). The feed contains links to the most recent items published on the node. Accessing the links will return the XML of the corresponding item.
Syntax of the URLs to access the RSS feed and corresponding items is:
https://DOMAIN/PubSub/NODE_ID
URLs of this type will return an RSS Feeds of the most recent items of the public Publish/Subscribe node with the name NODE_ID.
https://DOMAIN/PubSub/NODE_ID/ITEM_ID
URLs of this type will return the XML of the item ITEM_ID published on the public Publish/Subscribe node with the name NODE_ID.
Examples
You can try these examples to try the API:
https://lab.tagroot.io/PubSub/ReleaseNoteshttps://lab.tagroot.io/PubSub/ReleaseNotes/2025-07-15/Build_2025_07_15_This_release_contains_the_following
The ReleaseNotes publish/subscribe node is also a Web Node, i.e. used for publishing information online. Compare the source publish/subscribe information accessible via the links above, to the corresponding web links:
Posts by user
No more posts authored by the user could be found. You can go back to the main view by selecting Home in the menu above.