Login Auditor configuration in gateway.config
From build 2024-07-24, you can now configure the Login Auditor via the gateway.config file. This configuration is also accessible via the Node Explorer in the Admin menu (Sources & Nodes).
To configure the intervals of the Login Auditor, follow these steps:
- Open the Admin page for the Neuron®.
- Open the Node Explorer by clicking the Sources & Nodes button.
- Expand the Gateway configuration folder.
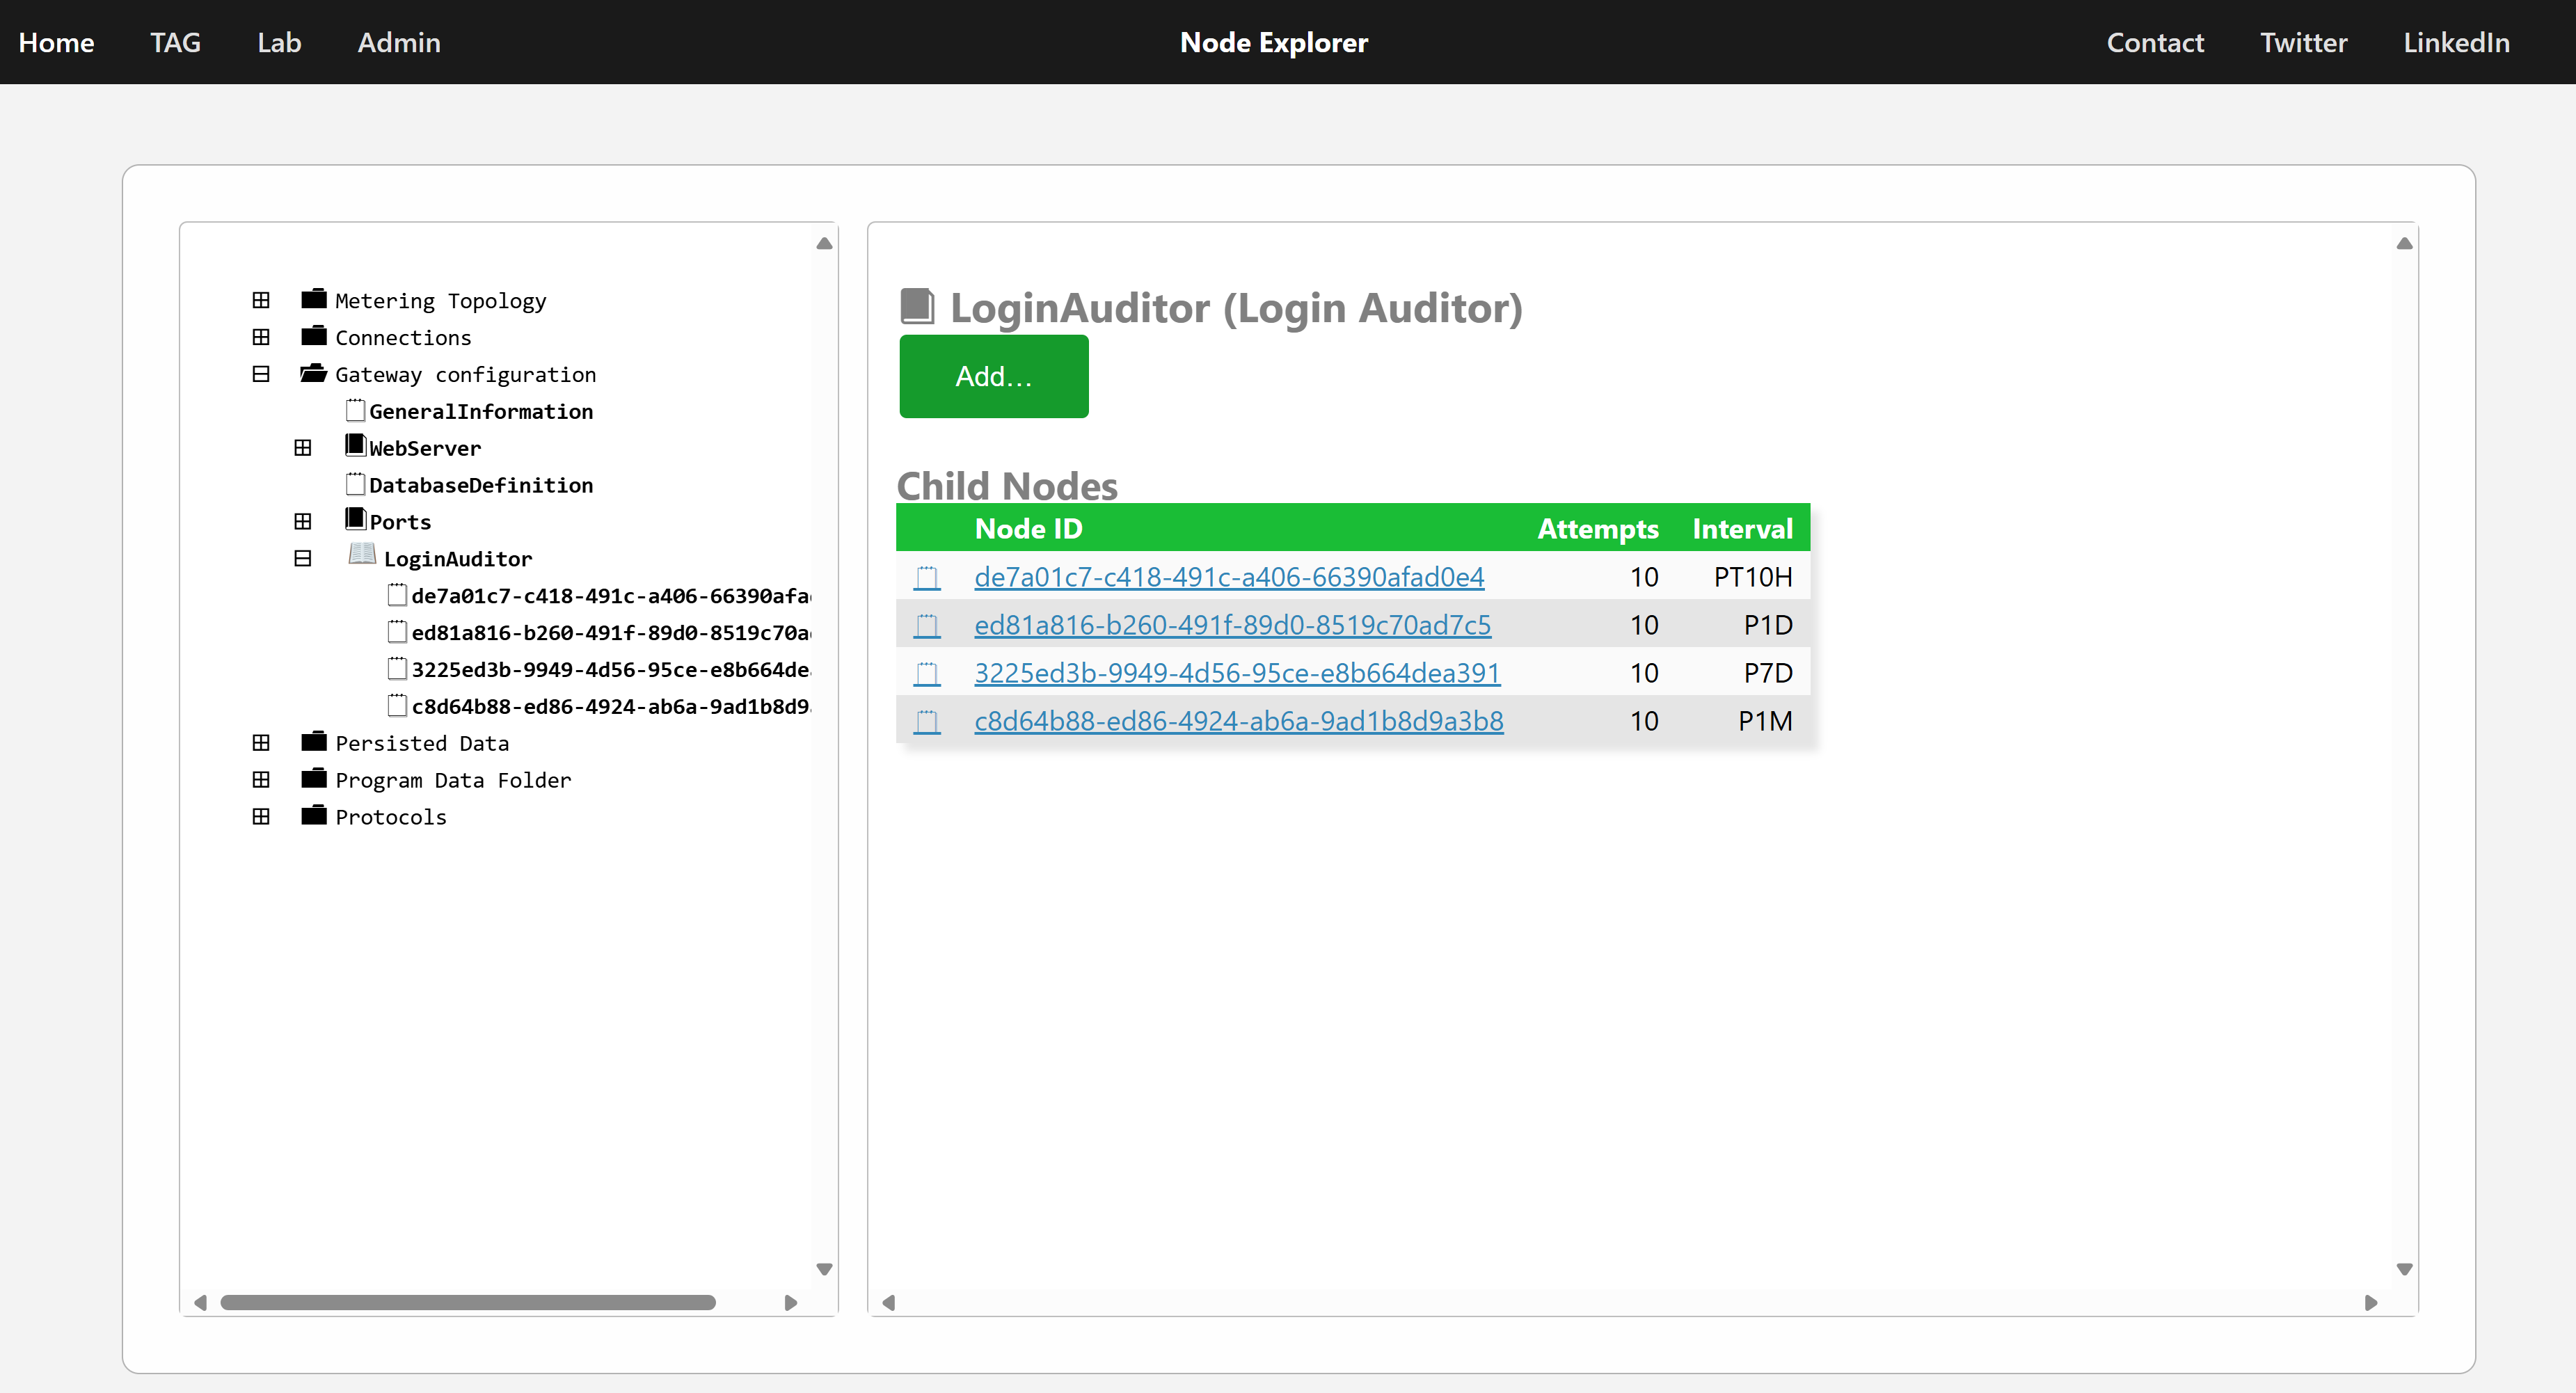
- Select the LoginAuditor node.
- Edit, add or delete interval nodes accordingly (see figure below).
- Restart the Neuron® when you’re done.
Note that:
- Intervals are specified using the XML Duration format.
- Interval nodes have no explicit Node IDs. For that reason, they are implicitly given GUIDs as IDs.
Controlling Multual TLS on a port level
As of build 2024-07-24 you can now control Mutual TLS settings (mTLS) on a Neuron® on a per port basis. You can for example use port 443 for normal HTTPS, without requesting client certificates, and enable mTLS on a secondary HTTPS port (for example 8088). To enable mTLS on only certain ports, do as follows:
- Go to the admin page:
- Open the Node Explorer by clicking the Sources & Nodes button.
- Expand the Gateway Configiuration source.
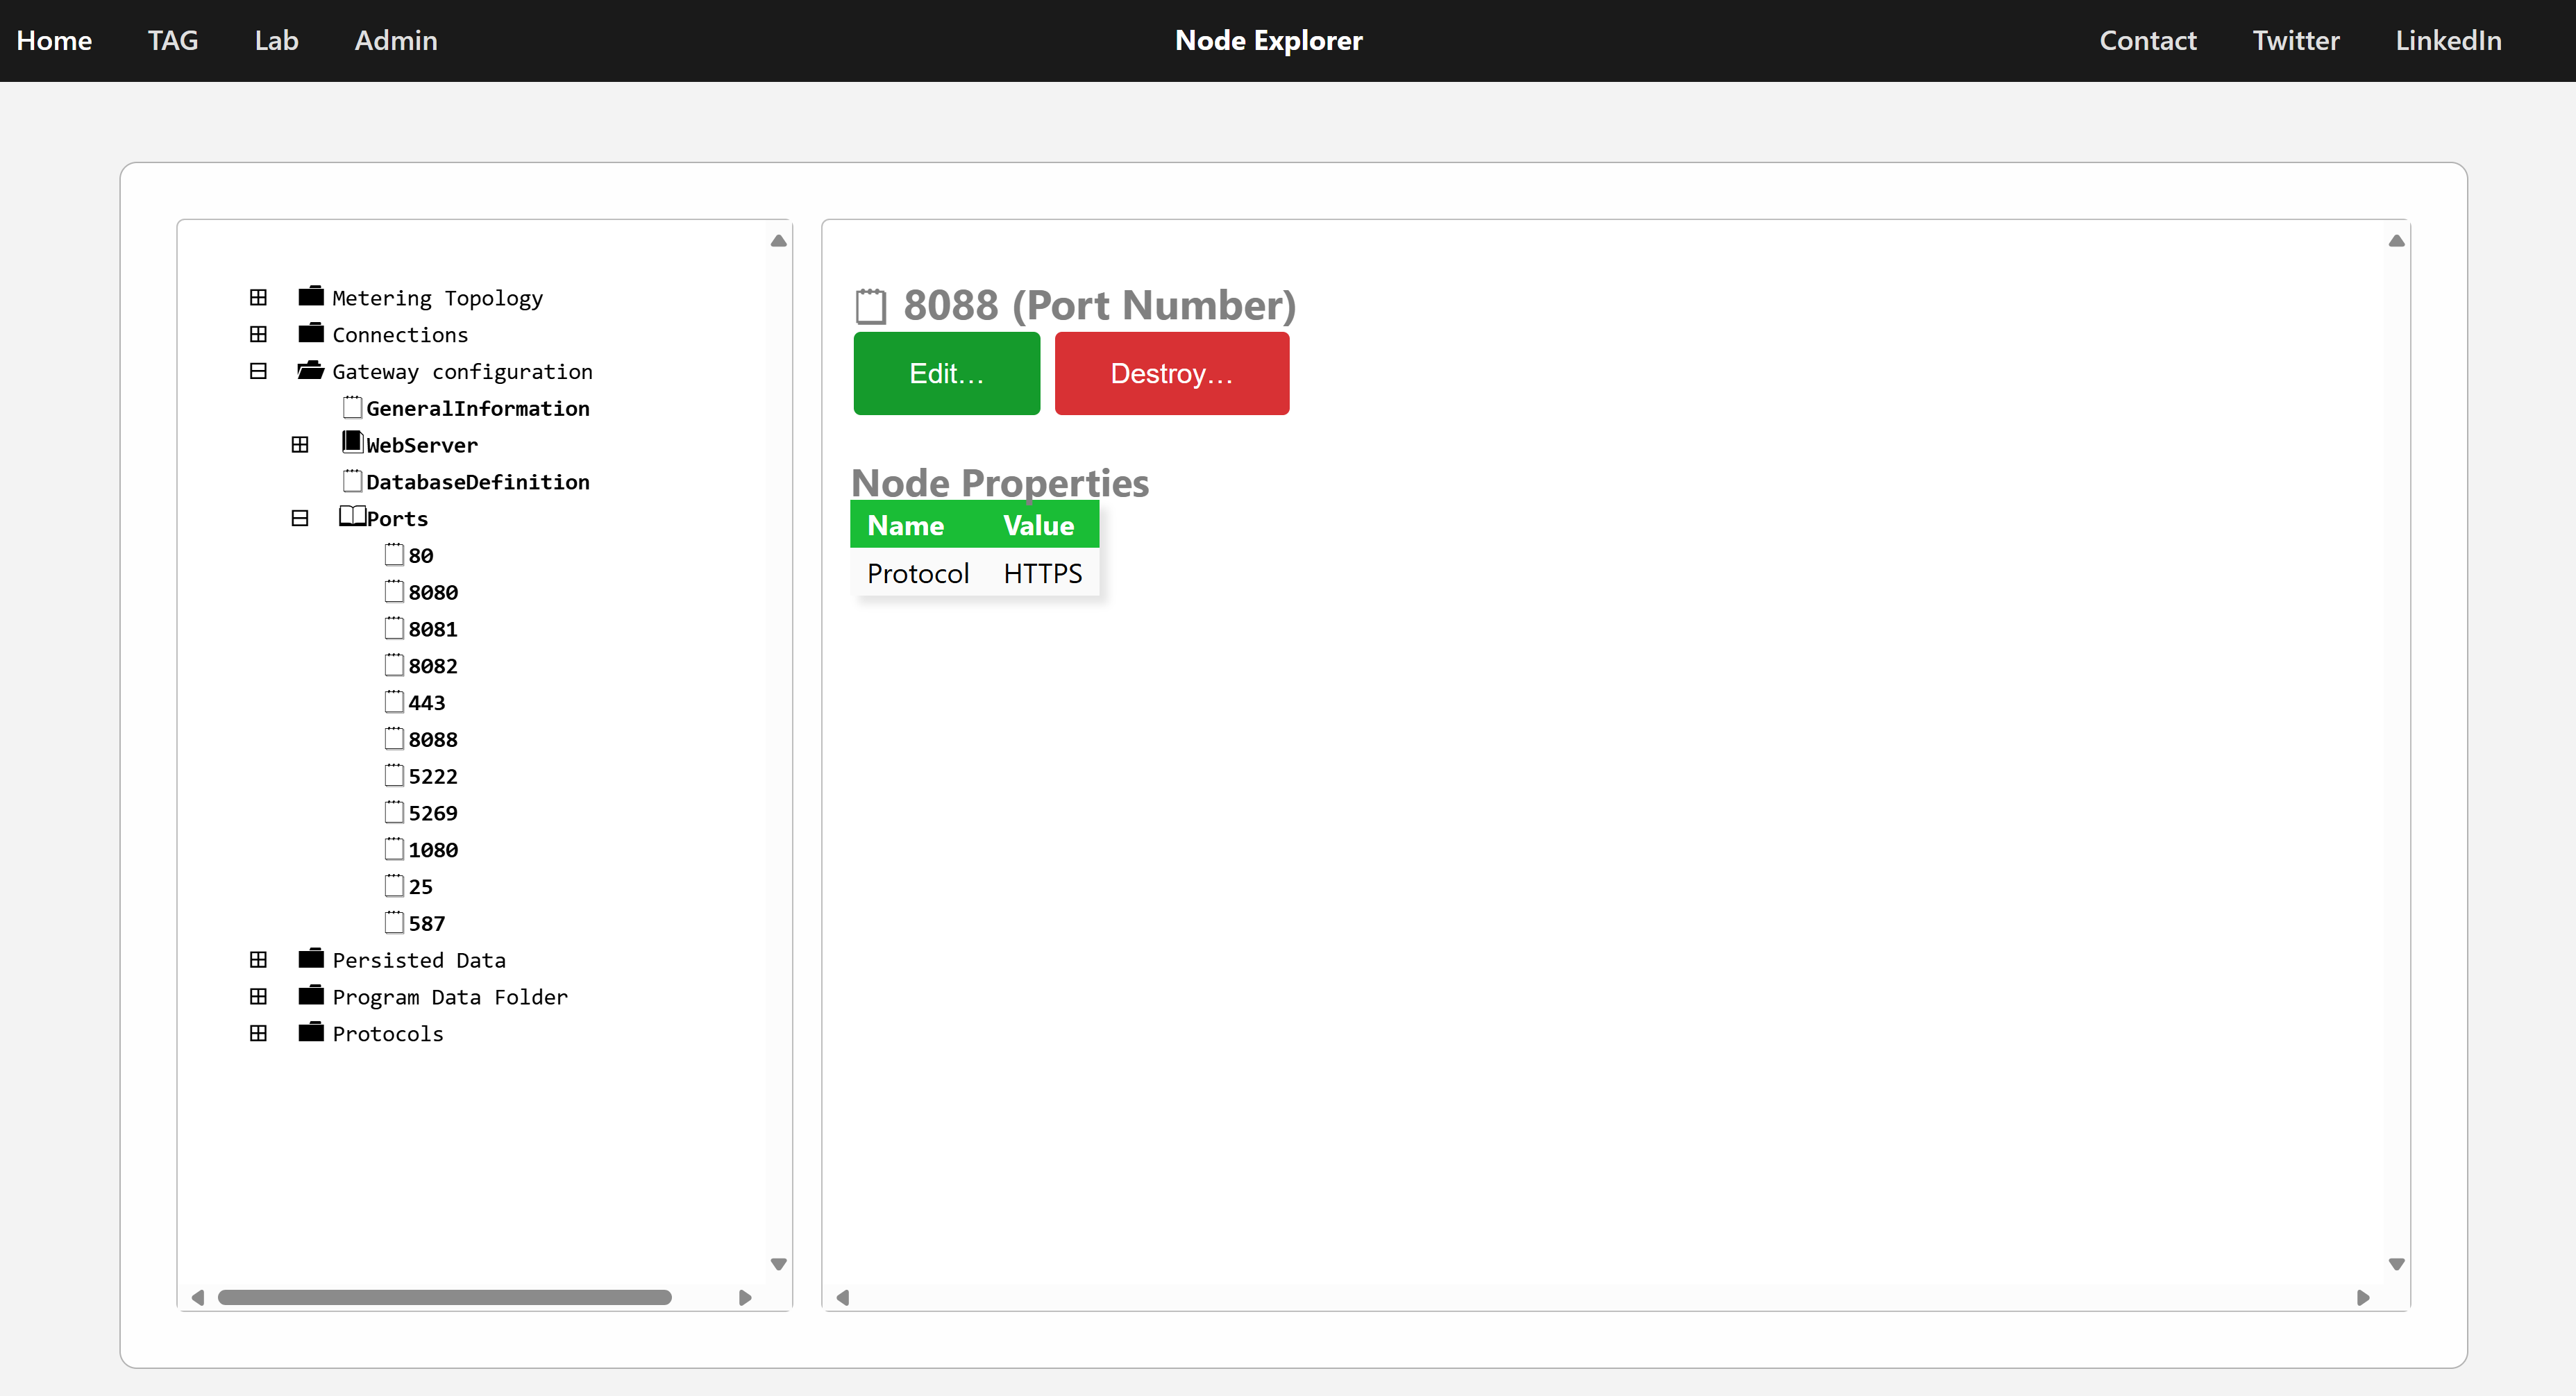
- Make sure the port is defined under Ports for use with the HTTPS protocol. (See figure below.)
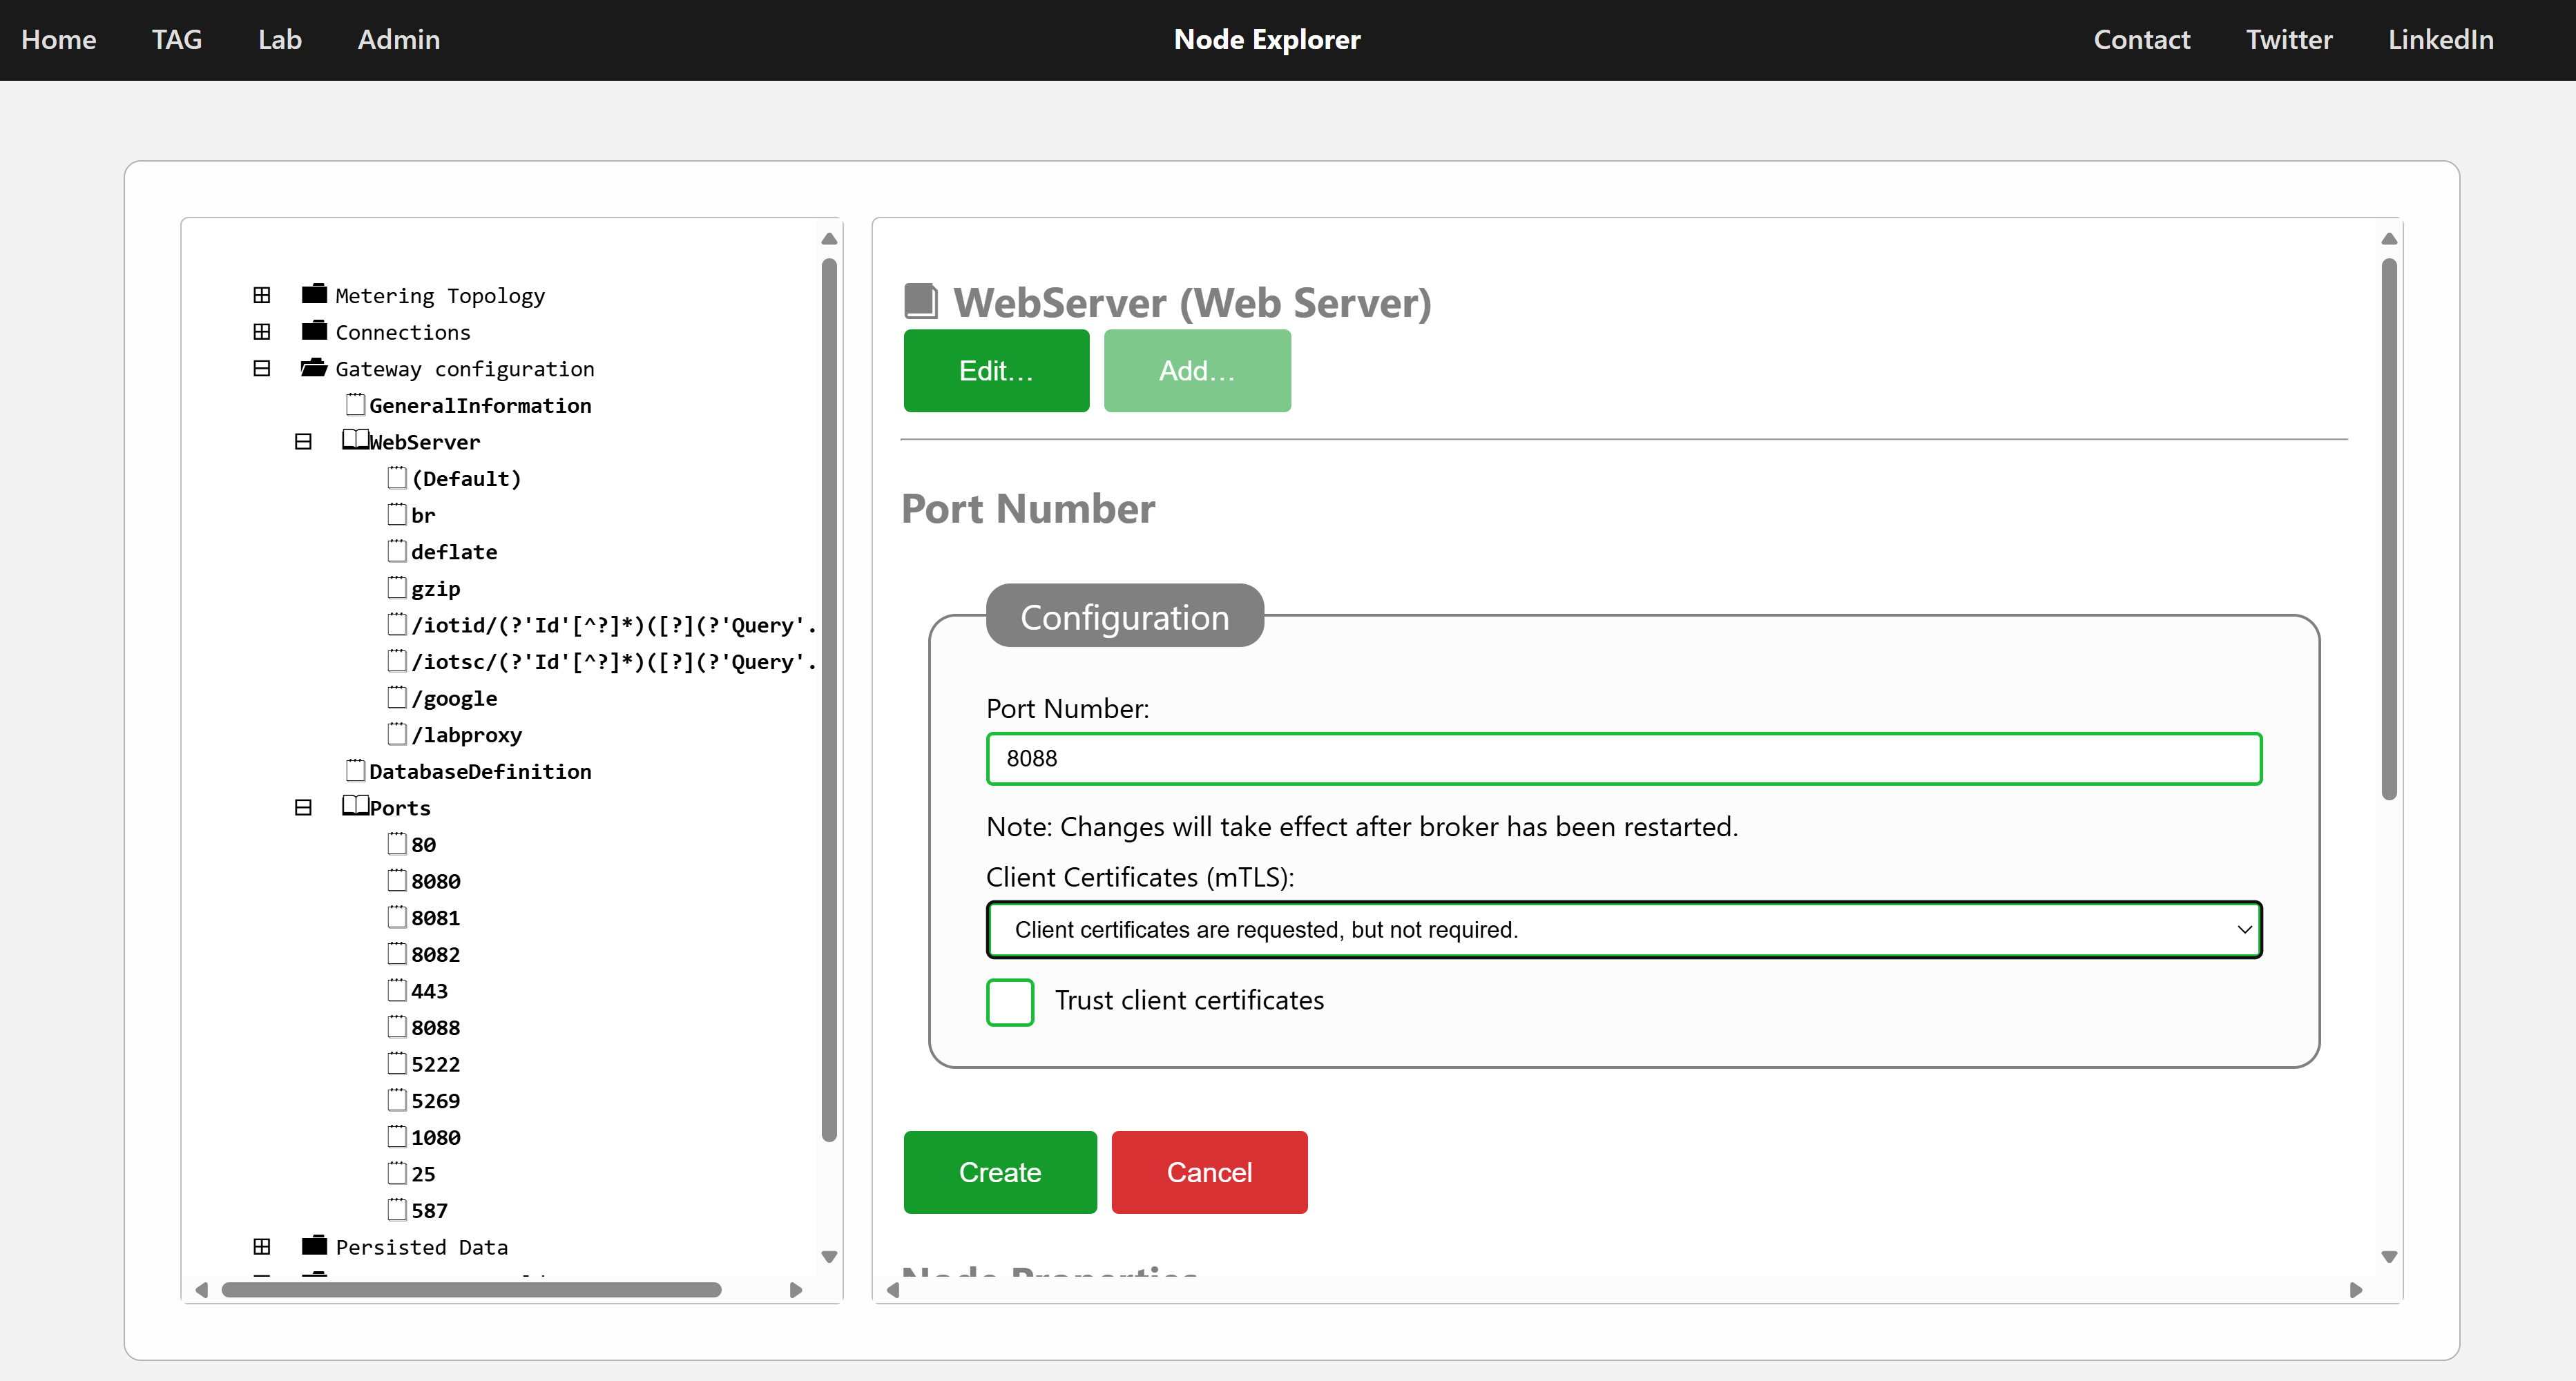
- Add a port-specific configuration node to the web server, specifying the same port to use mTLS. (See figure below.)
- Restart Neuron®.
PlantUML integration on Mac OS
PlantUML is a tool that can generate various types of diagrams from textual definitions. The TAG Neuron® can be integrated with PlantUML, if it is installed on the same machine. This article outlines how to install PlantUML on your MAC so that it will work with the TAG Neuron® installed on the same MAC machine.
First, make sure you have installed Java on your machine. You can easily do this from a terminal window by typing:
java -versionIf not available, make sure to install it first.
Download the
plantuml.jarfile, using the license that suits your requirements. This contains the compiled Java program that converts PlantUML text files into image diagram files.The downloaded file will contain version information included in the file name. For the file to be found by the TAG Neuron®, you need to rename the downloaded file, to just
plantuml.jar.Check what folders are in your system PATH. You can do this from the terminal window by executing:
echo $PATHCopy the
plantuml.jarfile downloaded earlier into one of the folders in defined in PATH, for example/opt/local/bin. As long as it is located in a folder defined in PATH, the TAG Neuron® will find it when it restarts.Restart the Neuron®
After restarting the Neuron®, you should se an event logged, that confirms that PlantUML and Java has been found on the machine, and that the PlantUML Markdown integration is active:
PlantUML found. Integration with Markdown added.
  Timestamp=01-06-2024 12:08:35PM, Level=Minor, Path=/opt/local/bin/plantuml.jar, Java=/usr/bin/java
You can later update PlantUML by simply downloading a new plantuml.jar file, replacing the previous file. You do not need to restart the Neuron® after updating PlantUML.
To test the PlantUML integration, you can open the PlantUML Lab from the Admin menu by pressing:

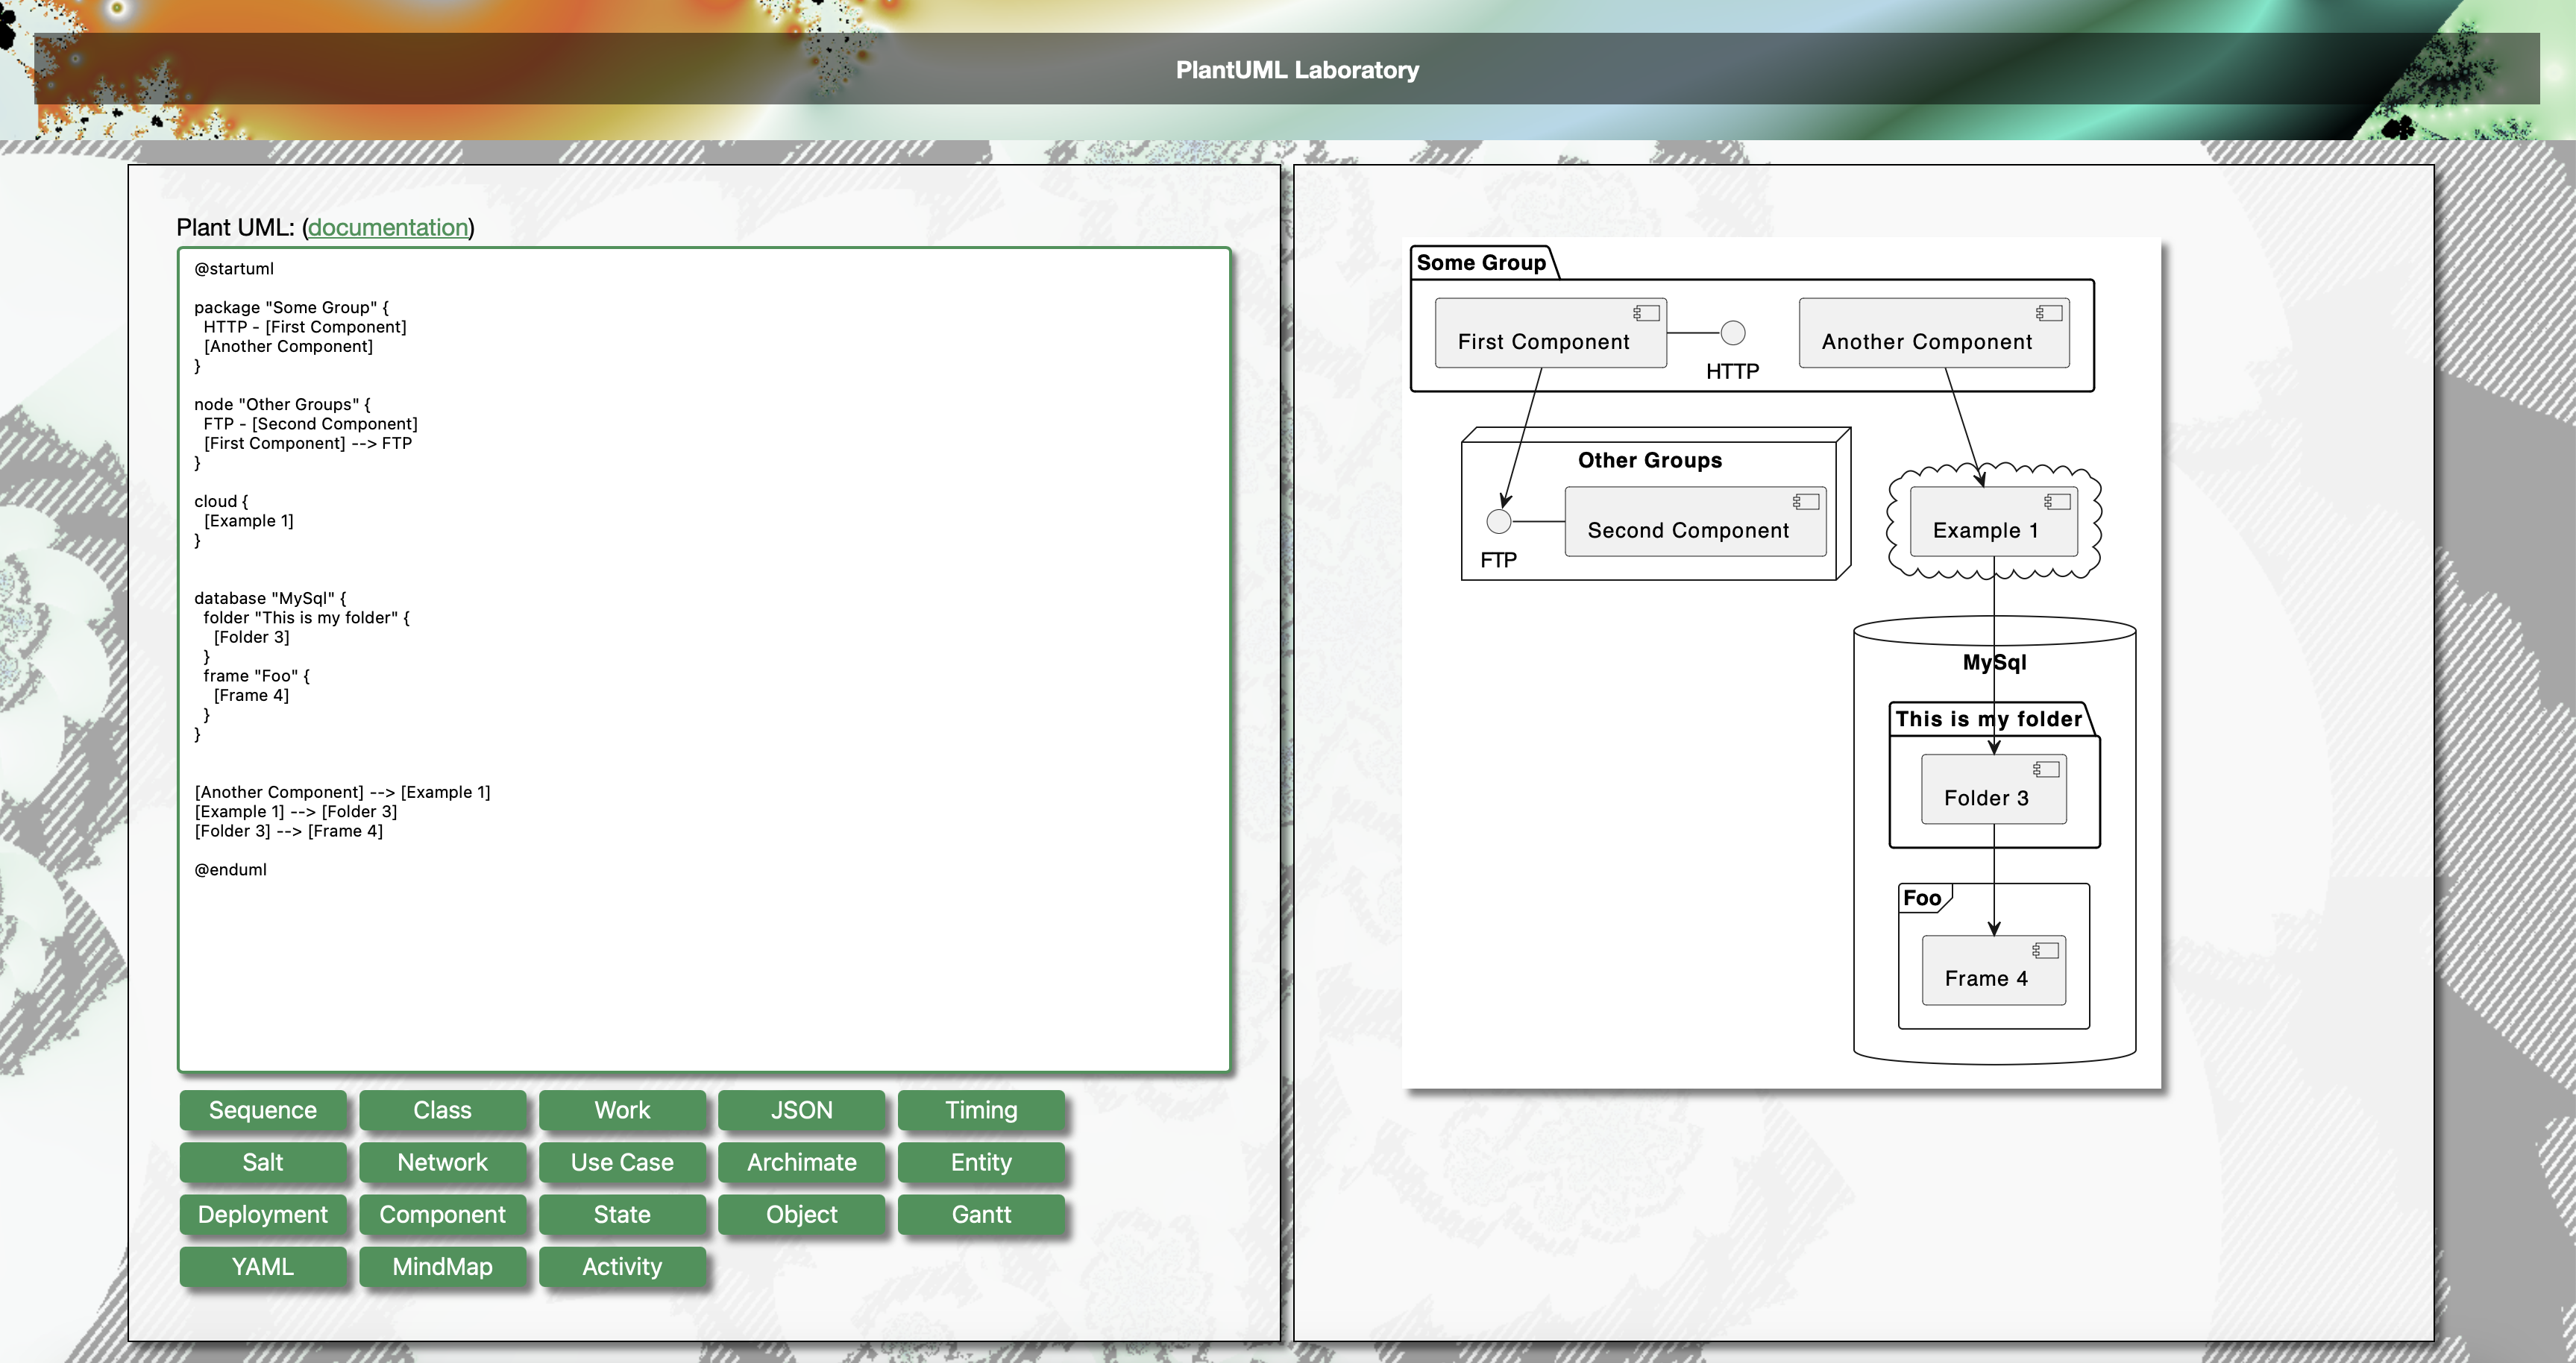
A page opens with two panes. In the left one you can edit PlantUML text. In the right one you’ll see the rendering of the text (or any errors found):
You can also check the PlantUML integration section in the Markdown documentation to see that the integration works.
Graphviz integration on Mac OS
The TAG Neuron® can integrate with GraphViz, permitting automatic generation of diagrams from GraphViz definitions in Markdown. The integration requires GraphViz to be installed by the operator of the Neuron®. Follow these steps to install GraphViz:
On Mac OS, GraphViz can be installed using MacPorts. It is an application that simplifies the installation of open source projects on your Mac via the terminal window. The MacPorts project provides multiple installers for different versions of Mac OS.
Once MacPort is installed, install GraphViz from the terminal window, using the following command-line (as described in the GraphViz MAC installation documentation).
sudo port install graphvizIf the terminal session cannot find port, use the full path of the MacPort application as follows:
sudo /opt/local/bin/port install graphvizSimilarly, you can install a GUI tool for viewing GraphViz documents:
sudo port install graphviz-guiOr:
sudo /opt/local/bin/port install graphviz-gui
Once GraphViz has been installed on the Mac, you need to restart the Neuron®. Once restarted, you should see a log entry during startup confirming the Neuron® has found GraphViz, and that the integration is in effect:
GraphViz found. Integration with Markdown added.
  Timestamp=31-05-2024 8:17:17PM, Level=Minor, Installation Folder=/opt/local/bin, Binary Folder=/opt/local/bin, dot=True, neato=True, fdp=True, sfdp=True, twopi=True
  circo=True
From the Admin-menu, you can now open the GraphViz Lab:

Once open, you can edit your diagrams in the left pane, and view the corresponding output in the right pane:
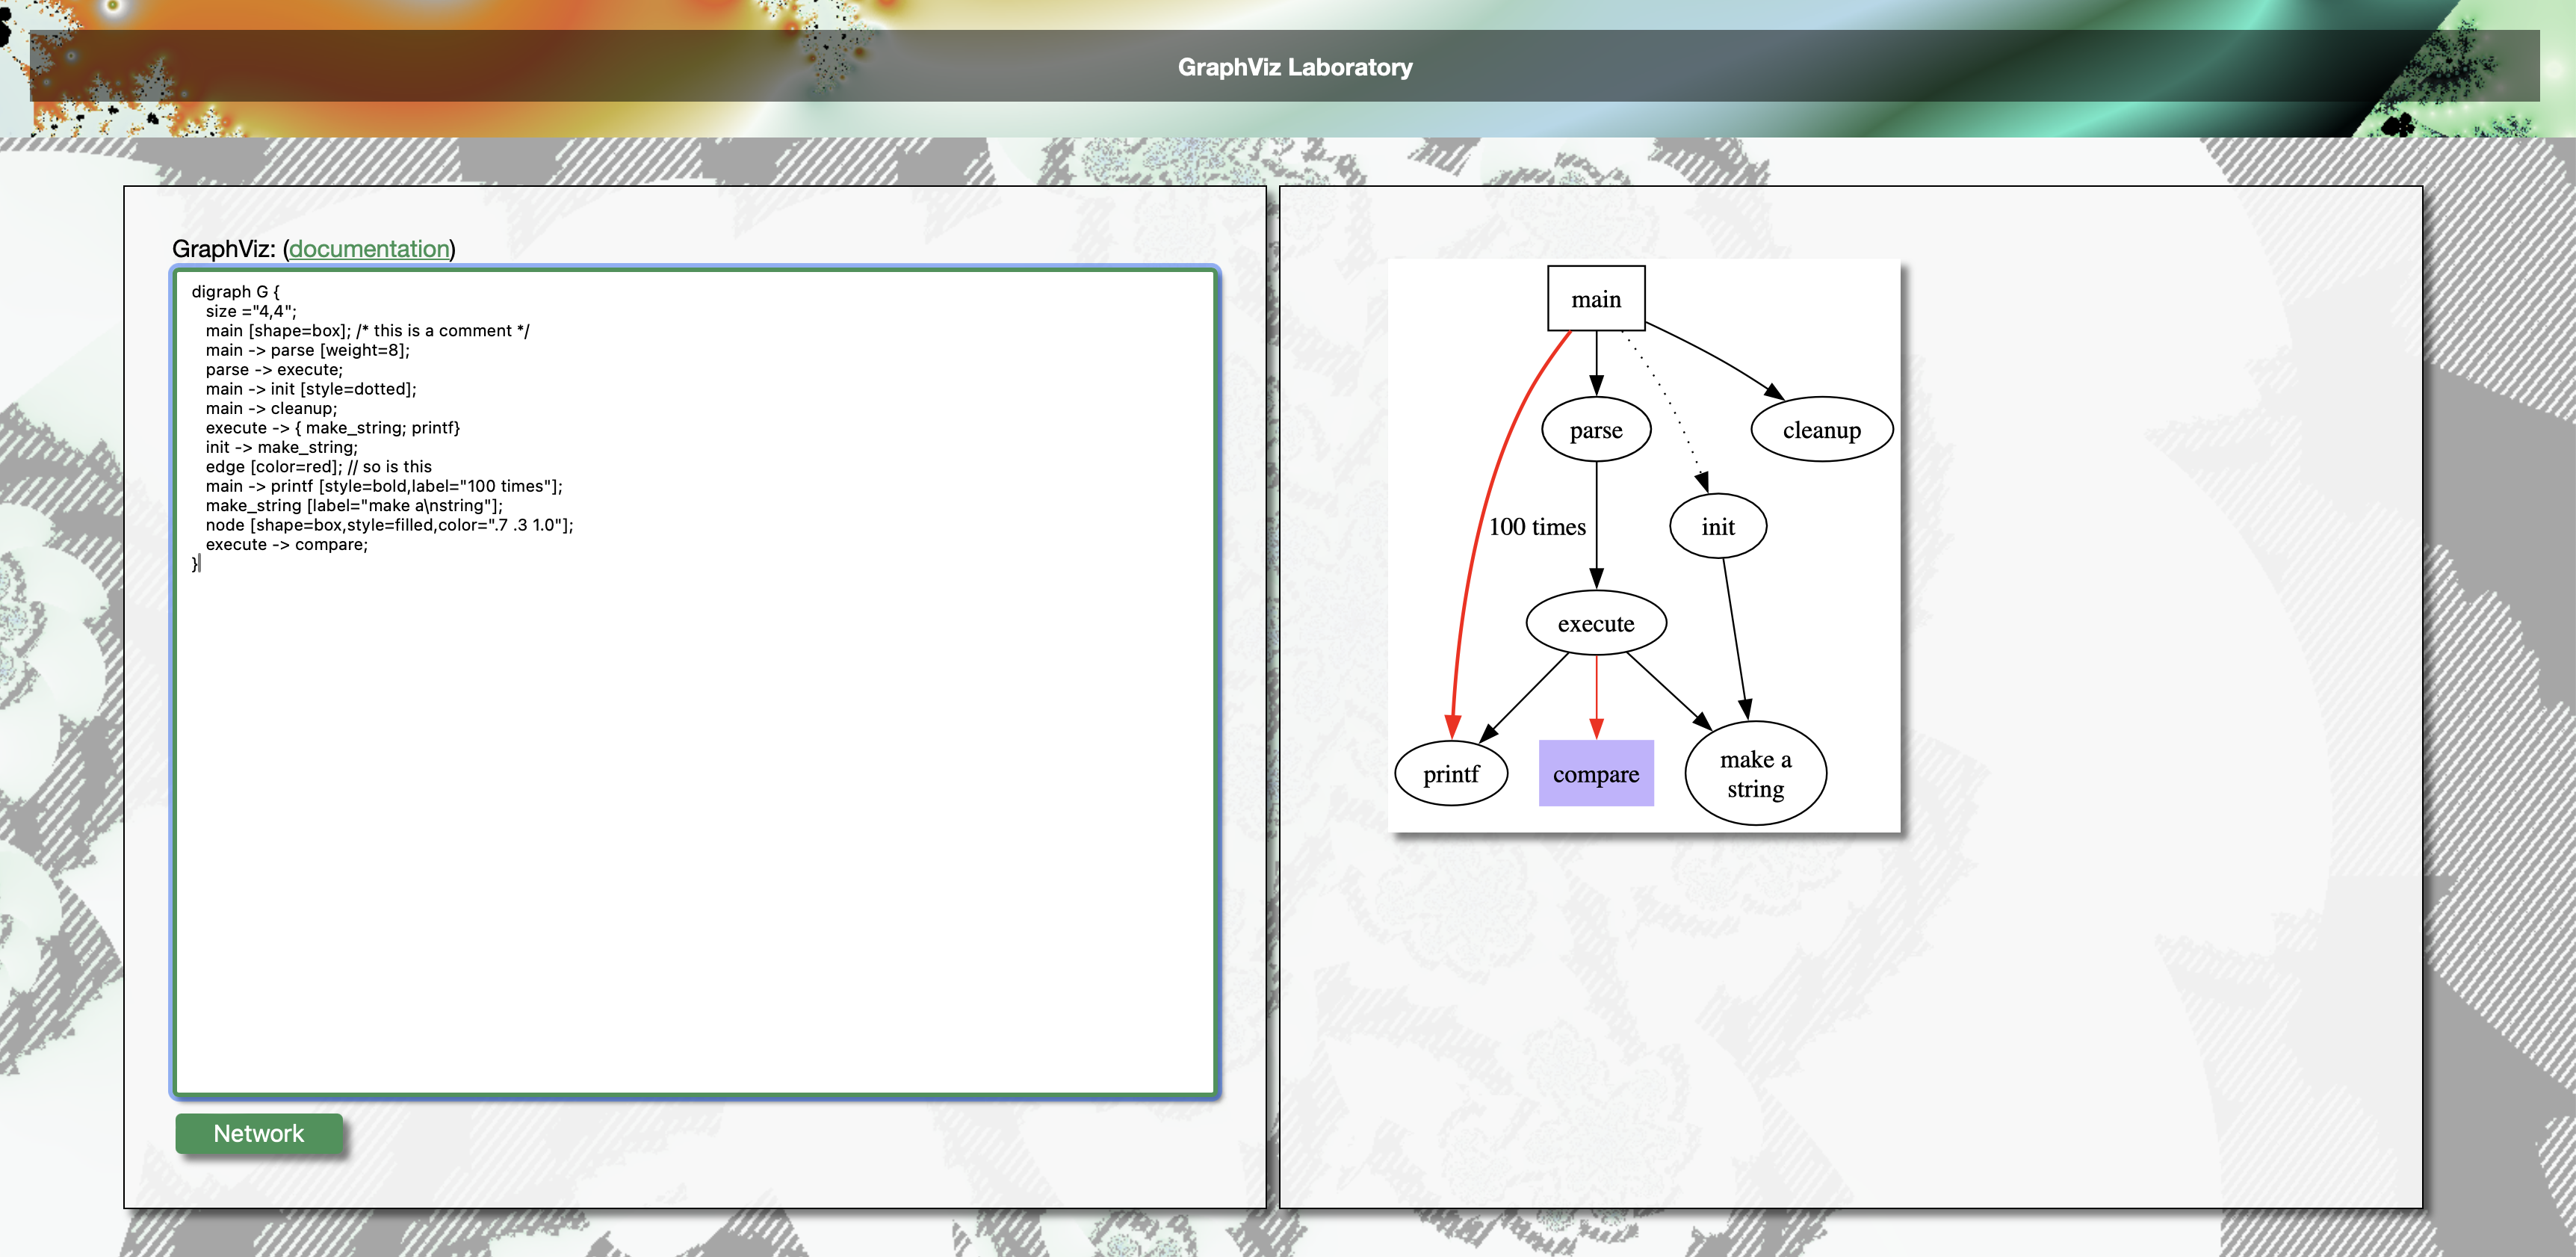
Integration into existing Markdown pages will also show that the integration works.
Domain-specific web configurations
Certain configurations in the TAG Neuron® need to be different, depending on domain used to access it. The Neuron® has one main domain, and up to 99 alternative domains. Each such domain can host domain-specific content. It can also have domain-specific configurations. This article lists how to perform such configurations and host such content.
Alternative Domains
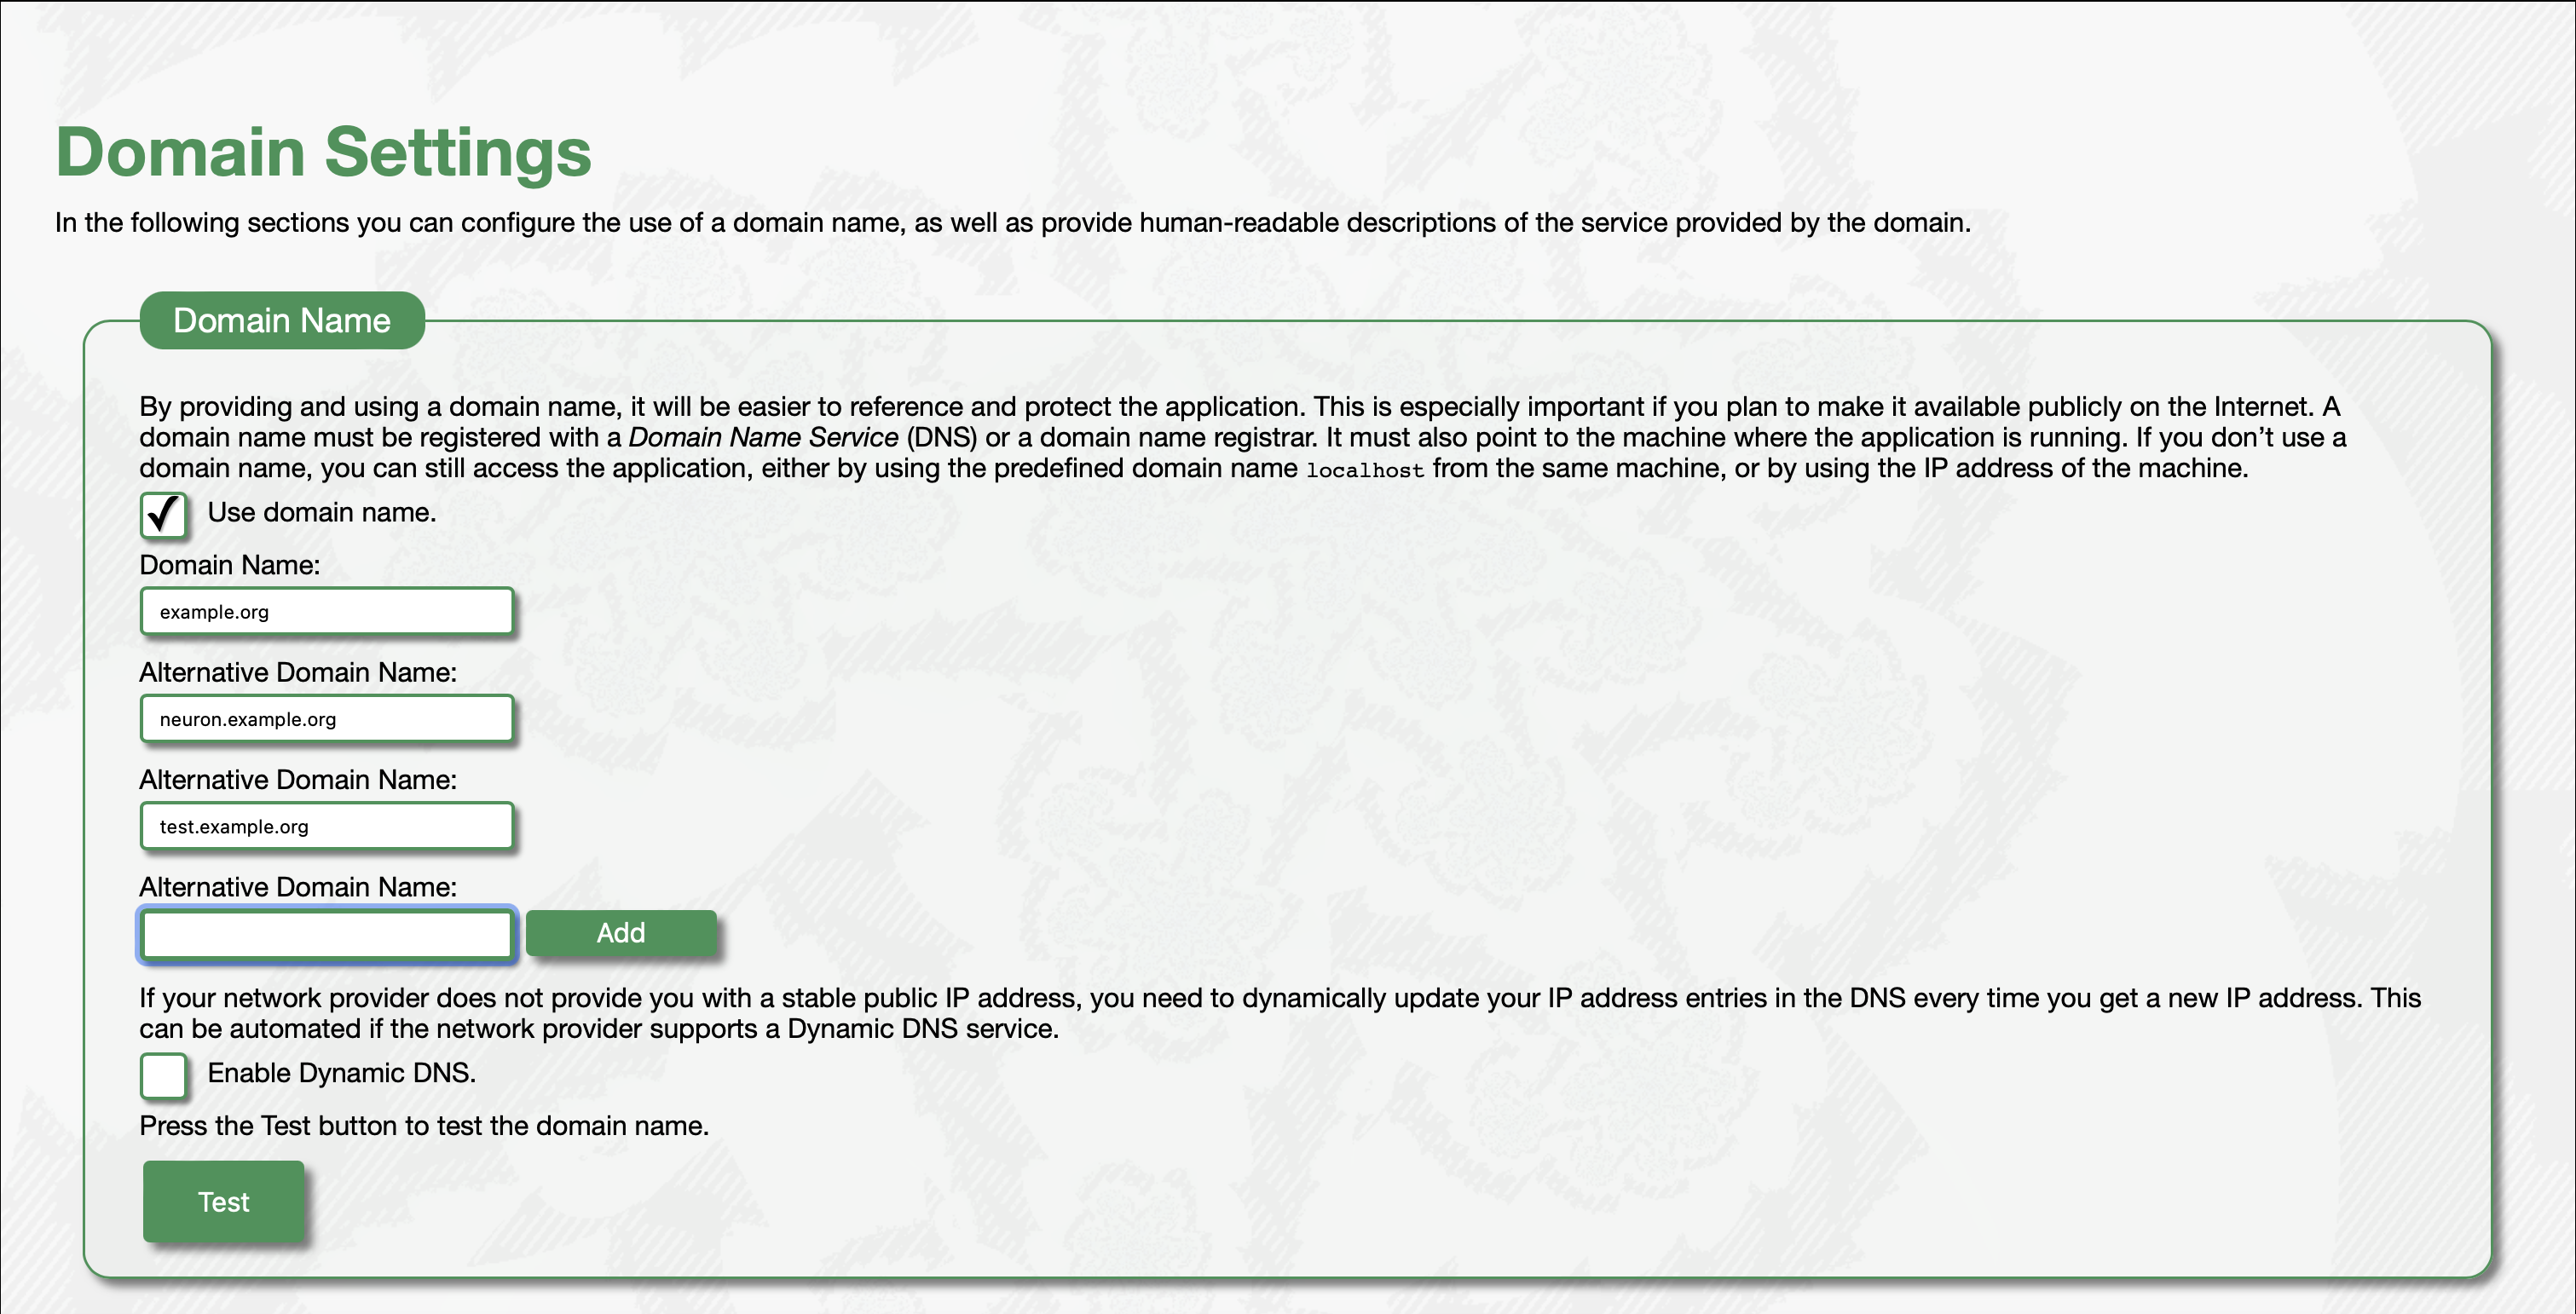
The Main Domain, together with Alternative Domains, are configured first in the DNS, and second in the Neurons Admin/Communication/Domain configuration page. You need to activate to use domain names, enter the main domain and alternative domainⓈ and then generate a certificate. Once created, the Neuron® can be accessed on both the main domain and alternative domain name.

Domain-specific content folders
When a browser access the Neuron® to get a resource, it sends the domain name used in a HTTP Header called Host. The Neuron® sees this header, and knows what domain was used to access the Neuron®. The web server in the Neuron® uses this information when it retrieves file-based content stored on the Neuron®. It first checks the subfolder under the Root folder matching the domain name used. If the file exists there, it is processed and returned first. If such a file (or folder) does not exist, the file in the Root folder is used. Any domain-specific content should therefore be placed in a subfolder under Root matching the domain name.
Example: If the Neuron® hosts a domain neuron.example.org, domain-specific files should be stored in Root\neuron.example.org.
favicon.ico
The file Root\favicon.ico displays a logo or favorite icon for pages on the Neuron®. This may need to be different on different domains. Press the Admin/Presentation/favicon.ico button to upload your favorite icon to the Neuron®. If you upload this icon using the main domain of the Neuron®, or using an IP-address or localhost, the icon will become the default favicon on the Neuron®. Any alternative domain will display this icon also, unless they have their own favicon uploaded. If you upload a favicon using an alternative domain URL, that icon will become the favicon for that particular alternative domain.


Note: Uploading a new icon will not affect the file in the Root folder. Likewise, changing the file in the Root folder will not affect the web resource, if a custom icon has been uploaded.
Theme
The theme used to display pages on the Neuron®, can also vary depending on which domain is used to view the content. Press the Admin/Presentation/Theme button to select the theme to use on the Neuron®. If you change theme using the main domain of the Neuron®, or using an IP-address or localhost, the icon will become the default theme on the Neuron®. Any alternative domain will display this theme also, unless they have their own theme selected. If you change the theme using an alternative domain URL, that theme will become the theme for that particular alternative domain.

robots.txt
The robots.txt file (located at Root\robots.txt) tells web crawlers (including search engines) what they are allowed to see. For privacy reasons, no content is allowed for web crawlers by default. If you need to change this (for instance, if you want search engines to be able to access content on the Neuron®), you need to edit this file. Press the Admin/Security/robots.txt button to edit the resource. Editing the resource using the main domain, will edit the default resource. Editing the resource using an alternative domain, will edit the resource, for that alternative domain only.

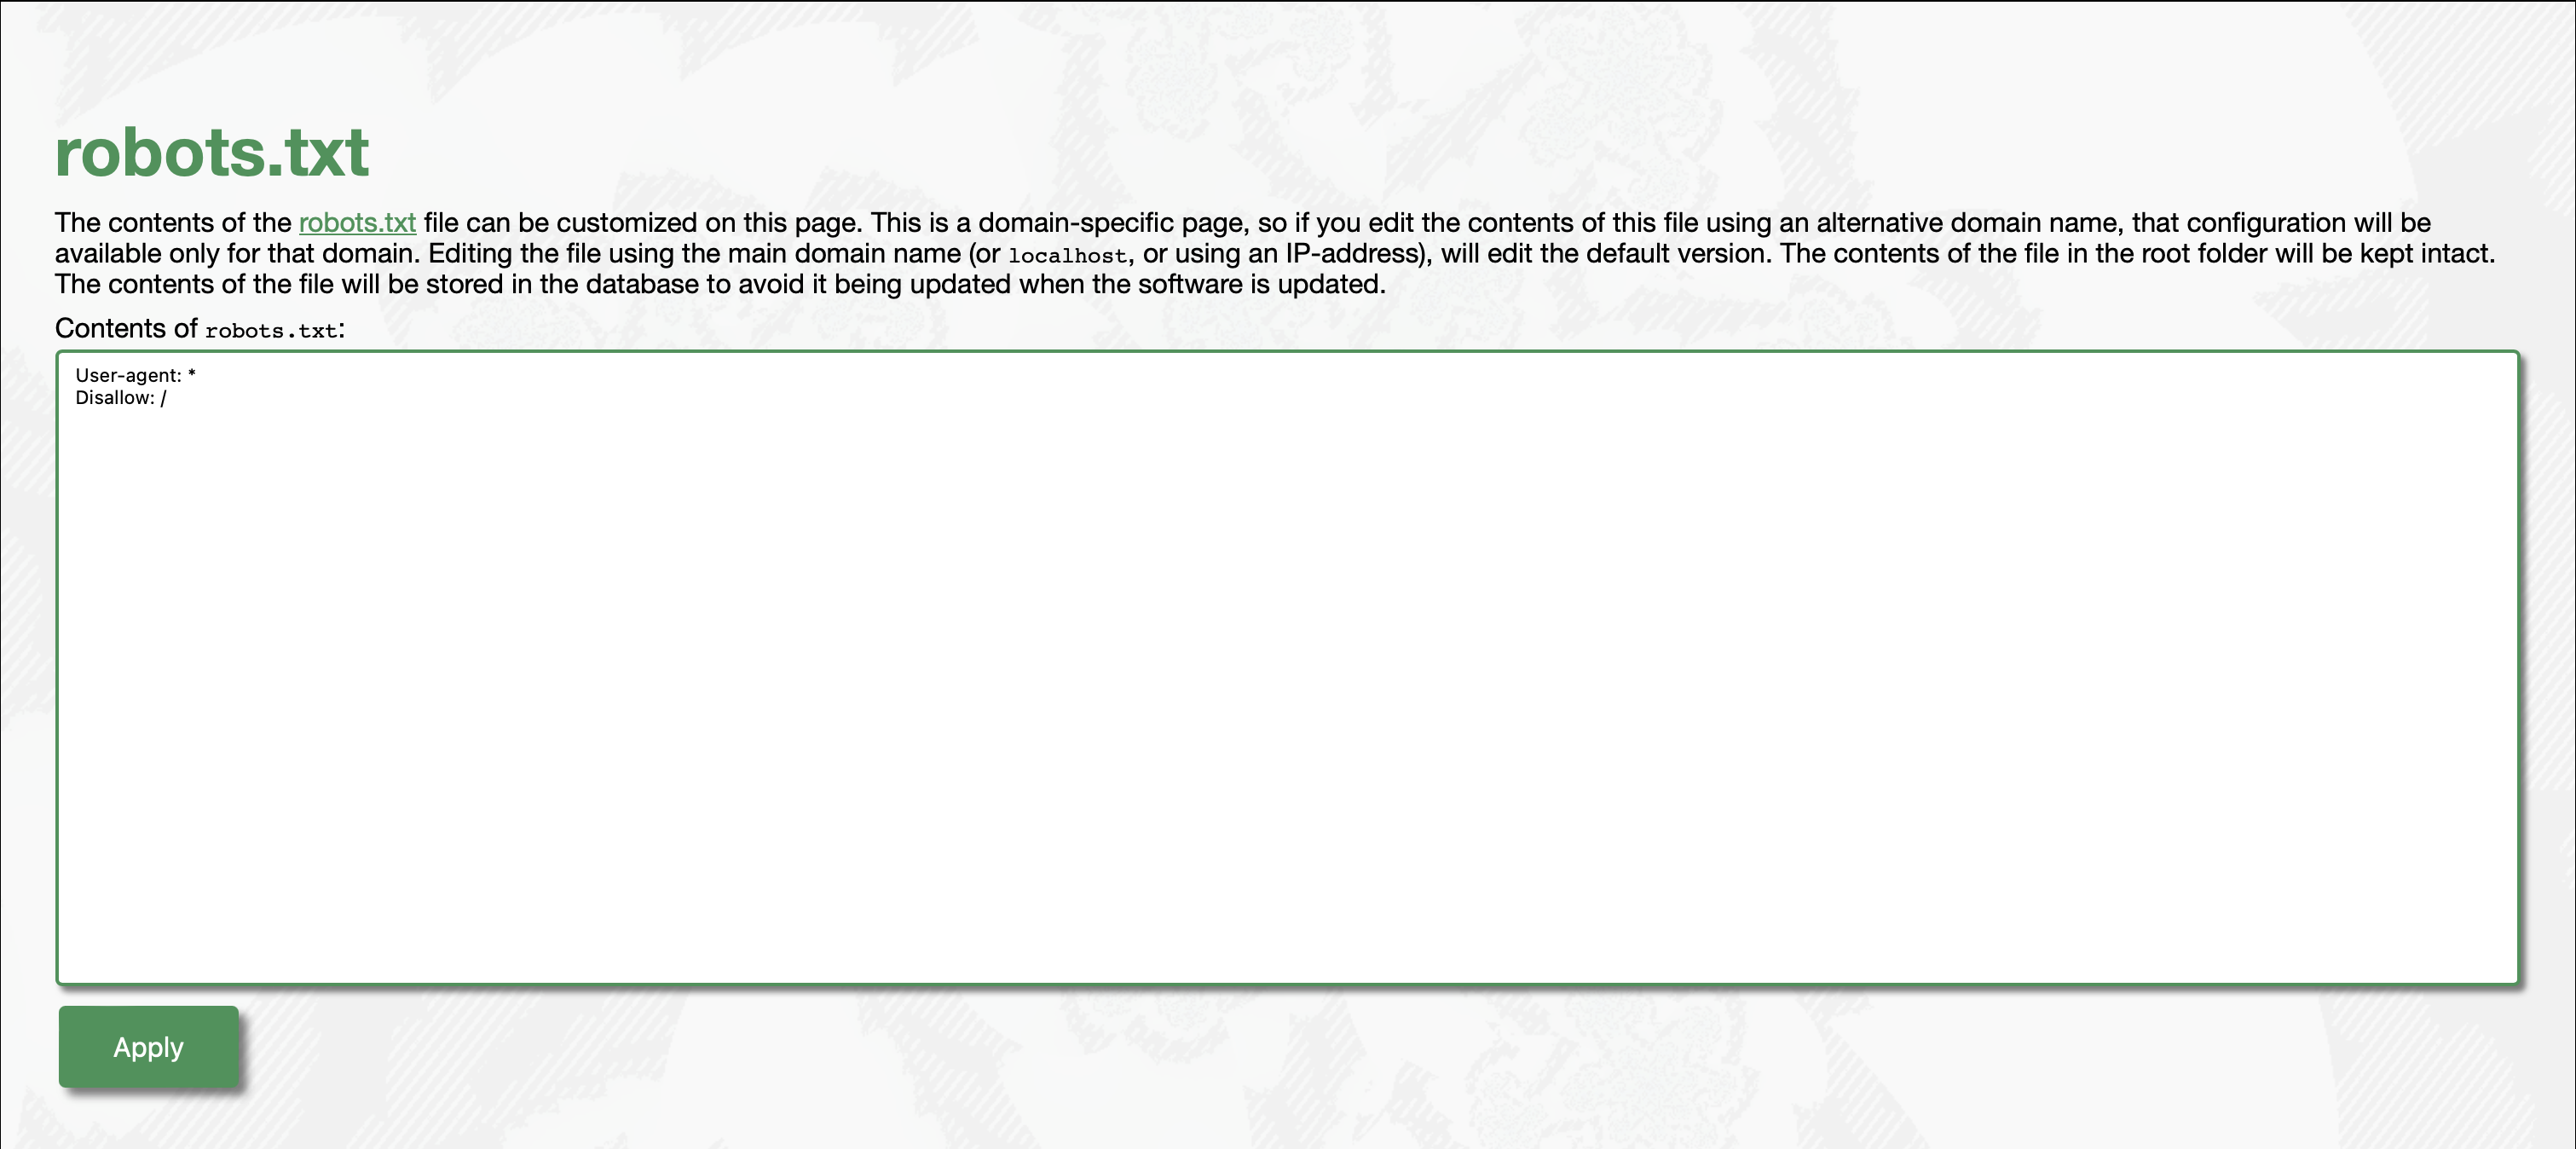
Note: Editing the contents of the file using this interface will not affect the file in the Root folder. Likewise, changing the file in the Root folder will not affect the web resource, if custom content has been provided.
security.txt
The security.txt file (located at Root\.well-known\security.txt) tells security researchers how they can contact responsible parties if they need to. The default content redirects them to the feedback page on the Neuron®. If you need to change this, you need to edit this file. Press the Admin/Security/security.txt button to edit the resource. Editing the resource using the main domain, will edit the default resource. Editing the resource using an alternative domain, will edit the resource, for that alternative domain only.

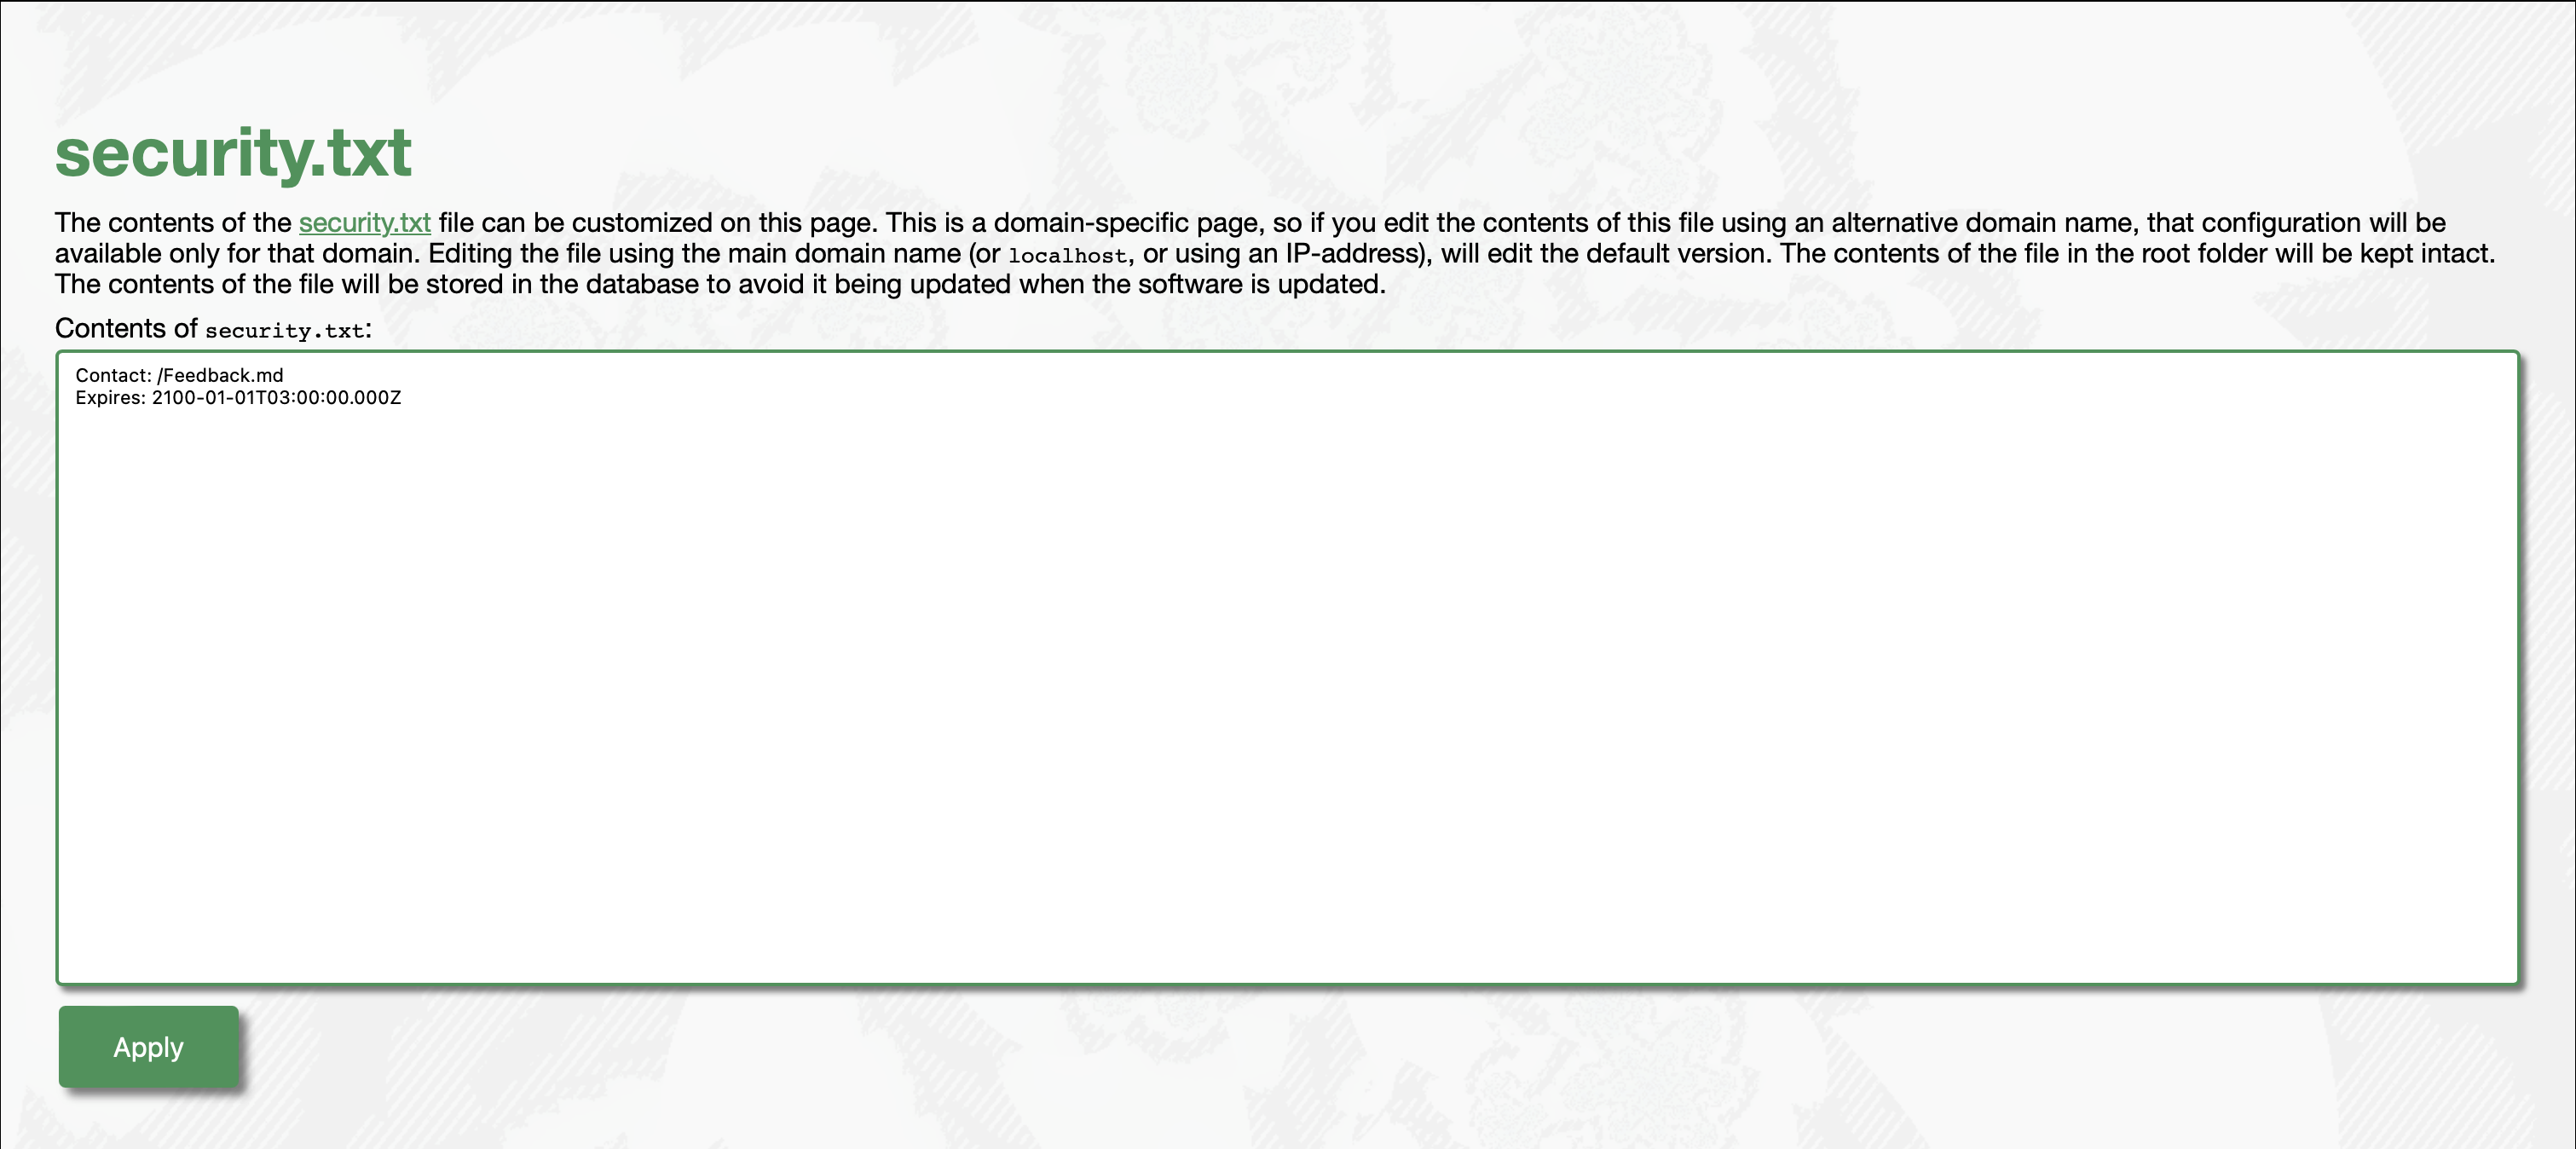
Note: Editing the contents of the file using this interface will not affect the file in the Root\.well-known folder. Likewise, changing the file in the Root\.well-known folder will not affect the web resource, if custom content has been provided.
This article is being written.
Posts by user
No more posts authored by the user could be found. You can go back to the main view by selecting Home in the menu above.