When developing server-to-server applications, it is important to be able to test webhooks without leaking sensitive or private information. To avoid having to use 3rd party services, such as webhook.site a new package has been made available containing a service that can be installed on any Neuron®, that allows you to view incoming POST requests in a similar fashion.
Installable Package
The Web-Hook Tester service has been made into a package that can be downloaded and installed on any TAG Neuron. If your Neuron is connected to the TAG Neuron network, you can install the package using the following information:
Note: This page does not require client authentication, and can be used anonymously.
Note 2: You can also use the scriptprompt to make custom POST calls to the page. This requires elevated privileges however, and cannot be done anonymously.
Creating a Page
Enter an ID and press the Start button to create a new page you can POST to. Since the service can be accessible by anyone, use an ID that is difficult to guess, if you do not want others to get easy access to the information. Press the Randomize button to create a random ID. You can customize the random ID to remember the purpose of the page, if you have multiple pages open.
Create WebHook Test Page
Test Page
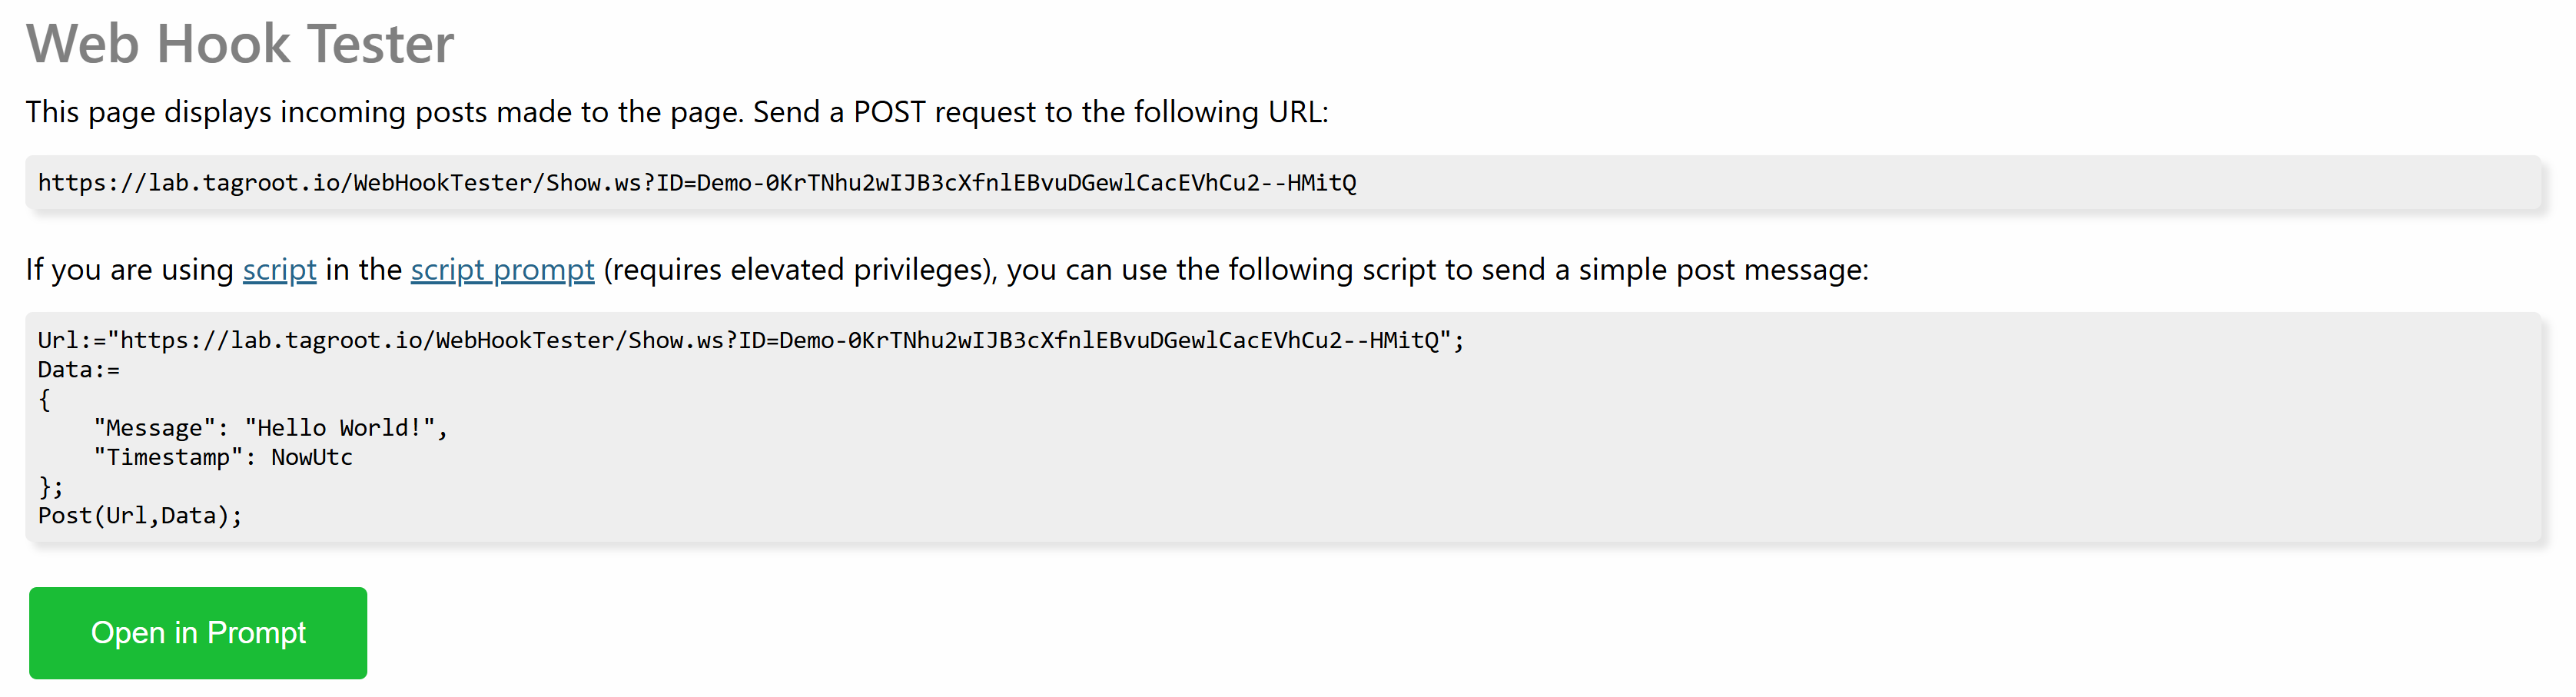
When you press the Start button, a new page is opened. It contains instructions how you can POST to the page:
WebHook Test Page
Use the URL presented to POST to the page. If you want to test a back-end service integration, this is the URL you provide as a webhook callback URL. Any POST made to this URL will be displayed on the page.
Note: Nothing is saved or persisted on the page. The page does not remember previous POSTs, so if you refresh the page you loose the information on the page.
Note 2: Make sure to differentiate between the URL of the page (which points to a resource with extension .md) and the URL to POST to (which points to a resource with extension .ws).
Incoming POSTs
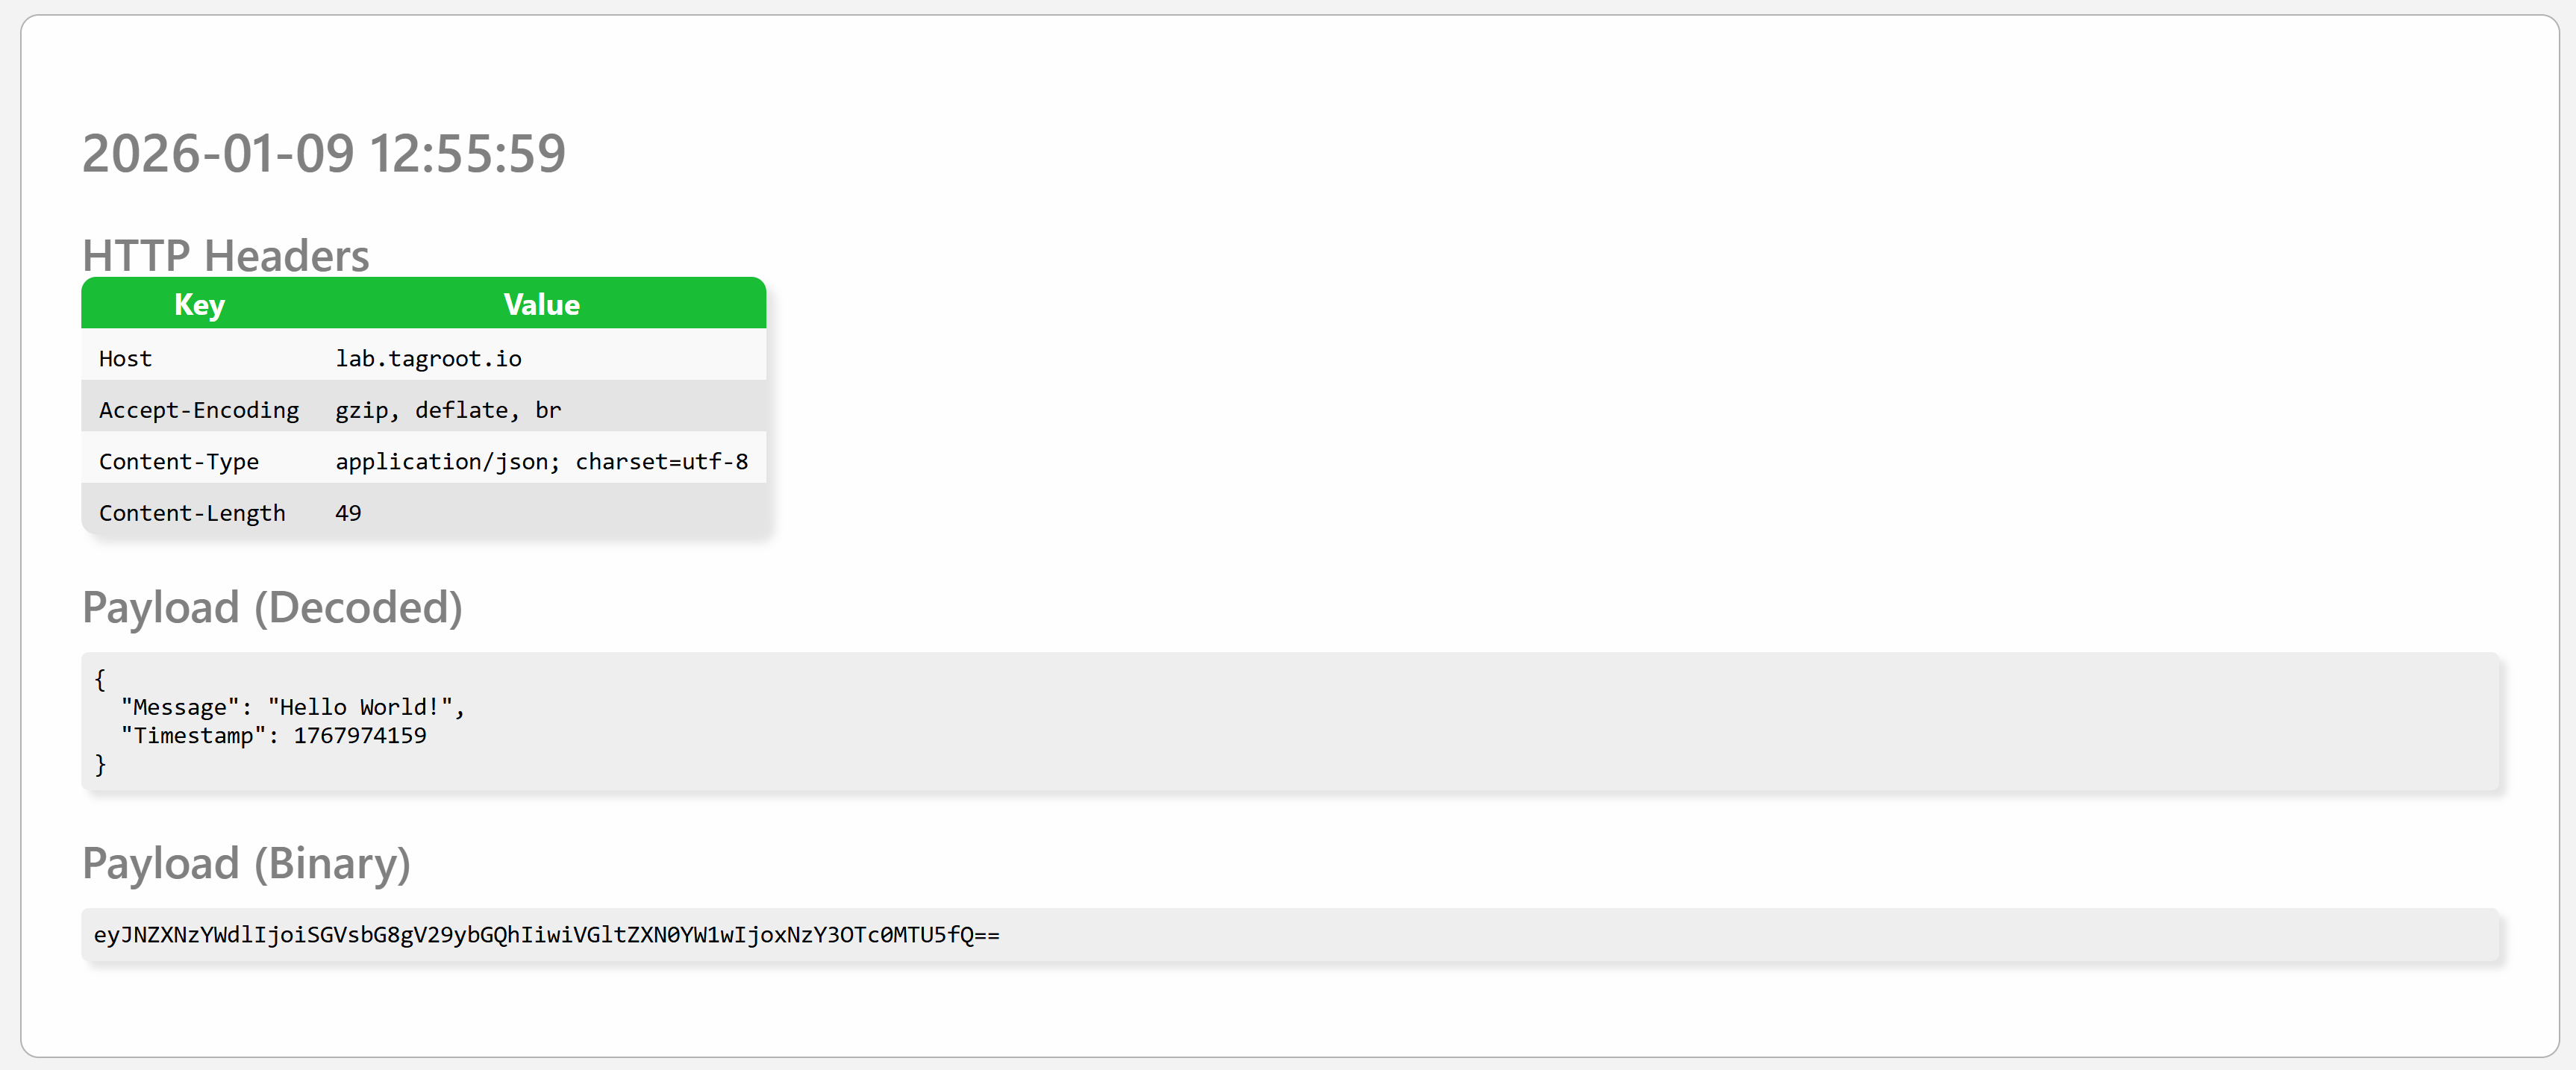
As soon as an incoming POST is made, it is displayed on the page as follows. It displays the time of the event, any HTTP headers in the request, together with a textual representation of the payload (if content is text-based), as well as the binary payload, BASE64-encoded. Each POST is presented in its own SECTION tag on the page.
WebHook POST Example
Responses
The response to a POST call to the resource will be a JSON object with one property called Forwarded, which indicate the number of pages the information was forwarded to. If this number is 0, the page has closed or lost contact with the Neuron. Example:
{
	"Forwarded":1
}
Tunneling POST request over XMPP
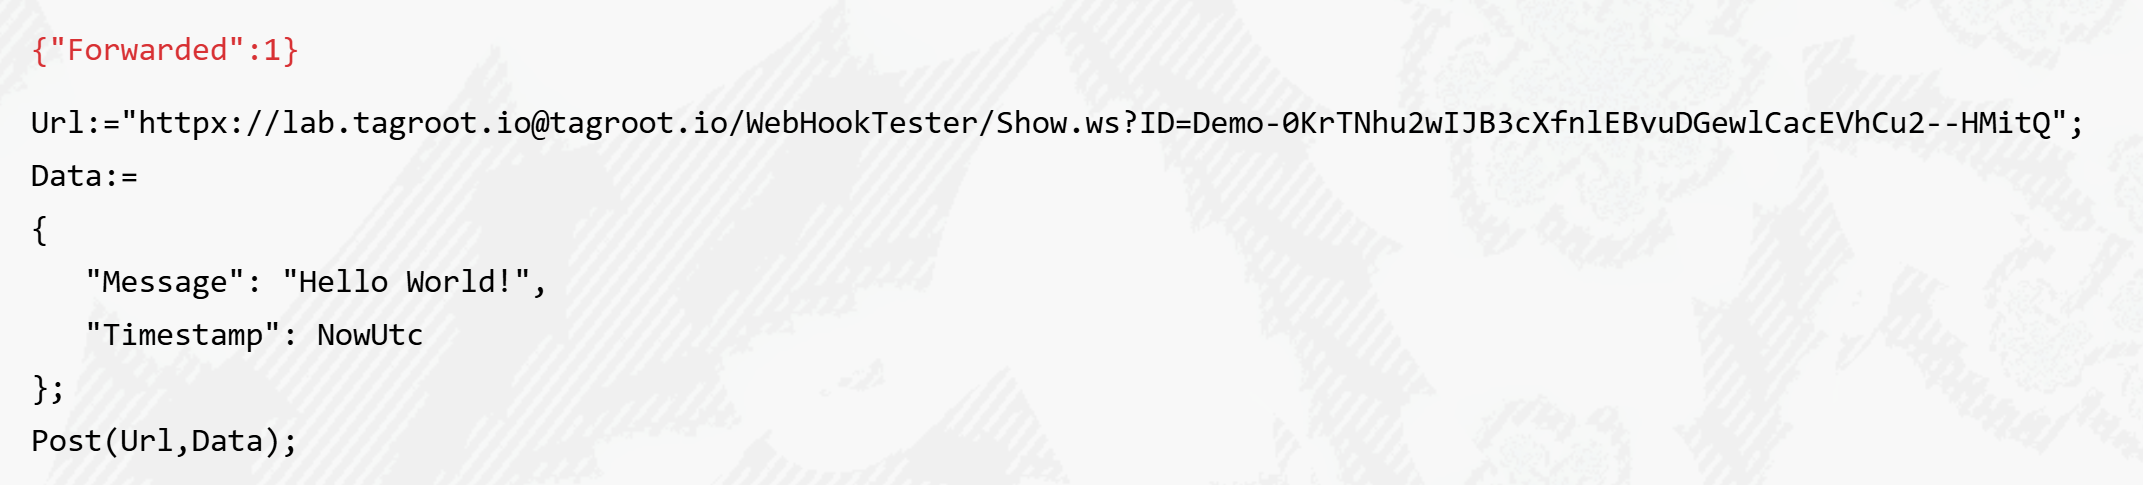
As the Neuron is connected to the XMPP network as well, since it is hosted on the IoT Gateway, the POST request can be tunneled over the XMPP network using the httpx:// URI scheme. This permits you to do callbacks to local development machines, or machines not accessible via the Internet.
To achieve this, you need to perform the call from another instance hosted on the IoT Gateway. It can be the IoT Gateway itself, Lil’Sis’ or another instance of the TAG Neuron, including a development version on a local machine. You replace the https scheme in the URI with the httpx URI scheme, and replace the host with the JID of the recipient. For the call to succeed, the sender and receiver need to be friends, i.e. have approved presence subscriptions, for the call over XMPP to be possible.
This can be easily tested using the script prompt:
WebHook Tester httpx Example
Note: Any software using the Waher.Content Internet Content-Type abstraction, and the InternetContent content access methods, together with the Waher.Networking.XMPP.HTTPX library (containing the httpx URI scheme definition) will automatically support httpx URIs.
Note 2: Since the QuickLogin API and RemoteLogin API are both hosted on the TAG Neuron®, you can register httpx callback URIs with these APIs. This makes it possible to host the recipient service behind a firewall, as long as it supports the HTTP over XMPP protocol
When the Neuron® updates itself, it executes the Waher.Utility.Install.exe application that is installed with the Neuron® in a parallel process. When the Neuron® starts, it copies the install utility to a subfolder, to make sure its executable files are not the same as the Neuron’s. When the process has started, the Neuron® stops its execution, releasing the locks on the executable files, and releasing a named semaphore that signals to the install tool the files have been released. The install utility then performs its update instructions. In all neurons prior to build 2024-11-20, the Neuron® got restarted when the operating system restarts the service. This implies a delay from when the install procedure is completed, until Windows decides to restart the service. For some reasons, Windows may choose not to restart the service at all, leaving the service disabled.
Windows Defender
Furthermore, if Windows Defender is executing on the server, it can intercept the updating of each archive, which may take considerable time. This time may interfere with the restarting of the Neuron®, which may lock files, prohibiting the update. To minimize problems during the update, Windows Defender could be temporily disabled, drastically increasing update speed.
Auto-restarting service
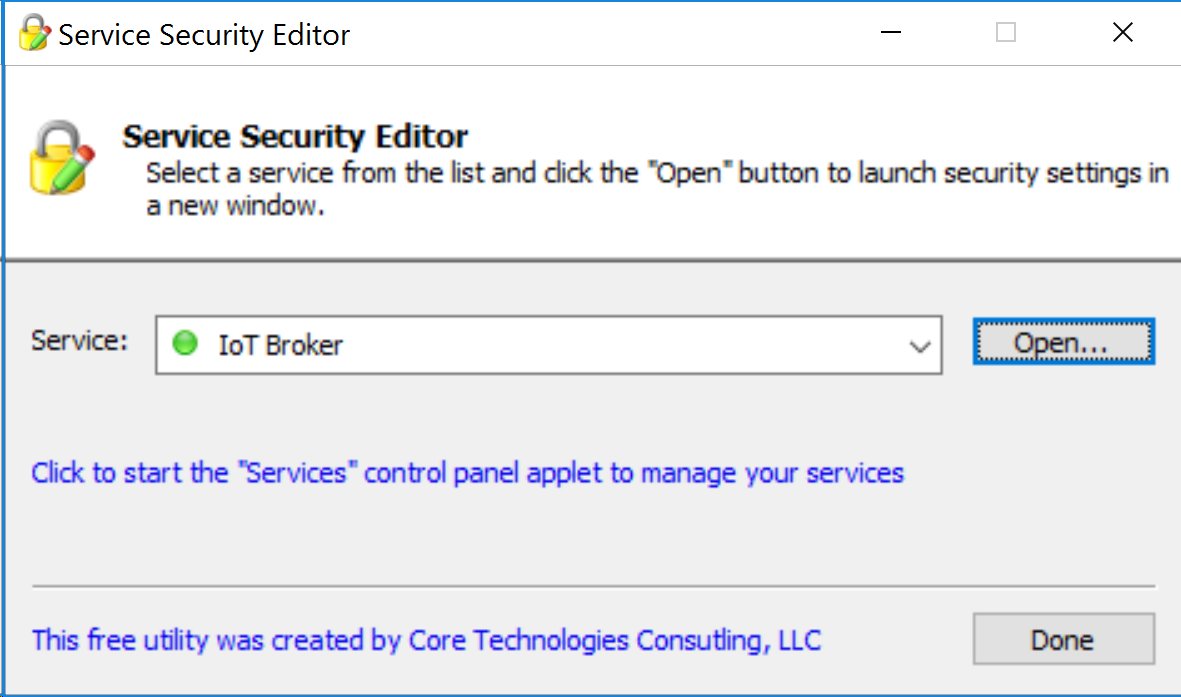
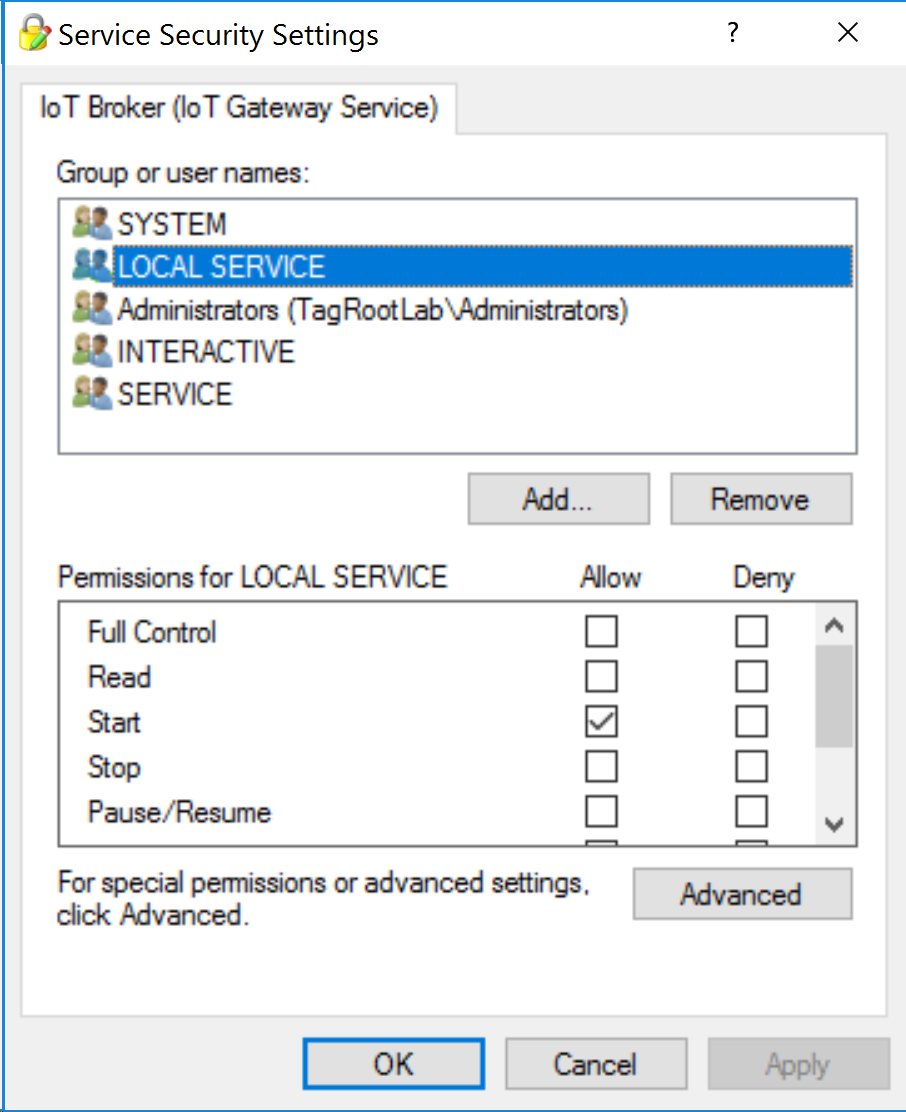
To speed up the restarting of the service, and remove the dependency on Windows having to automatically restart the service, the install utility has been updated and can now issue a service restart command when the install procedure is completed. For this to work, the application needs to have sufficient privileges to do this. The service runs using the system Local Service account, with very few privileges. By default, this user cannot start services. The new installer gives the Local Service account access rights to start the Neuron® Windows service (i.e. the IoT Gateway Service). If you are running a Neuron® installed prior to 2024-11-20, or if the configuration was not successful, you can manually give the Local Service account sufficient privileges to enable this feature. Follow these steps:
A new service package is available, that help services send SMS messages to its users. The service uses the GatewayAPI SMS service. The service also publishes a configuration page, accessible from the administration page, and a simple script function making it easy to integrate with services hosted on the Neuron® where the service is installed. The service is also available open source on GitHub.
Installable Package
The service has been made into a package that can be downloaded and installed on any TAG Neuron. If your Neuron® is connected to this network, you can install the package using the following information:
After installation, you will find the service in the Software section:
GatewayApi service button
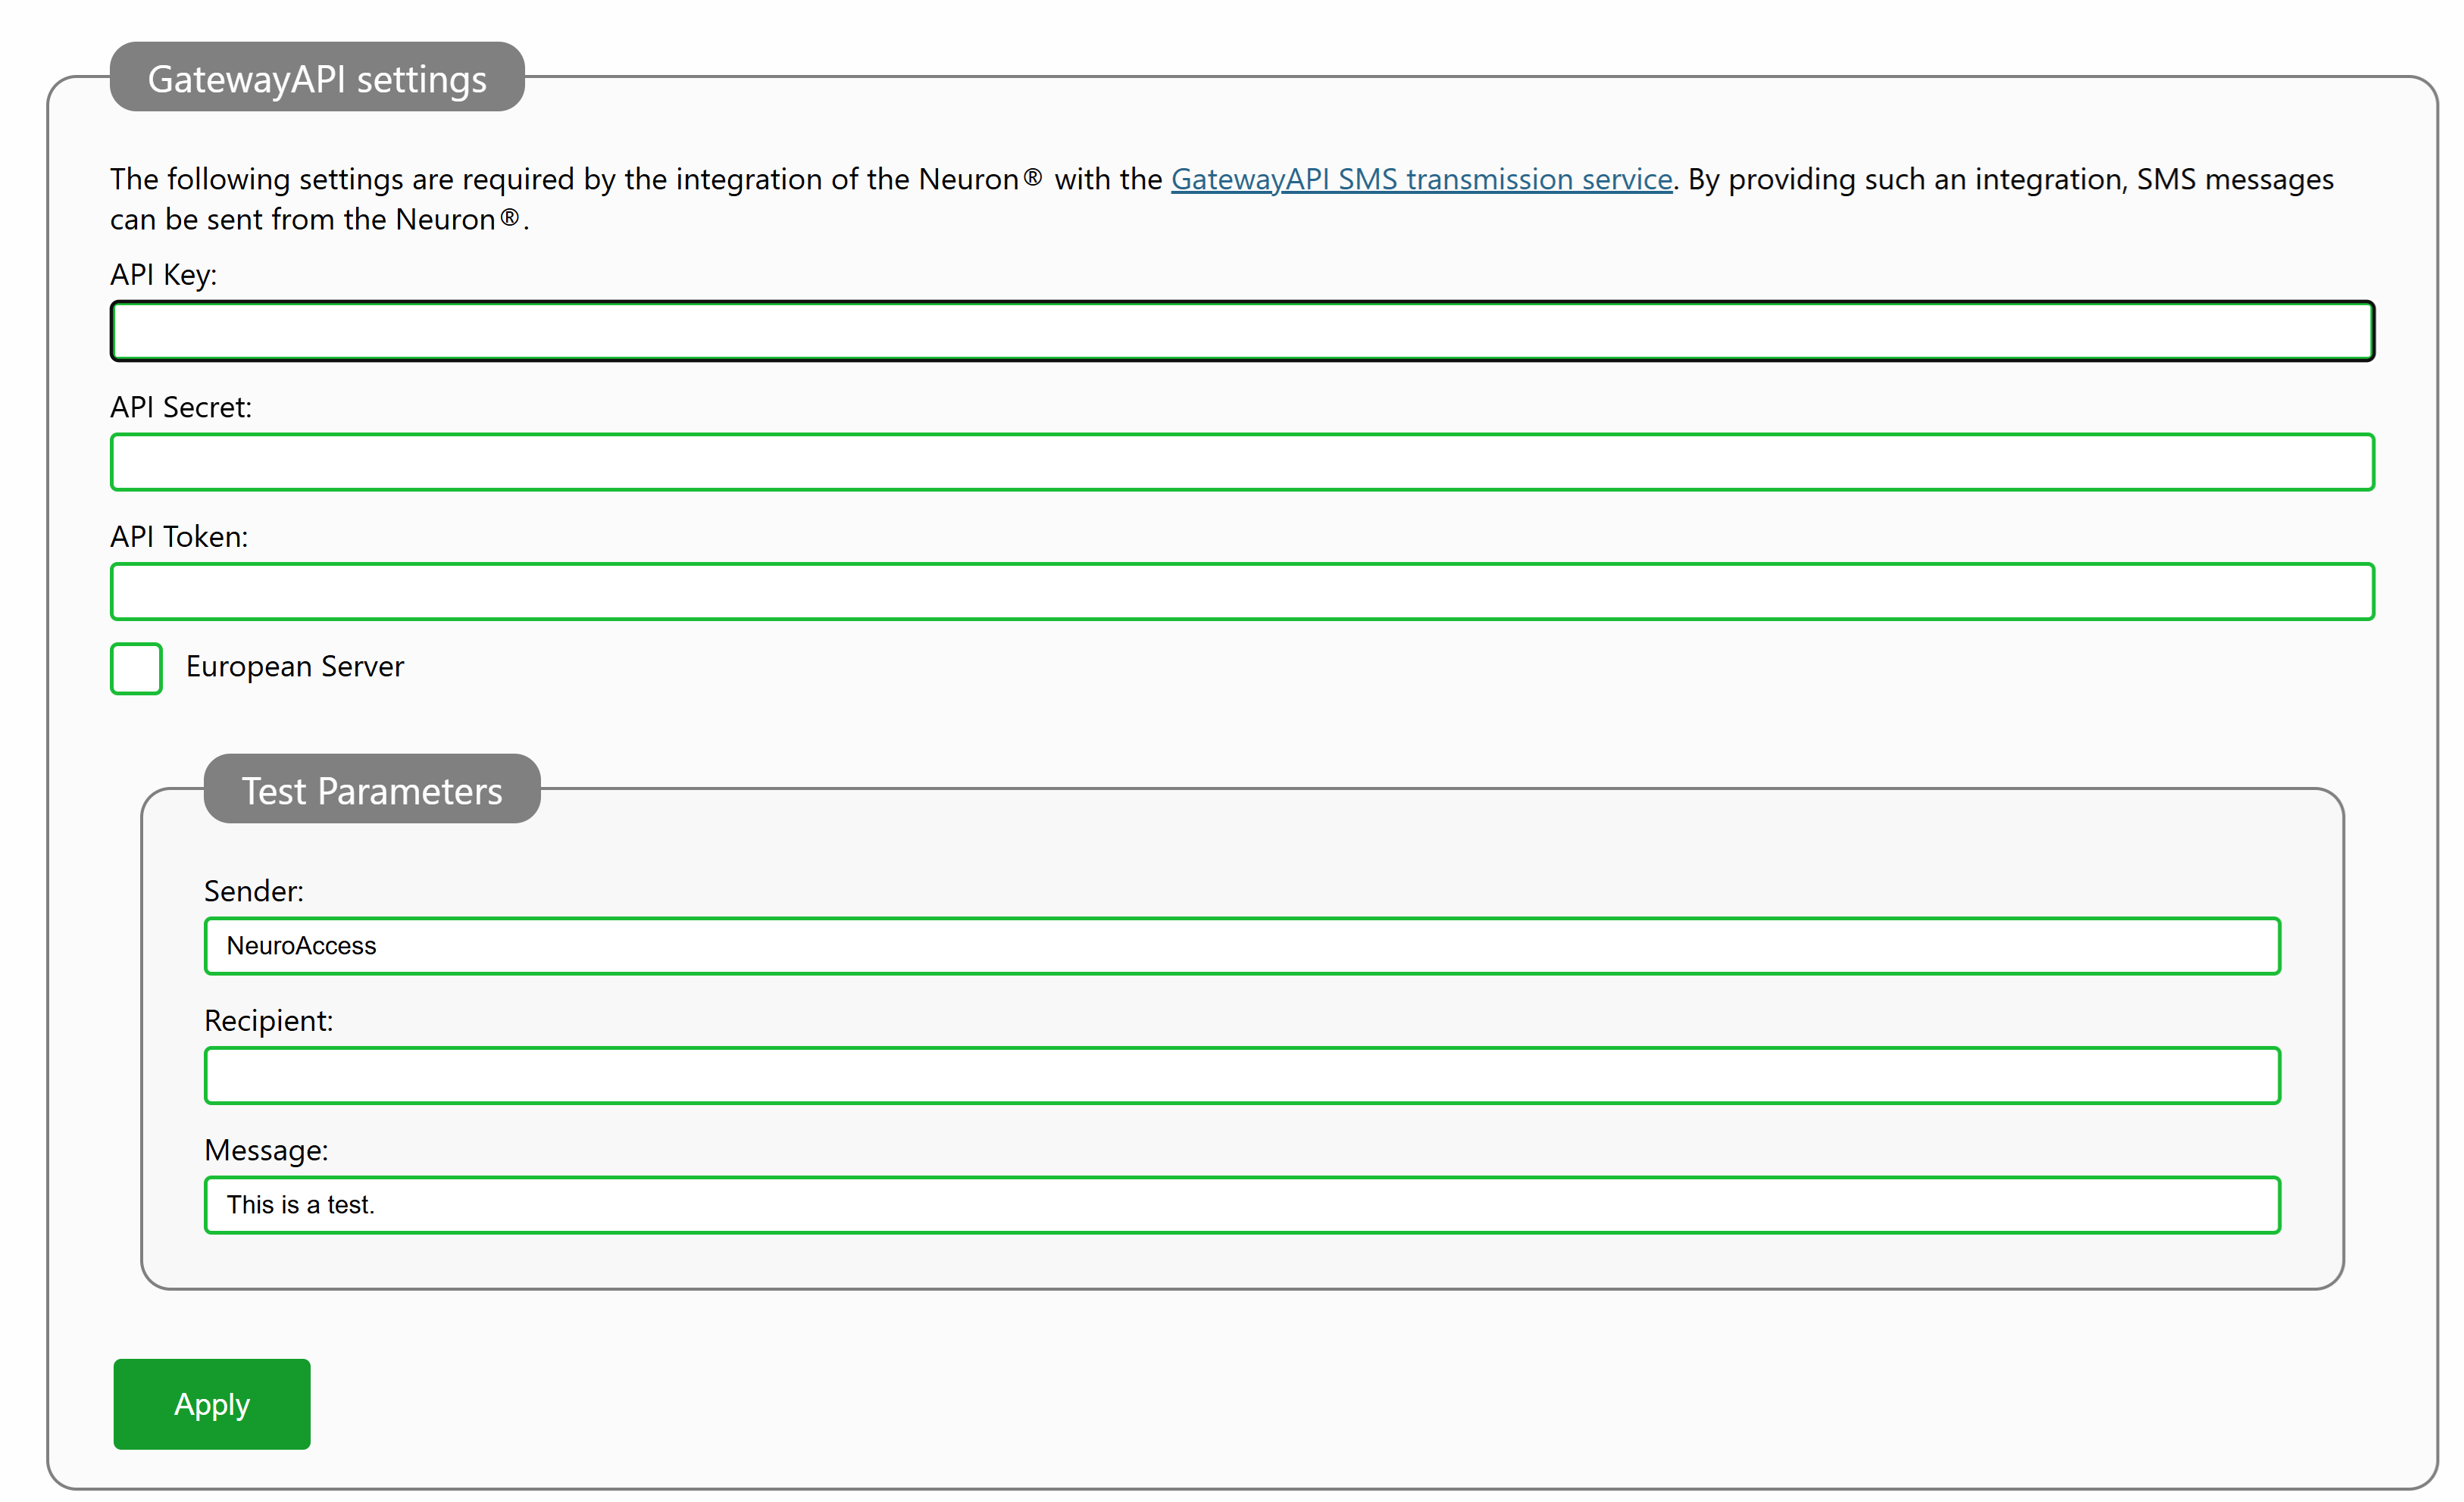
Press the button to open the configuration page. Fill in the parameters provided to you by GatewayAPI. Make sure you use the European server, if you configured your account for use within Europe. Otherwise you leave the box unchecked. You can also provide test parameters to test your configuration. Notice that the sender name can only be 11 characters if consisting of non-digits.
GatewayApi Configuration
You also have a Sniffer available (if you have sufficient privileges) to trouble shoot any configuration or communication issues:
GatewayApi Sniffer
Sending SMS from script
Once the service is configured, you can send SMS messages easily from script, using the SendGatewayApiSms script function, as follows:
SendGatewayApiSms script function
Onboarding API
The custom Onboarding API provided by TAG has been updated as well, and been changed to use the new service instead of the earlier service textlocal.
You can also access the service from the Admin menu, by pressing the Neuro-Access button:
Neuro-Access Button
Configuration of the Onboarding Neuron®, used by this service, has been moved to the Neuron® itself. See the article Configuring alternative onboarding Neuron for more information.
Onboarding process
During the onboarding process, the user validates its e-mail address and phone number with an onboarding Neuron®, who directs the app to the most suitable host for the Neuro-Access account. If the user chooses to create a simple Neuro-Access digital identity (i.e. only containing the phone number and e-mail address provided) the digital identity can be automatically approved, if the host Neuron® is able to validate the information with the onboarding Neuron. This service performs this task: It registers an Identity Authenticator with the Neuron®, which authenticates such simple Neuro-Access digital identities with the onboarding Neuron®, and approves the applications automatically, if the information matches the information validated during the onboarding process.
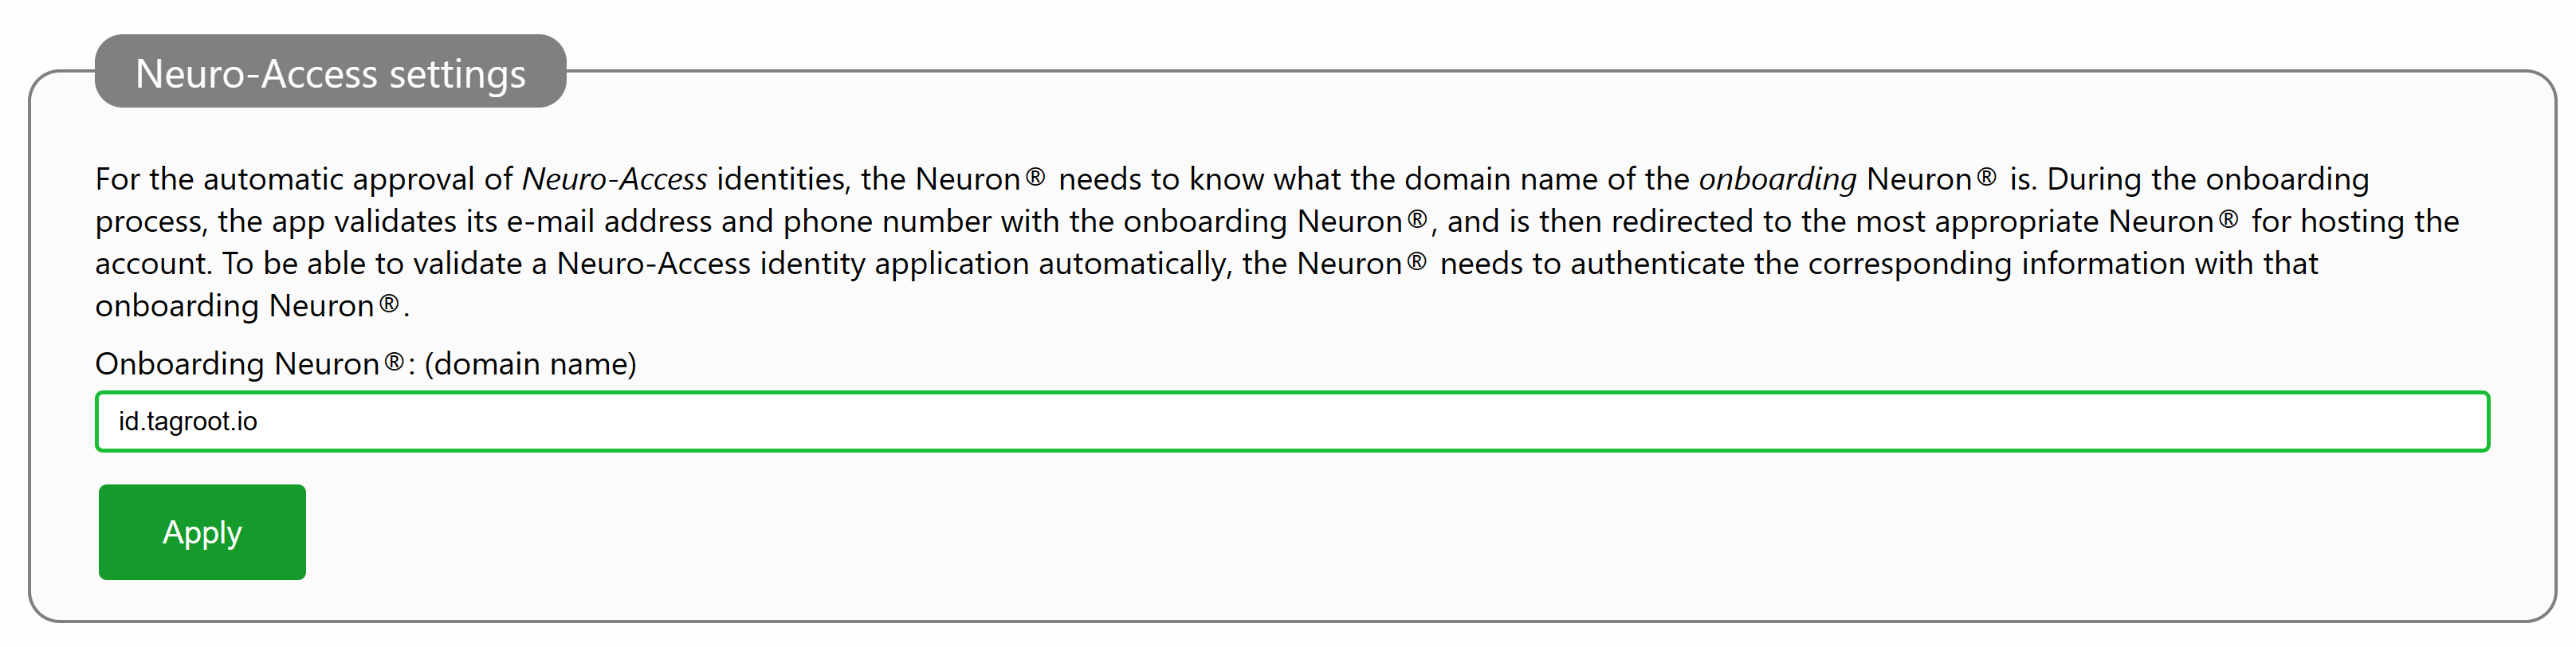
Configuration page
The configuration page for the service is very simply. All you need to do is provide the domain name of the onboarding Neuron® used. By default, the TAG ID Onboarding Neuron® will be selected.
Neuro-Access Settings
Configuration of the Onboarding Neuron®, used by this service, has been moved to the Neuron® itself. See the article Configuring alternative onboarding Neuron for more information.
A new service has been published, that allows users and services on a TAG Neuron® to create multi-purpose QR-codes. Such QR-codes can embed multiple links and sets of information, including multimedia-content such as images and video, into one simple QR-code.
Following is a list of features:
Supports multiple links, for multiple purposes.
Include descriptive labels and and descriptions.
Can be used to embed multi-media, such as images, video, audio, etc.
Allows for custom design and presentation.
Supports TAG URI schema coloring of QR-codes.
Allows limitation of codes in time.
Allows limitation of codes in number of uses.
Can count usage.
Can be used by services on the Neuron® to create custom Multi-purpose QR-codes from script.
Installation Package
The following package contains the service. Install it on your Neuron® to enable multi-purpose QR-codes on the Neuron®.
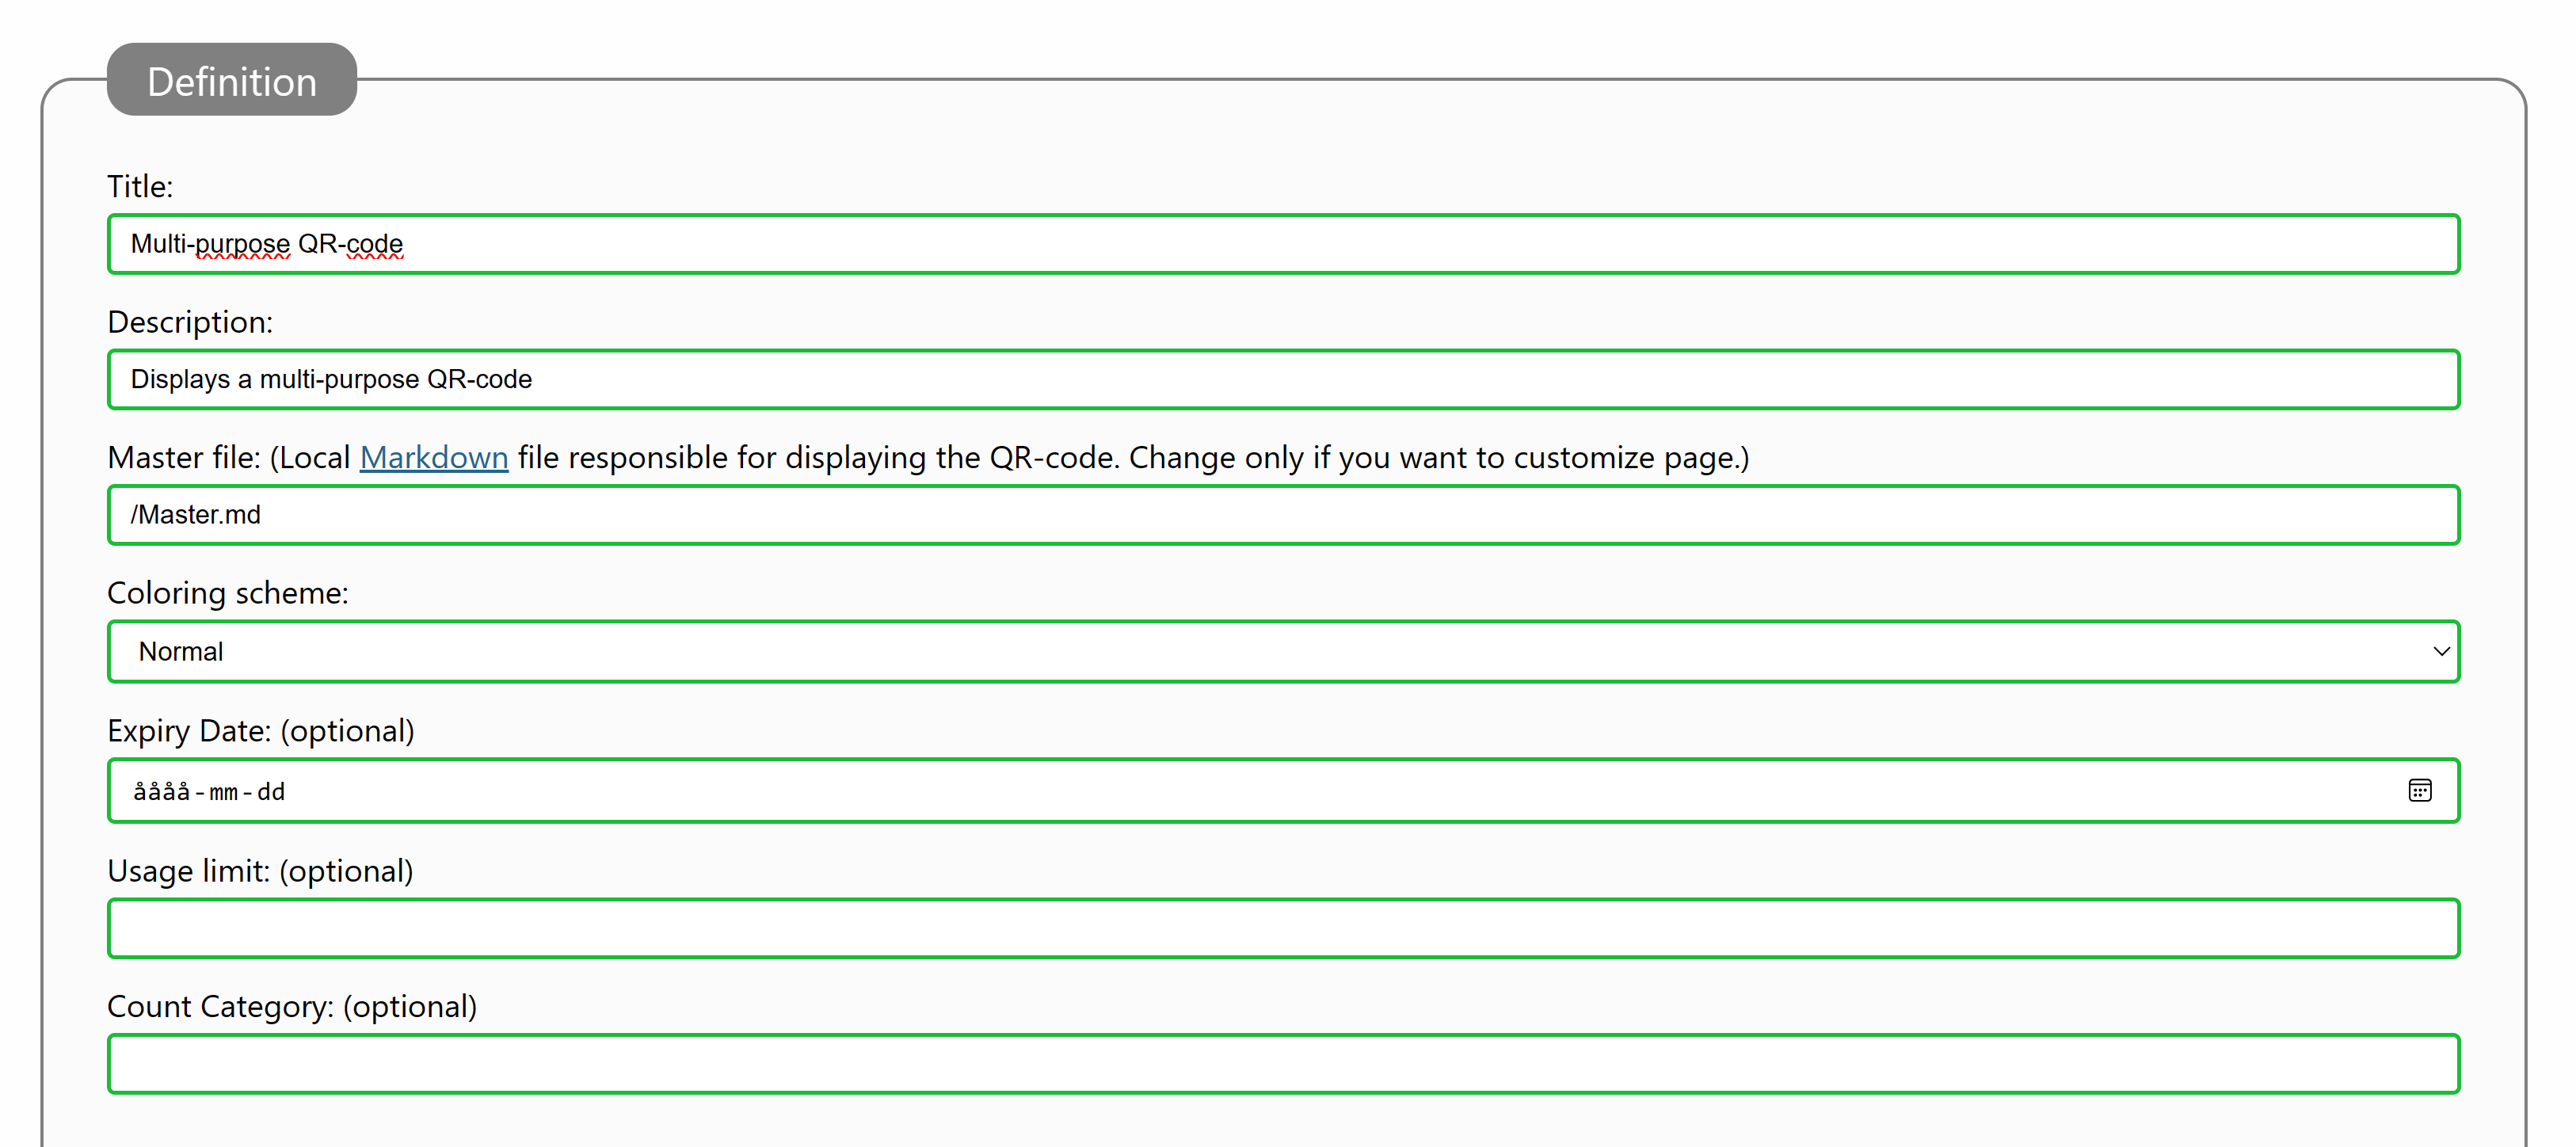
Start by going to the /MultiQR.md page on the Neuron® where the service is installed. A link to the page will be available from the Admin page, under Software. The first part of the page will contain the general definition of the QR-code:
General Definition
The Title will represent the Title of the page that opens when scanning the page. As such, it will appear in the header of the page. If will also be shown at the top of the page, if the default presentation is selected. (Custom designs can be used, see below. For the purposes of brevity, it will be assument the default presentation is selected in all the following items, unless explicitly stated otherwise.)
Description contains a textual presentation of the QR code to the user. It will also appear in the HTML header, describing the page.
You can customize the presentation of the QR-code, by providing a different Master file, than the default suggested file. If using the default file, the QR-code will be loaded and then presented by the MultiQR.md file. If providing another master file, the MultiQR.md file will still load the QR-code definition, but pass the definition to the selected Master-file, in the MultiQrCode variable. The custom file can then choose how to present the information.
Coloring scheme allows you to select how the QR-code is to be displayed to users. You can choose between available coloring schemes on the Neuron®.
It is possible to limit the use of the QR-code in two ways. You can set an expiry date, after which the QR-code will no longer be avaialble. You can also set a usage limit, which caps the number of times the QR-code can be used.
Statistics on how often QR-codes are used can be configured by setting a Count Category. If set, the counter defined by category, prefixed with MultiQR., will be incremented each time it is used.
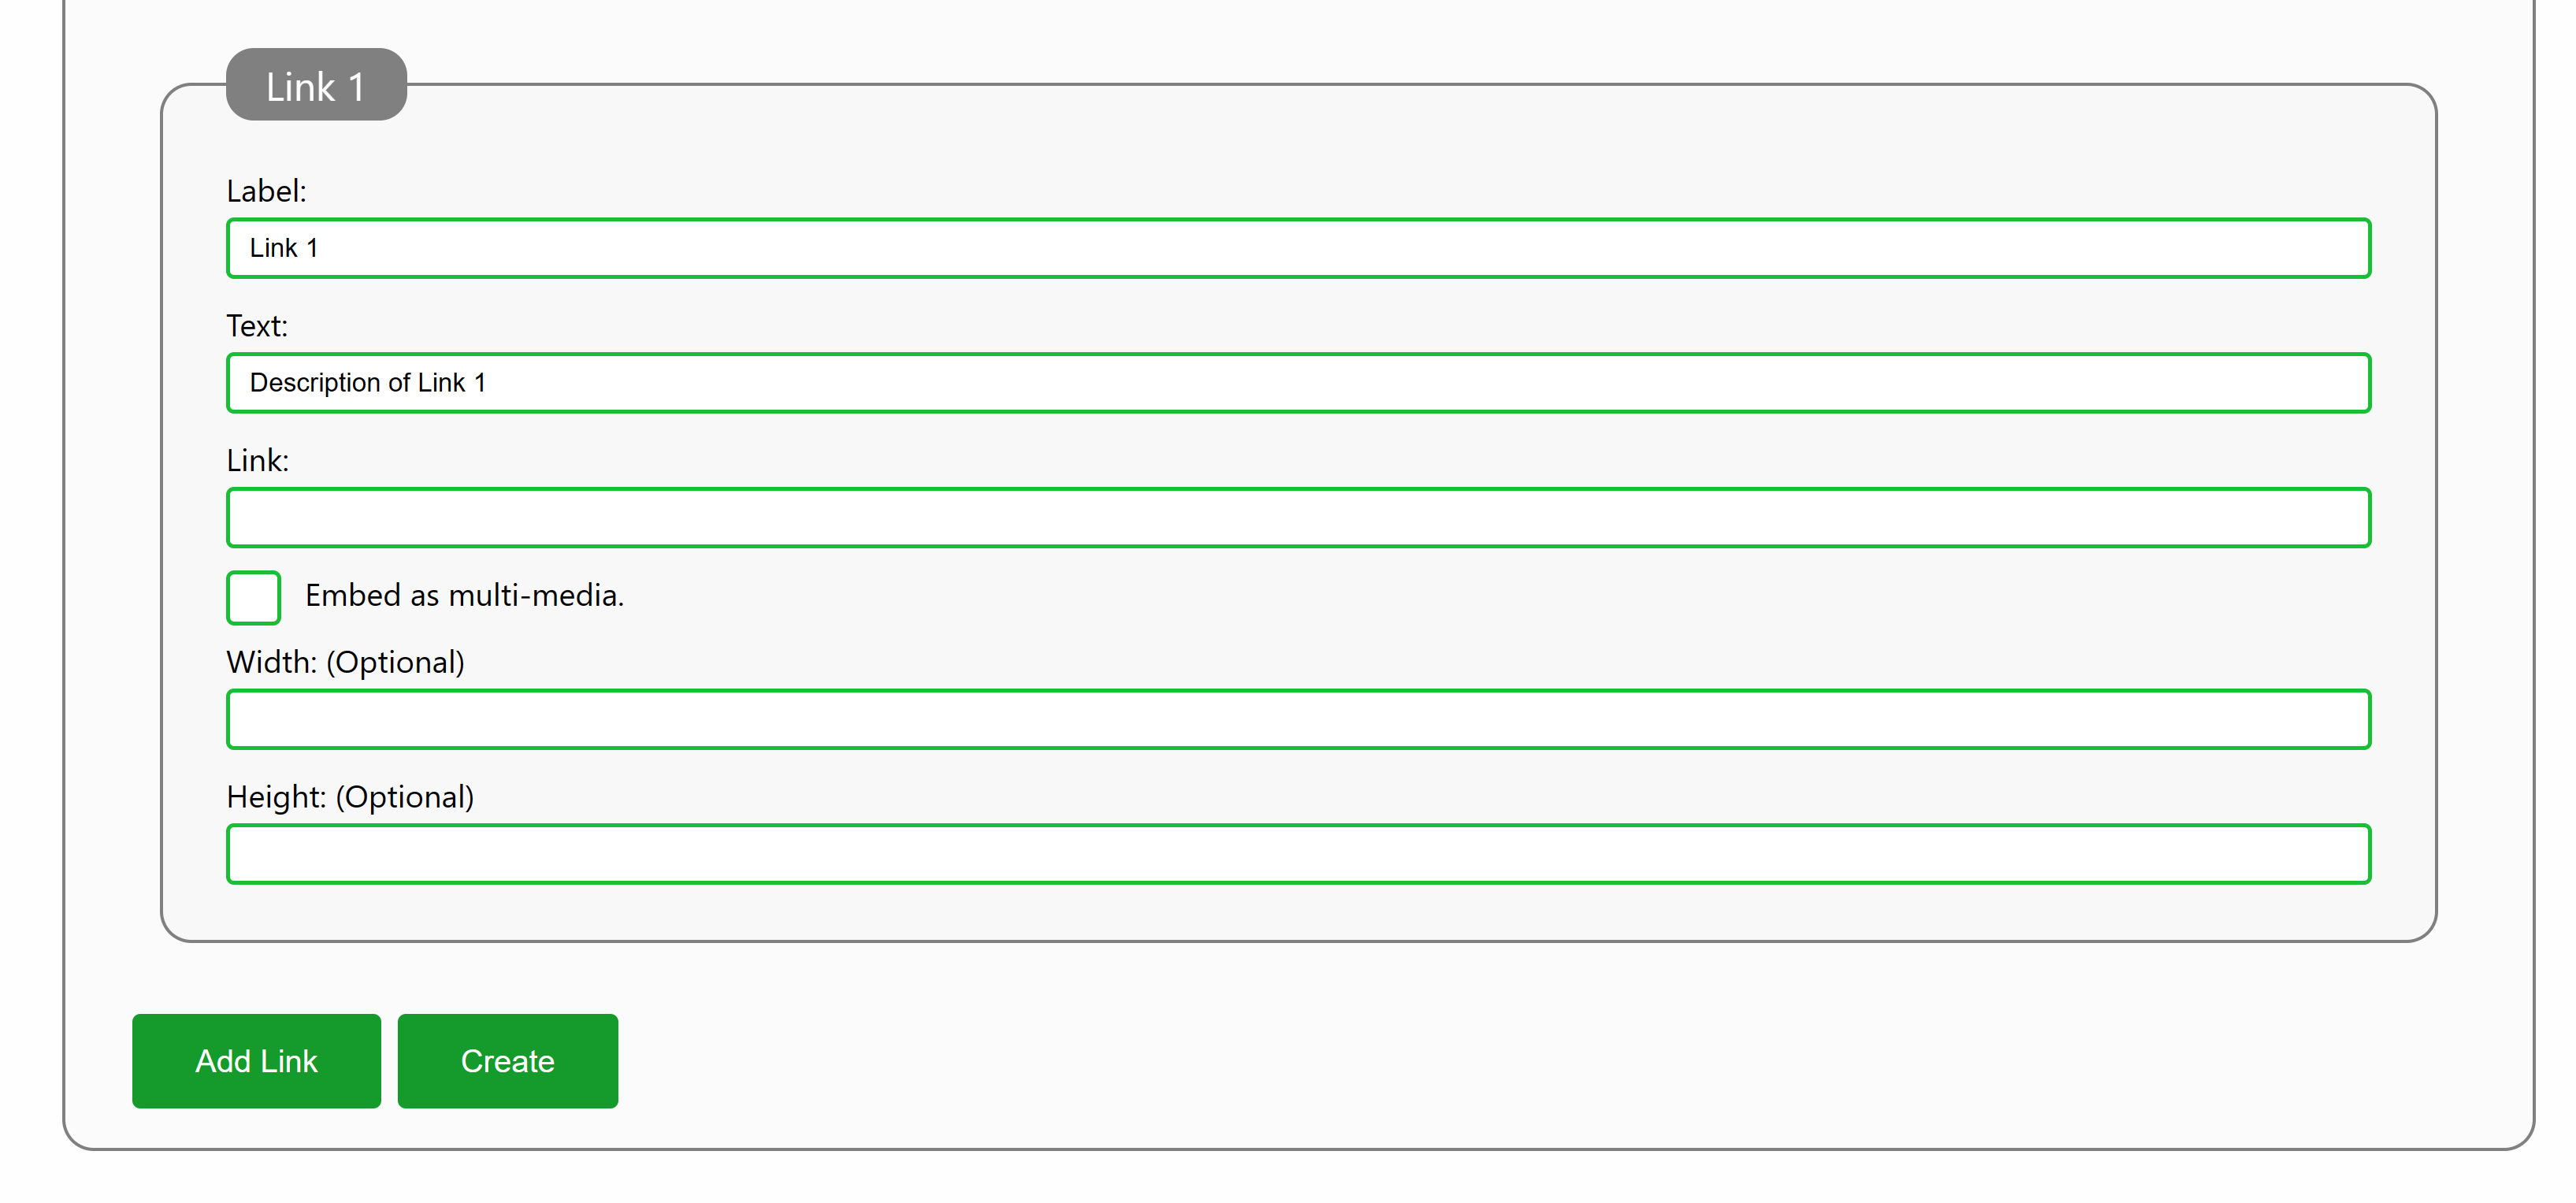
Adding links
Each QR-code contains at least one link. You can add more, by pressing the Add Link button. For each link, you provide the following information:
Link Information
The Label provides a sub-header label for the link.
Text contains a textual description of the link.
The link itself should be provided under Link, as a valid URL.
If the link represents multi-media, you can choose to embed the content on the page. Instead of a link to the content, it will be embedded directly on the page.
If the embedded multi-media represents an image or video, you can also optionally provide a Width and Height. This enables the content to be presented properly, and to scale.
Creating the code
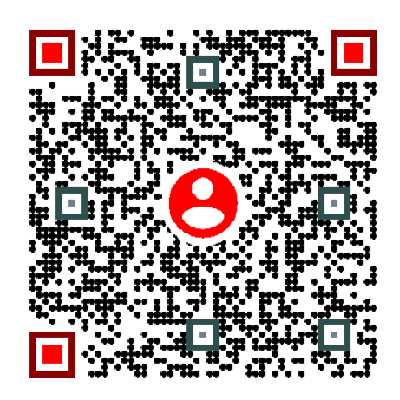
Once the infomration has been properly provided, you create the QR-code by pressing the Create button. If you want to see how a multi-purpose QR-code would look like, scan the following code:
Multi-Purpose QR-Code
QR-codes presented on the page can both be scanned again, but also clicked, to directly navigate to the underlying URL. URLs are also presented, together with labels and descriptions provided. Embedded Multi-media will be presented directly.
Script interface
You can create multi-purpose QR-codes from script using the following call:
The Image property returns a link to the image of the multi-purpose QR code. Use it to download or present the image of the QR code. The Page property returns an URL to the page showing the contents of the QR-code. The QR code image contains a link to this page encoded.
Example:
CreateMultiQR(
\{
	"Title": "Test",
	"Description": "This QR-code was created as part of a test.",
	"Master": "/Master.md",
	"Scheme": "nfeat",
	"ExpiryDate": Today.AddDays(30),
	"CountLimit": 100,
	"CountCategory": "Test",
	"Label1": "Kermit",
	"Text1": "Following is an image of Kermit.",
	"Link1": "https://upload.wikimedia.org/wikipedia/en/6/62/Kermit_the_Frog.jpg",
	"MultiMedia1": true,
	"Width1": null,
	"Height1": null,
	"Label2": "More Information",
	"Text2": "The following link contains more information about Kermit.",
	"Link2": "https://en.wikipedia.org/wiki/Kermit_the_Frog",
	"MultiMedia2": false,
	"Width2": null,
	"Height2": null
\}, "/MultiQR.md");