Configuring HTTP/2 settings on a Neuron
From build 2025-01-24 it is possible to configure HTTP/2 settings in the Nueron®. These are settings that are available in the gateway.config file. They are applied during startup of the Neuron®, and require a restart of the Neuron®, if changed.
You can also edit the settings from the Sources & Nodes option in the administrative menu. In the screen that appears, you select the Gateway configuration source, and the WebServer node:

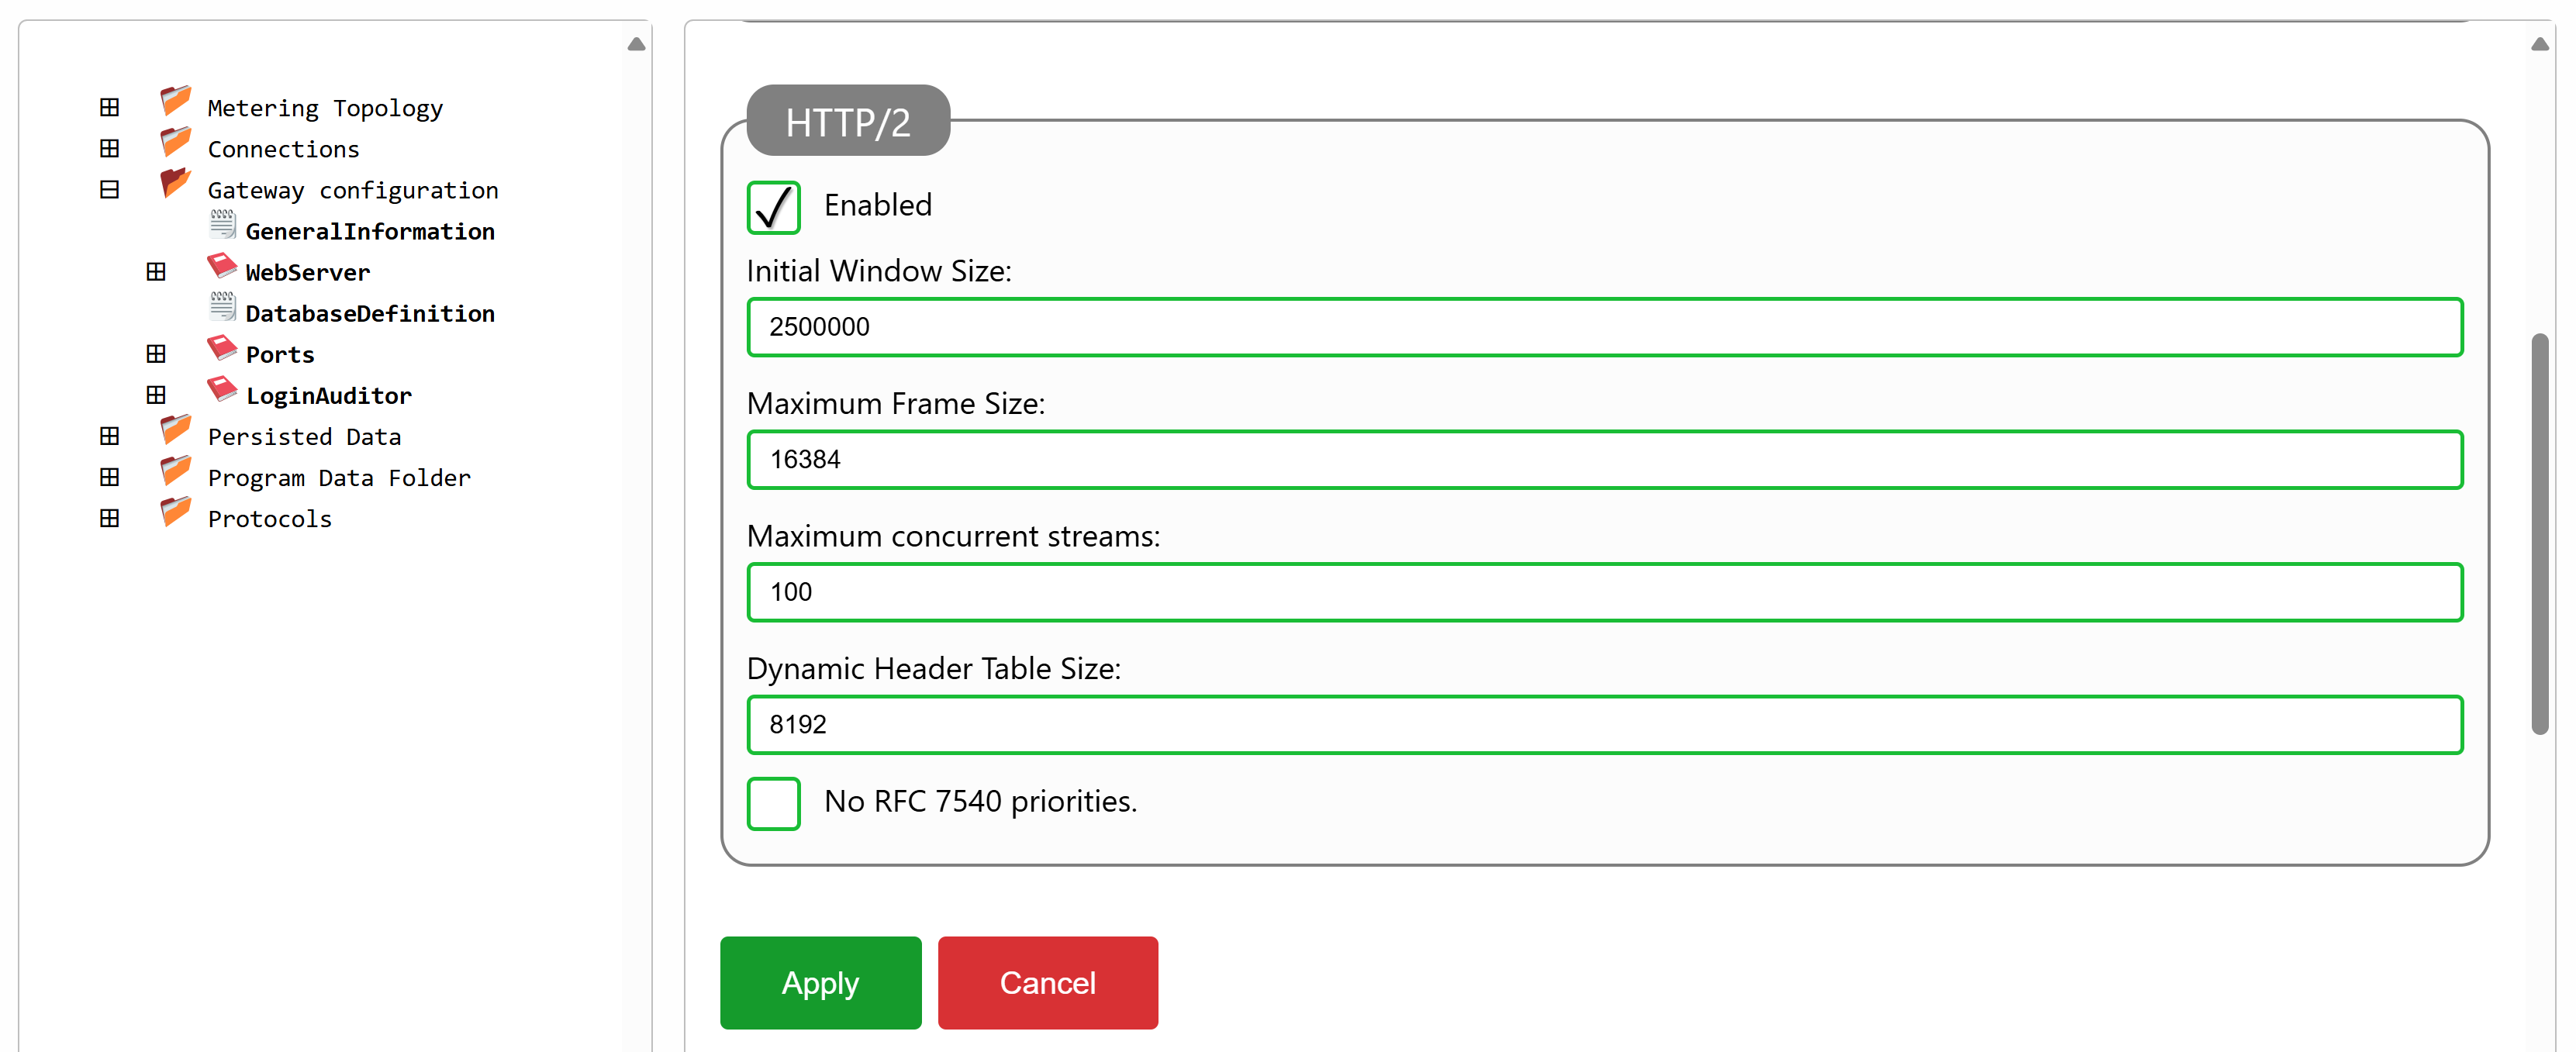
Pressing the Edit... button shows the properties of the WebServer node. Scrolling down, you find the HTTP/2 header, and the corresponding HTTP/2-related attributes you can configure. After setting the values, press the Apply button. This will update the gateway.config file. You have to restart the Neuron® for the changes to take effect.

For a reference to the meaning of these settings, see the following normative texts:
Custom Reports in Operations using Script
In operations it is common to extract information from the system using script from the script prompt, either for trouble-shooting purposes or for statistical purposes. Often, these tasks are done many times, and script may be customized for each Neuron®, depending on tasks being performed and services run. While creating services or custom content pages can be a way to formalize these script into working reports accessible from the web admin interface, you can also create custom reports on the Neuron® using script nodes and command queries, via the web administration page directly. Such reports can then be easilly deployed across Neurons in the network, using simple copy and paste operatios using the Simple IoT Client in the IoT Gateway repository. This article will give an example of this process.
Creating nodes
You can create nodes on a Neuron® using any application or interface that supports the Neuro-Foundation interfaces. This includes the Simple IoT Client, and also the Node Explorer available in the web administrative interface, under Data and Sources & Nodes. In this article, we assume you use the Simple IoT Client, and that you are connected to some Neuron® or broker, and are friends with the Neuron® on which you want to create the report nodes. You also need to be an administrator on the Neuron®, which you can become by adding your JID to the list of recipients of notifications on the Neuron®. Once an administrator, you get access privileges to execute script on the Neuron®, and to create the necessary nodes.
You begin by expanding the Neuron® node. You will se a list of available data sources. Expand the Metering Topology, which is the source where you will be able to add virtual nodes and script nodes. On the Root node, you can add a Virtual Node to host your reports. In this example, we will create a report that displays the information about a legal identity that is hosted by the Neuron® itself, and therefore accessible to administrators of the Neuron®. So, we can create a Script Node under the Reports node and call it Legal. Under the Legal node, we can add a Script Query node and call it Get Local ID. This will be the command that executes the report. Under the Get Local ID node, we need to add parameter nodes. For our example, it is sufficient to add a string-valued parameter, which we will call LegalID. The report will only take one input parameter. The setup may look something like shown in the following image.

Sensor Readout script
To the script node, you can add read-out script. This will make the node readable as a sensor. Here you can add some basic script providing simple access to data you may be interested in often. In this example, you can add the following example script to the node named Legal. It will read-out some basic statistics about number of legal objects on your Neuron®:
if Request.IsIncluded(Waher.Things.SensorData.FieldType.Status) then
(
	preview([Field(this,NowUtc,"#Identities",
		(select count(*) from "LegalIdentities"),"Status")]);

preview([Field(this,NowUtc,"#Attachments",
	(select count(*) from "LegalAttachments"),"Status")]);

preview([Field(this,NowUtc,"#Identity References",
	(select count(*) from "LegalIdentityReferences"),"Status")]);

preview([Field(this,NowUtc,"#Contracts",
	(select count(*) from "Contracts"),"Status")]);

preview([Field(this,NowUtc,"#Contract Signatures",
	(select count(*) from "ContractSignatures"),"Status")]);
);

[Field(this,NowUtc,"Domain",
	Waher.Service.IoTBroker.XmppServerModule.Legal.MainDomain.Address.Value,
	"Identity")]
Reading the Legal node (reading all fields and field types), may look as follows. Note that the preview function used in the script, makes the information available in the client as soon as it is available, instead of letting the user having to wait until the entire script has completed before showing the information.

Custom Report script
While sensor data readout script may be useful, it is not sufficiently versatile for reporting requirements. Apart from readout script, you can add any number of commands to a script node. Commands exist of three types:
Simple Commands are just commands that are not parametrized. Examples may be clear cache, toggle switch, etc. They are just activated, by pressing a button, or selecting the command from a context menu.
Parametrized Commands are commands that receive input from one or more command parameters. You add as many parameters as you like. The parameter values will be available in script using variables names equal to their parameter names. When a user wants to execute a parametrized command, the user is first presented with a parameter dialog, where the user needs to provide sufficient information to execute the command. Once completed (and passing validation checks), the command can be executed.
Parametrized Queries work like parametrized commands, except they return information to the user in the form of a report. This information is returned asynchronously via a Query object that is passed to the script. A typical progression when returning information in a report include:
- Setting a title.
- Beginning sections (and subsections)
- Creating tables
- Reporting records
- Completing tables.
- Reporting objects (any object that is Internet encodable, using a codec understood by the Neuron®)
- Ending sections
You do not excplicitly need to start and stop the query. That is done by the Neuron®. Refer to the reference documention to see what methods are available on the Query object, and how to pass information back to the user as the script executes.
As for our example, we can add the following script to the script query node Get Local ID. It refers to the string-valued query parameter LegalID to get the identifier of the Legal ID to include in the report. You can try parts of the script in the script prompt, to see what it does, if unsure.
Q:=Waher.Things.Queries;
Column:=Q.Column;
Alignment:=Q.ColumnAlignment;
Record:=Q.Record;
Type:=Q.QueryEventType;
Level:=Q.QueryEventLevel;
Binary:=System.Byte[];
EncodedObject:=Waher.Content.Binary.EncodedObject;
Legal:=Waher.Service.IoTBroker.Legal.LegalComponent;

Query.SetTitle("Get Legal ID");

Query.BeginSection("Input Parameters");
Query.NewTable("Input","Input Parameters",[
	Create(Column,"Name","Parameter",null,null,null,null,Alignment.Left,null),
	Create(Column,"Value","Value",null,null,null,null,Alignment.Left,null)
]);
Query.NewRecords("Input",[
	Create(Record,["Legal ID:",LegalID])
]);
Query.TableDone("Input");
Query.EndSection();

Properties:=null;
Attachments:=null;

Query.BeginSection("General Information");
ID:=select top 1 * from Waher.Service.IoTBroker.Legal.Identity.LegalIdentity where Id=LegalID;
if !exists(ID) then
	Query.LogMessage(Type.Error,Level.Major,"Legal ID not found on this machine.")
else
(
	Query.NewTable("GeneralInformation","General Information",[
		Create(Column,"Name","Parameter",null,null,null,null,Alignment.Left,null),
		Create(Column,"Value","Value",null,null,null,null,Alignment.Left,null)
	]);

Records:=[foreach P in properties(ID) do
(
	if P[0]="Properties" then
		Properties:=P[1]
	else if P[0]="Attachments" then
		Attachments:=P[1]
	else
	(
		if P[1] is Binary then P[1]:=Base64Encode(P[1]);
		Create(Record,P)
	)
)];
Query.NewRecords("GeneralInformation",[x in Records:x is Record]);
Query.TableDone("GeneralInformation");
);
Query.EndSection();

if exists(Properties) then
(
	Query.BeginSection("Encoded Properties");
	Query.NewTable("Properties","Identity Properties",[
		Create(Column,"Name","Parameter",null,null,null,null,Alignment.Left,null),
		Create(Column,"Value","Value",null,null,null,null,Alignment.Left,null)
	]);
	Query.NewRecords("Properties",[foreach P in Properties do Create(Record,[P.Name,P.Value])]);
	Query.TableDone("Properties");
	Query.EndSection();
);

if exists(Attachments) then
(
	Index:=0;
	foreach Attachment in Attachments do
	(
		Index++;
		AttachmentId:="Attachment" + Index;
		AttachmentName:="Attachment " + Index;
		Query.BeginSection(AttachmentName);

Query.NewTable(AttachmentId,AttachmentName,[
	Create(Column,"Name","Parameter",null,null,null,null,Alignment.Left,null),
	Create(Column,"Value","Value",null,null,null,null,Alignment.Left,null)
]);
Query.NewRecords(AttachmentId,[foreach P in properties(Attachment) do
(
	if P[1] is Binary then P[1]:=Base64Encode(P[1]);
	Create(Record,P)
)]);
Query.TableDone(AttachmentId);

AttachmentObj:=select top 1 * from Waher.Service.IoTBroker.Legal.Attachments.Attachment where Id=Attachment.Id.Value;

if exists(AttachmentObj) then
(
	Query.BeginSection("Decoded object");
	Query.NewObject(Create(EncodedObject,
		Legal.LoadEncryptedFile(AttachmentObj.LocalFileName,AttachmentObj.Salt),
		AttachmentObj.ContentType))
		??? Query.LogMessage(Exception);
	Query.EndSection();
)
else
	Query.LogMessage(Type.Error,Level.Major,"Attachment ID not found on this machine: " + Attachment.Id);

Query.EndSection();
)
);
Query Execution
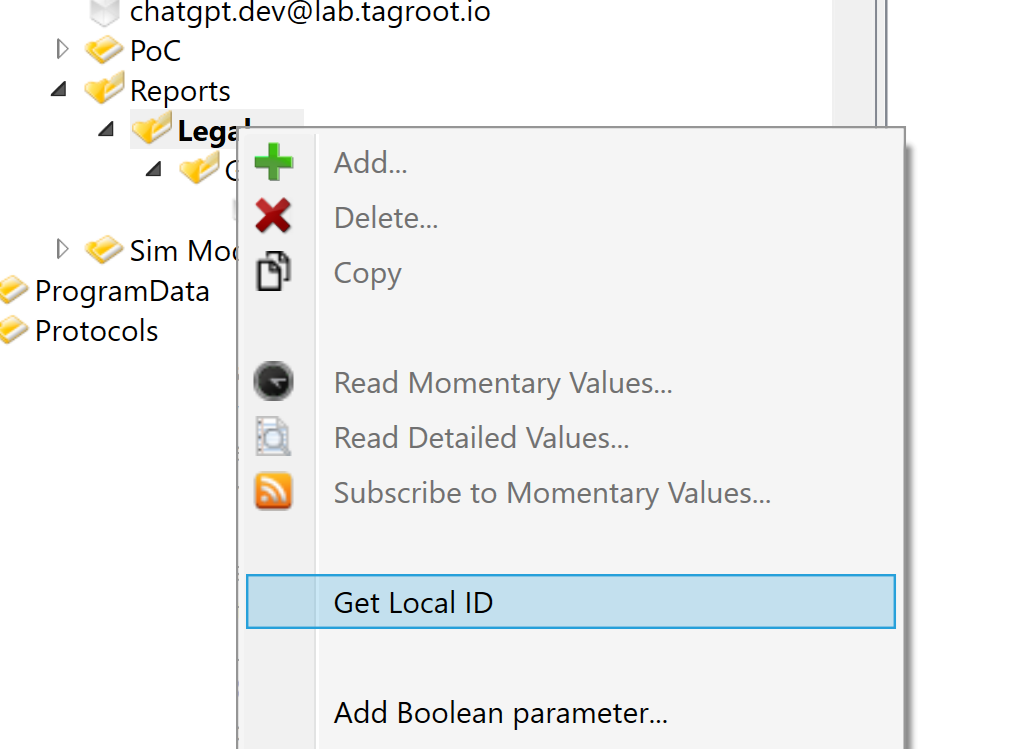
Once the script is added, we can execute the command. The command is available on the Legal node. In the Simple IoT Client you will find it in the context menu:

Select the command, and a parameter dialog with your command parameters appear. In this example, only one parameter is listed, the Legal ID we want to display.

Once valid parameters have been provided, the command can be executed. In our example, the identity is displayed as follows:

You can scroll down to see the Internet-encoded objects you have included (in this example, an image):

Web Administrative Interface
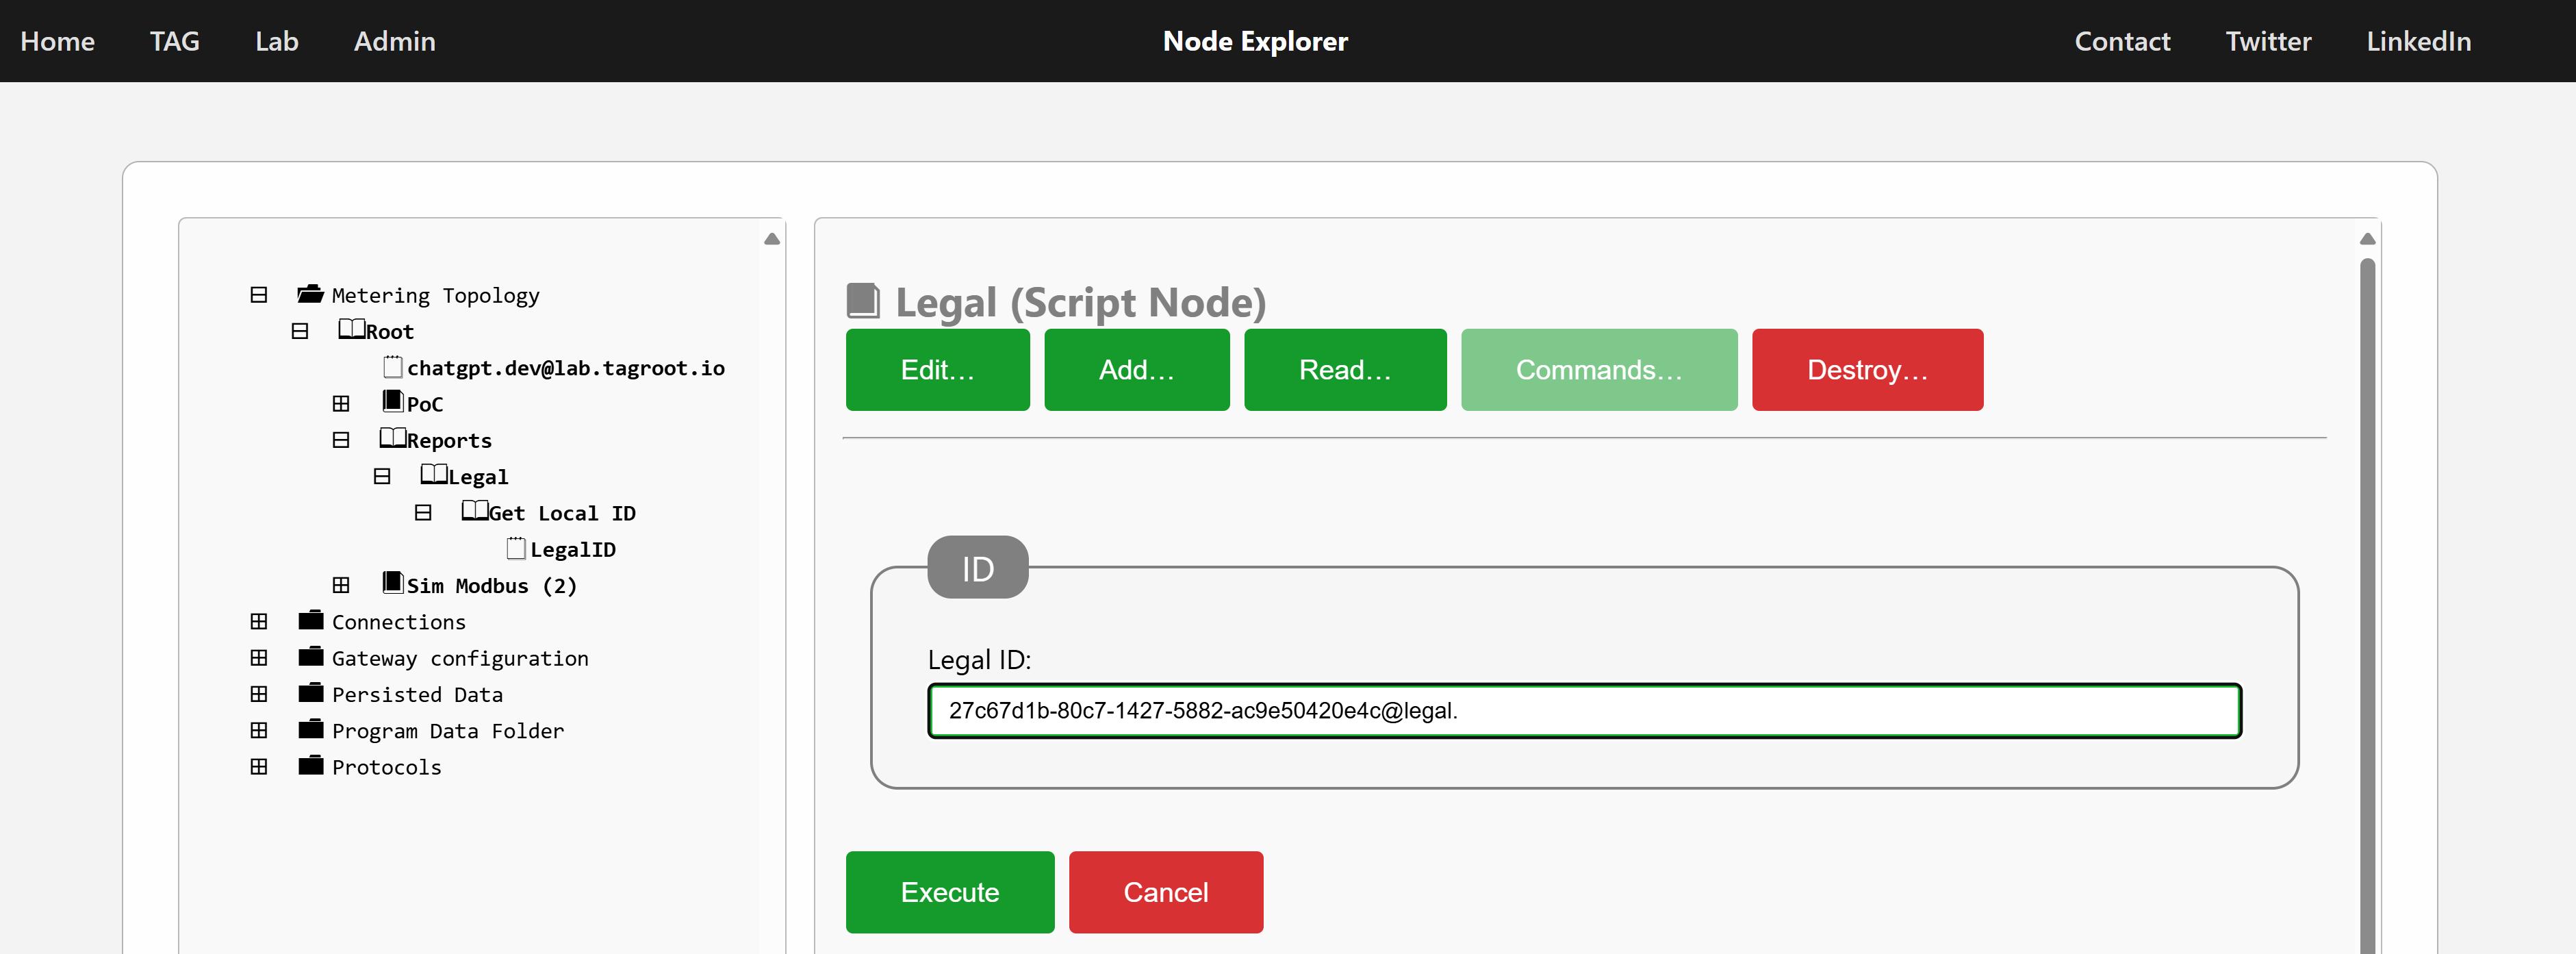
All nodes and command are available in the administrative interface of the Neuron® as well. The same procedures as described above, can be performed via the web interface as well. You can find the node in the Metering Topology, under Root and Reports. Clicking on the Legal node, shows available options. By pressing the Commands button you see available commands on the node.

Press the Get Local ID command, and the parameter dialog appears:

Once parameter dialog is completed, execute the command query, and the report will be displayed accordingly:

Simplified Reports
If you are only going to execute a parametrized query, for instance, against the internal database, you don’t have to setup and transmit the result to the client using the Query object variable available in the script explicitly. You can just make sure the script returns the result set. If nothing has been reported in the script, the result of the script is returned by itself. If the result is a table, the table will be returned as a table directly to the client. For instance, creating a query script node with the following script returns some simple statistics in the form of a table to the client requesting the information.
select
		LocalName,
		Namespace,
		count(*) Nr
	from
		Waher.Service.IoTBroker.WebServices.Agent.Crypto.AgentKey
	group by
		LocalName,
		Namespace
	order by
		LocalName,
		Namespace
Deploying reports across Neurons
The Web Administrative interface on the Neuron® lets you operate the Neuron® itself, but not other Neurons. The Simple IoT Client however, can connect and administer multiple neurons at the same time. It also has a feature where it can copy node hierarchies from anywhere (which basically reads out the selected nodes, and their information it has access to) and paste it to anywhere (which basically creates new nodes and edits them accordingly). You can also copy the information and paste it into any editor, edit the corresponding XML to customize it, and reselct and copy the edited document and paste it to the desired recipient.
Posts tagged #operations
No more posts with the given tag could be found. You can go back to the main view by selecting Home in the menu above.